How Men of Quality Resolve Differences

How Men of Quality Resolve Differences
Pudel and Peper attacks - an ugly but inevitable part of any 17th C. British Civil War, "Oh! The Shame of it All!"

Sunday, April 25, 2021

Patriots and Loyalists: Visiting a classic design, P1

 PaL - It's your pal for AmRev!


Am I biased towards these rules just because I have an *ahem* autographed copy??

Nah, they are a nicely done advance to old school wargaming, and have some very cool mechanisms that bring regimental linear warfare to life. I have to admit - I streamlined them a bit, simply tossing out 2-3 of the mechanisms like supporting a melee that are pretty complicated and not worth the energy [IMHO]. Aside from that, straight from the book!

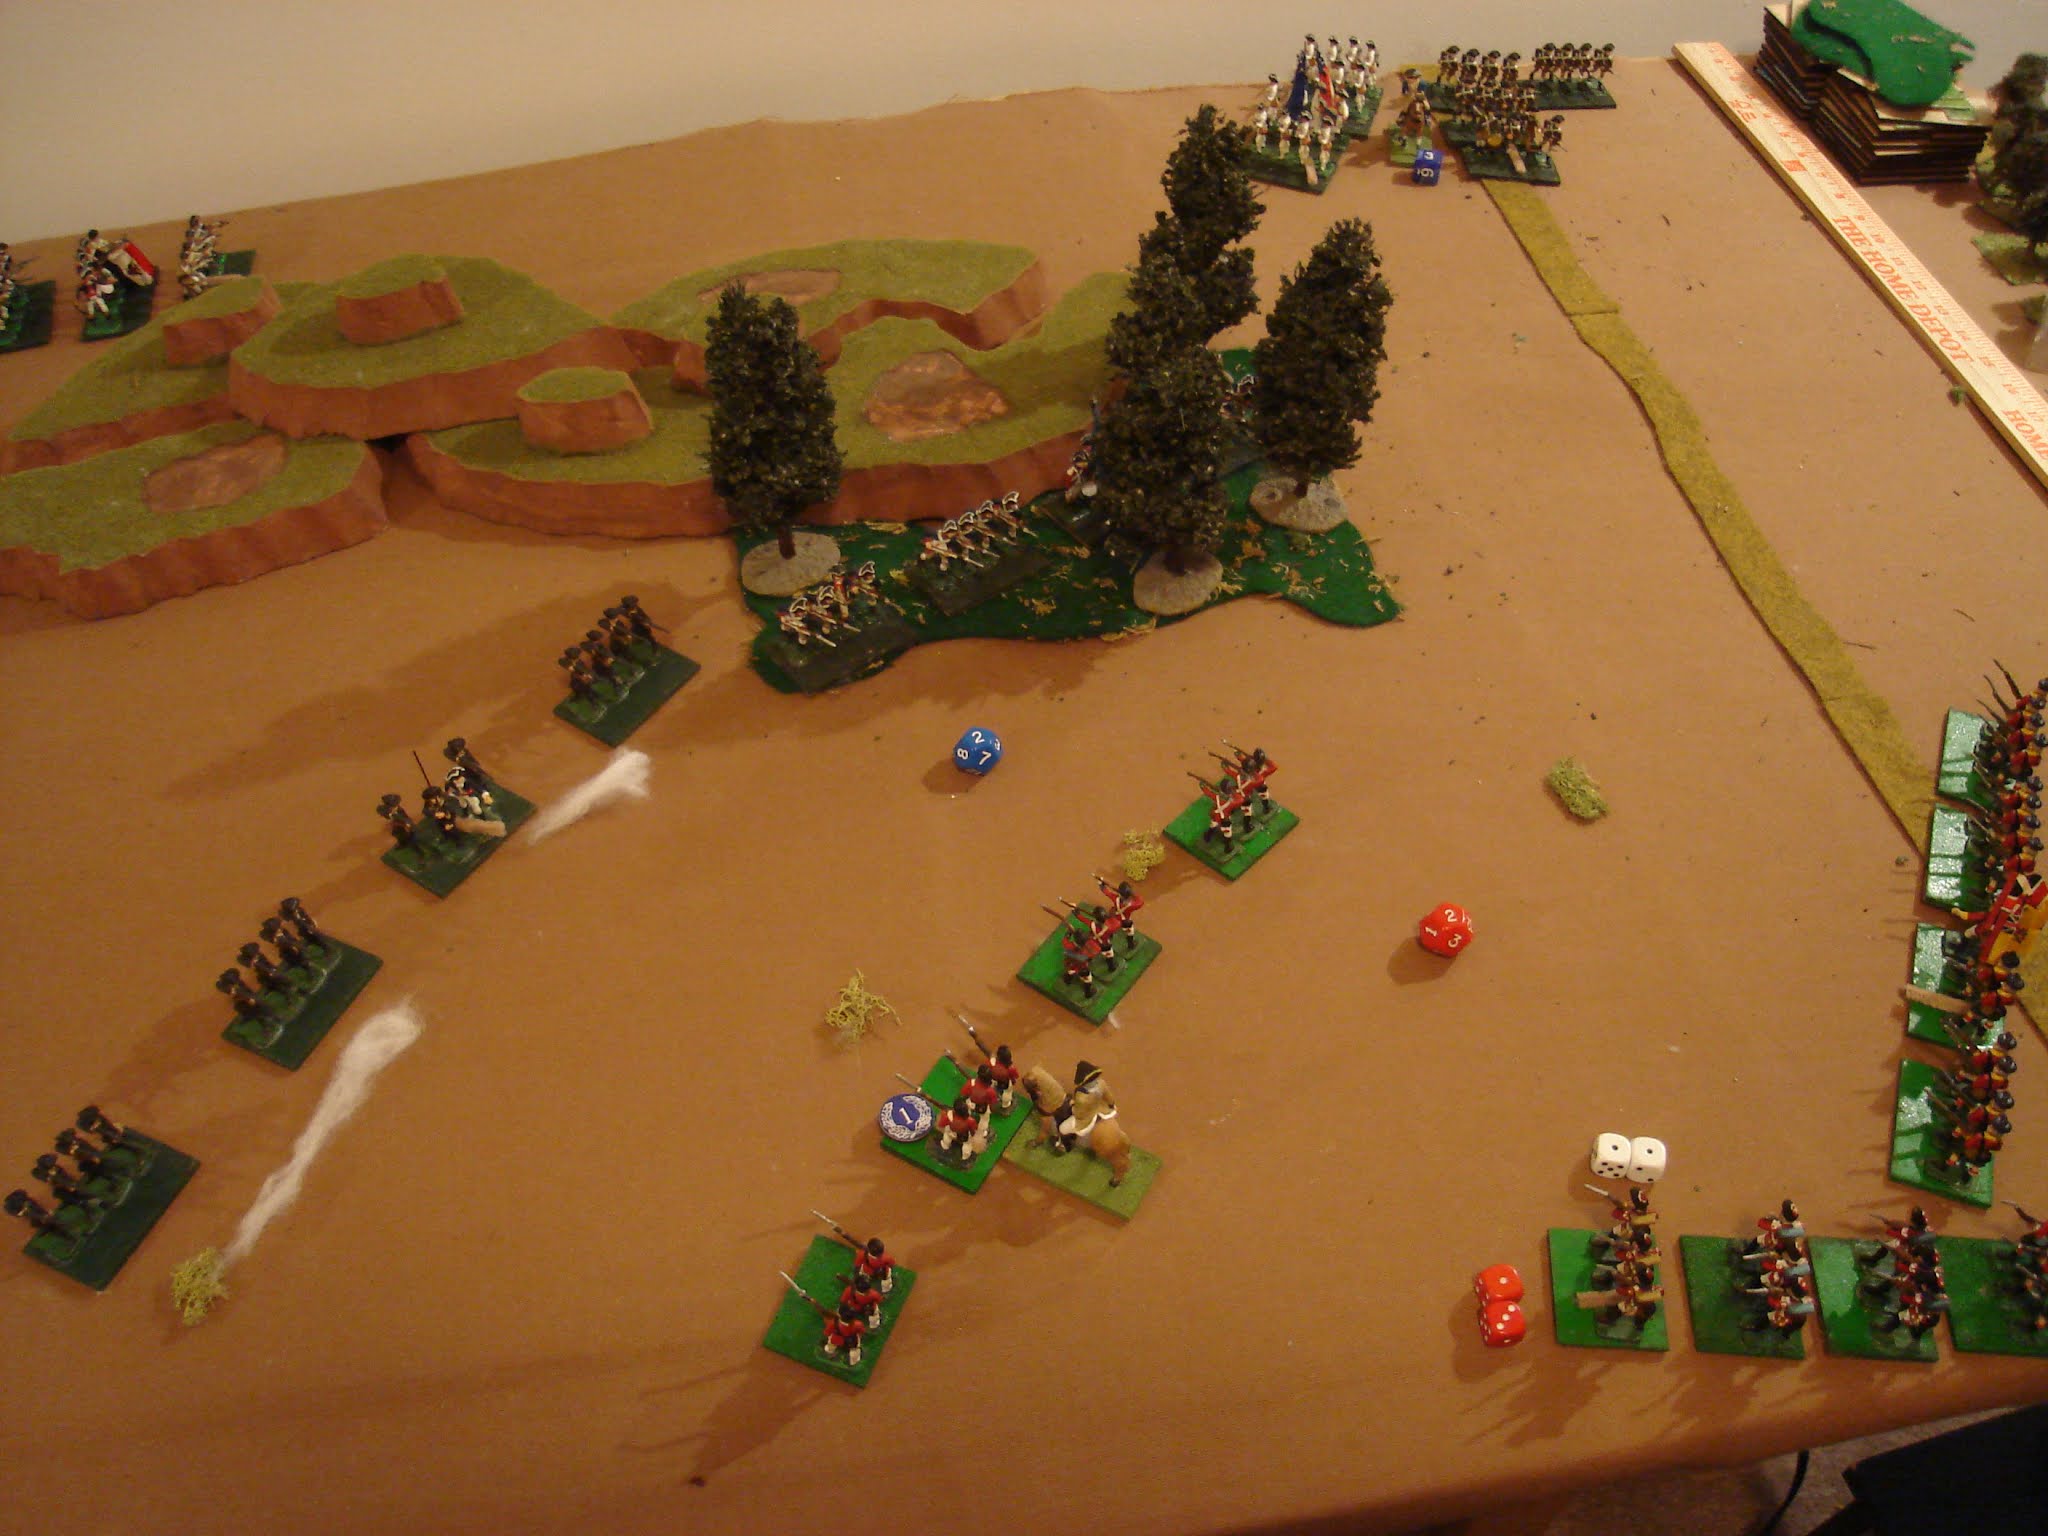
First playtest had a few problems with me entering the British along the entire board edge by mistake [they are supposed to enter at the road], which significantly speeds up their attack which already has 2-1 odds minimum. British plan is to attack hard on their left with the elite Highlanders, use the large German unit as a base of fire, while the Tories and gun make the road and valley an unhealthy place.  The Lights will move forward quickly to seize the woods and flank any advance down the road.

British main effort looking at the hill...doesn't look tooo tough!  Irish and Tories are second-rate line, so are being used as morale support and some shooting, respectively.

In an unbelievable event, the highlanders - ELITE - take some tough long-range shooting, and fall back off the board!  The Irish fan out and begin their unexpected advance.

Another playtest, and this time I switched the British lineup around a bit. Fire from the gun and Highlanders had the Americans vacating the hill on turn 2 or so.  Eventually I realized I had the setup wrong, and it should take a couple of turns for the British just to enter the board at the road, deploy into lines, and then start shooting!  Still, the familiarization with the rules is good, haven't played them in ages... Also getting a feel for how I want to attack with the Brits.

Along the way, I played a few of the PaL rules incorrectly, but it was OK as a first effort. A few more false starts and then things went better for a blog post.

One-Hour Wargames Scenario #4 "Take the High Ground" once again. It can be helpful to play the same scenario multiple times and even switching the rule sets - makes for great comparisons. Again, some 2nd rate line infantry on the hill, holding on while the Continental types race to the rescue from the main army.

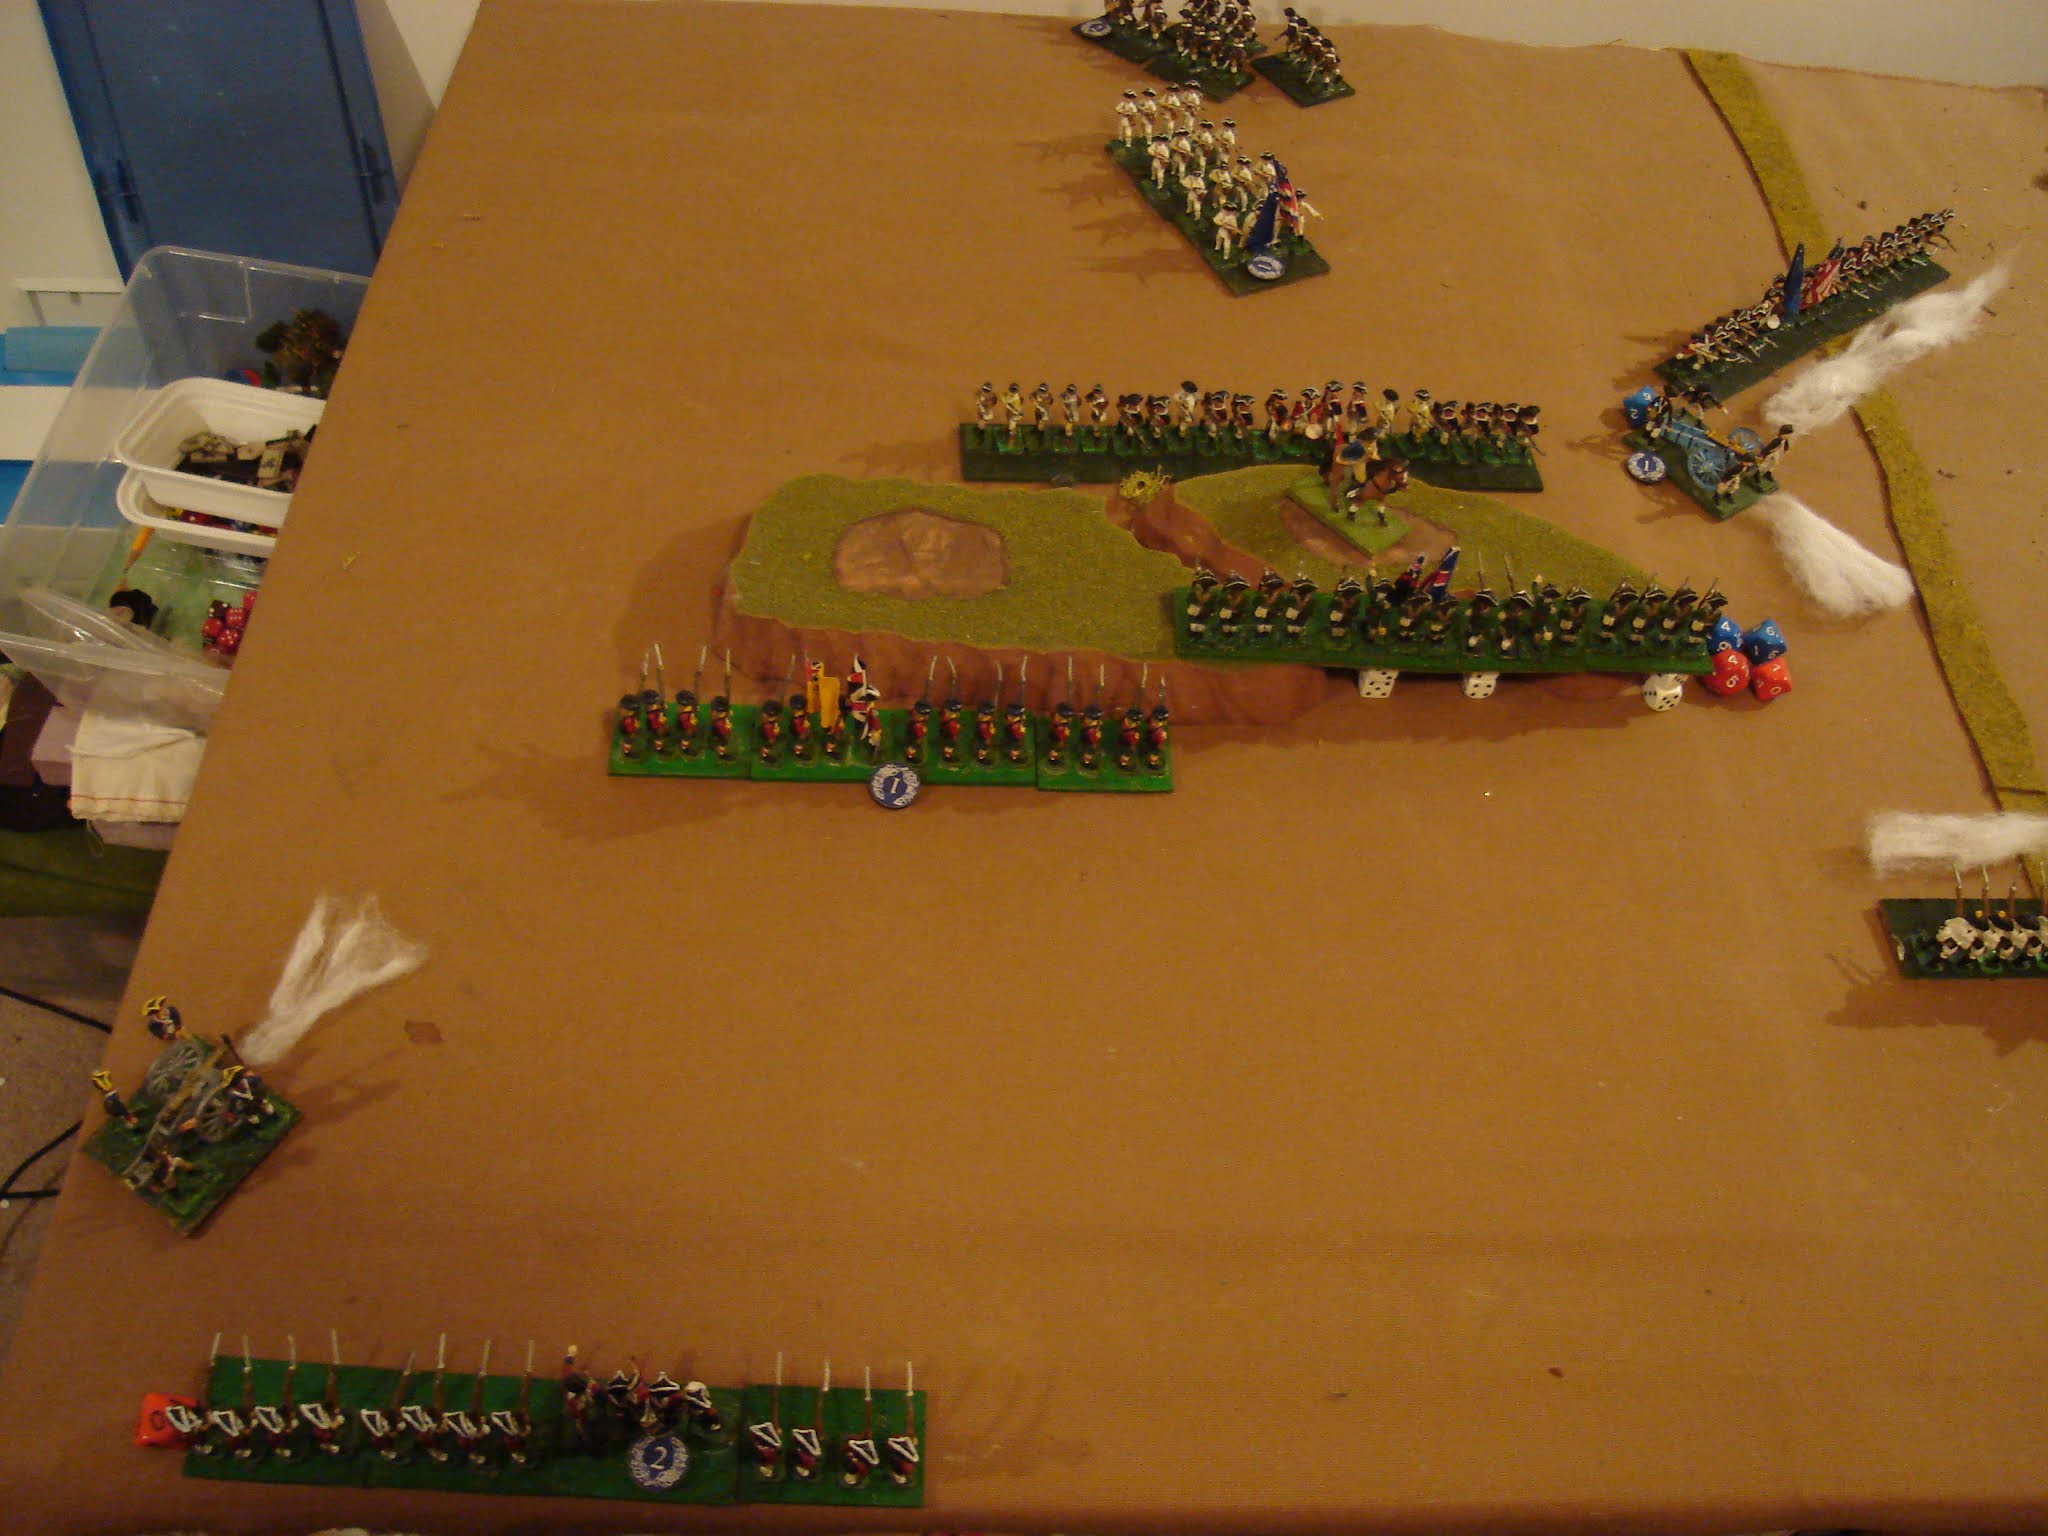
This time the 105th Irish have a gun to support them to the left. Next the Argyll Highlanders and the Loyalists, then a large German Unit - Anhalt Zerbst?  Have to be, I just love that name for some reason...and last on the right the Lights. Gen. Howe's cunning plan is for the Lights to seize and secure the woods, while the Germans outflank the hill, anchoring their right on the woods., The Scots will smash through closely supported by the Loyalists and Irish, and the light 6lb gun peppers anyone who isn't ready to bow to King George III!

The Brits enter the table and start executing their simple plan. It immediately goes awry as the Rebels on the hill dominate the Fire fight, causing the 105th to fall back...

...and the Scots lose a leader [they needed to beat a '20' and rolled a '15']! Both Units now have a Permanent Marker [PM], at 5 PM they are done and headed off to the pub! In PaL, if you get PM=No. of Bases the Unit is destroyed.  As PaL bases are 3 figs, I've made my 16 fig units = 5 base units.  The 16th man is collecting mess dues!
Pal uses a % fire system, but unusually there are no casualties and no figures removed - all shooting [as in ALL shooting] provokes a Morale Check, and the % the Firing unit accumulates is subtracted from your morale roll. So, if you Fire at all, you force a morale check upon your opponent. 

For example, if my unit Fires at you with 10% [might be 5 Bases at 2% per Base at that Range] and your morale is an 80% to pass then you check morale at 70%.  You may then commit the battalion's leaders up to 20%, and add them to your Morale, so it would be 90%. You roll and pass with an 89% [whew!]. However, you now need to roll again to see if you "lose a Leader" [resulting in a PM] by beating the % you used a leader for [here 20%] and the Scots rolled a 15 but needed a 21 or higher.  Calculating these shots involves constant mathematics, which is pretty Old School, in my book, and a bit fatiguing!

The reason to use the leaders is that if you fail your Morale roll you retreat 12" and become disordered. This will take a couple of turns to fix, so it is usually better to up your % chance to pass and take the increased risk of taking a PM due to "leader casualties'.  There is no limit on leaders, it is abstracted.  

In essence, you can risk additional % of a PM [which takes your unit out of the fight completely] by pushing your men to "hold the line".  Easy concept...hard to explain?

British return Fire but the State Line holds.

View from the British right. The Lights and the Rifles are about to face off in the woods, while two Continental Line and a 6lb light gun head for their positions. The Yankee plan is to angle back a continental line unit from the left of the hill to the road, putting the gun in the hinge for devastating close-range firepower.

View from the left. The disorderly Irish [but, *ahem* I repeat myself, *snicker*] and their gun, facing off against the Pennsylvanians, who are doing well for a bunch of Quakers. Must've eaten their oats!

North Carolinians blaze away.

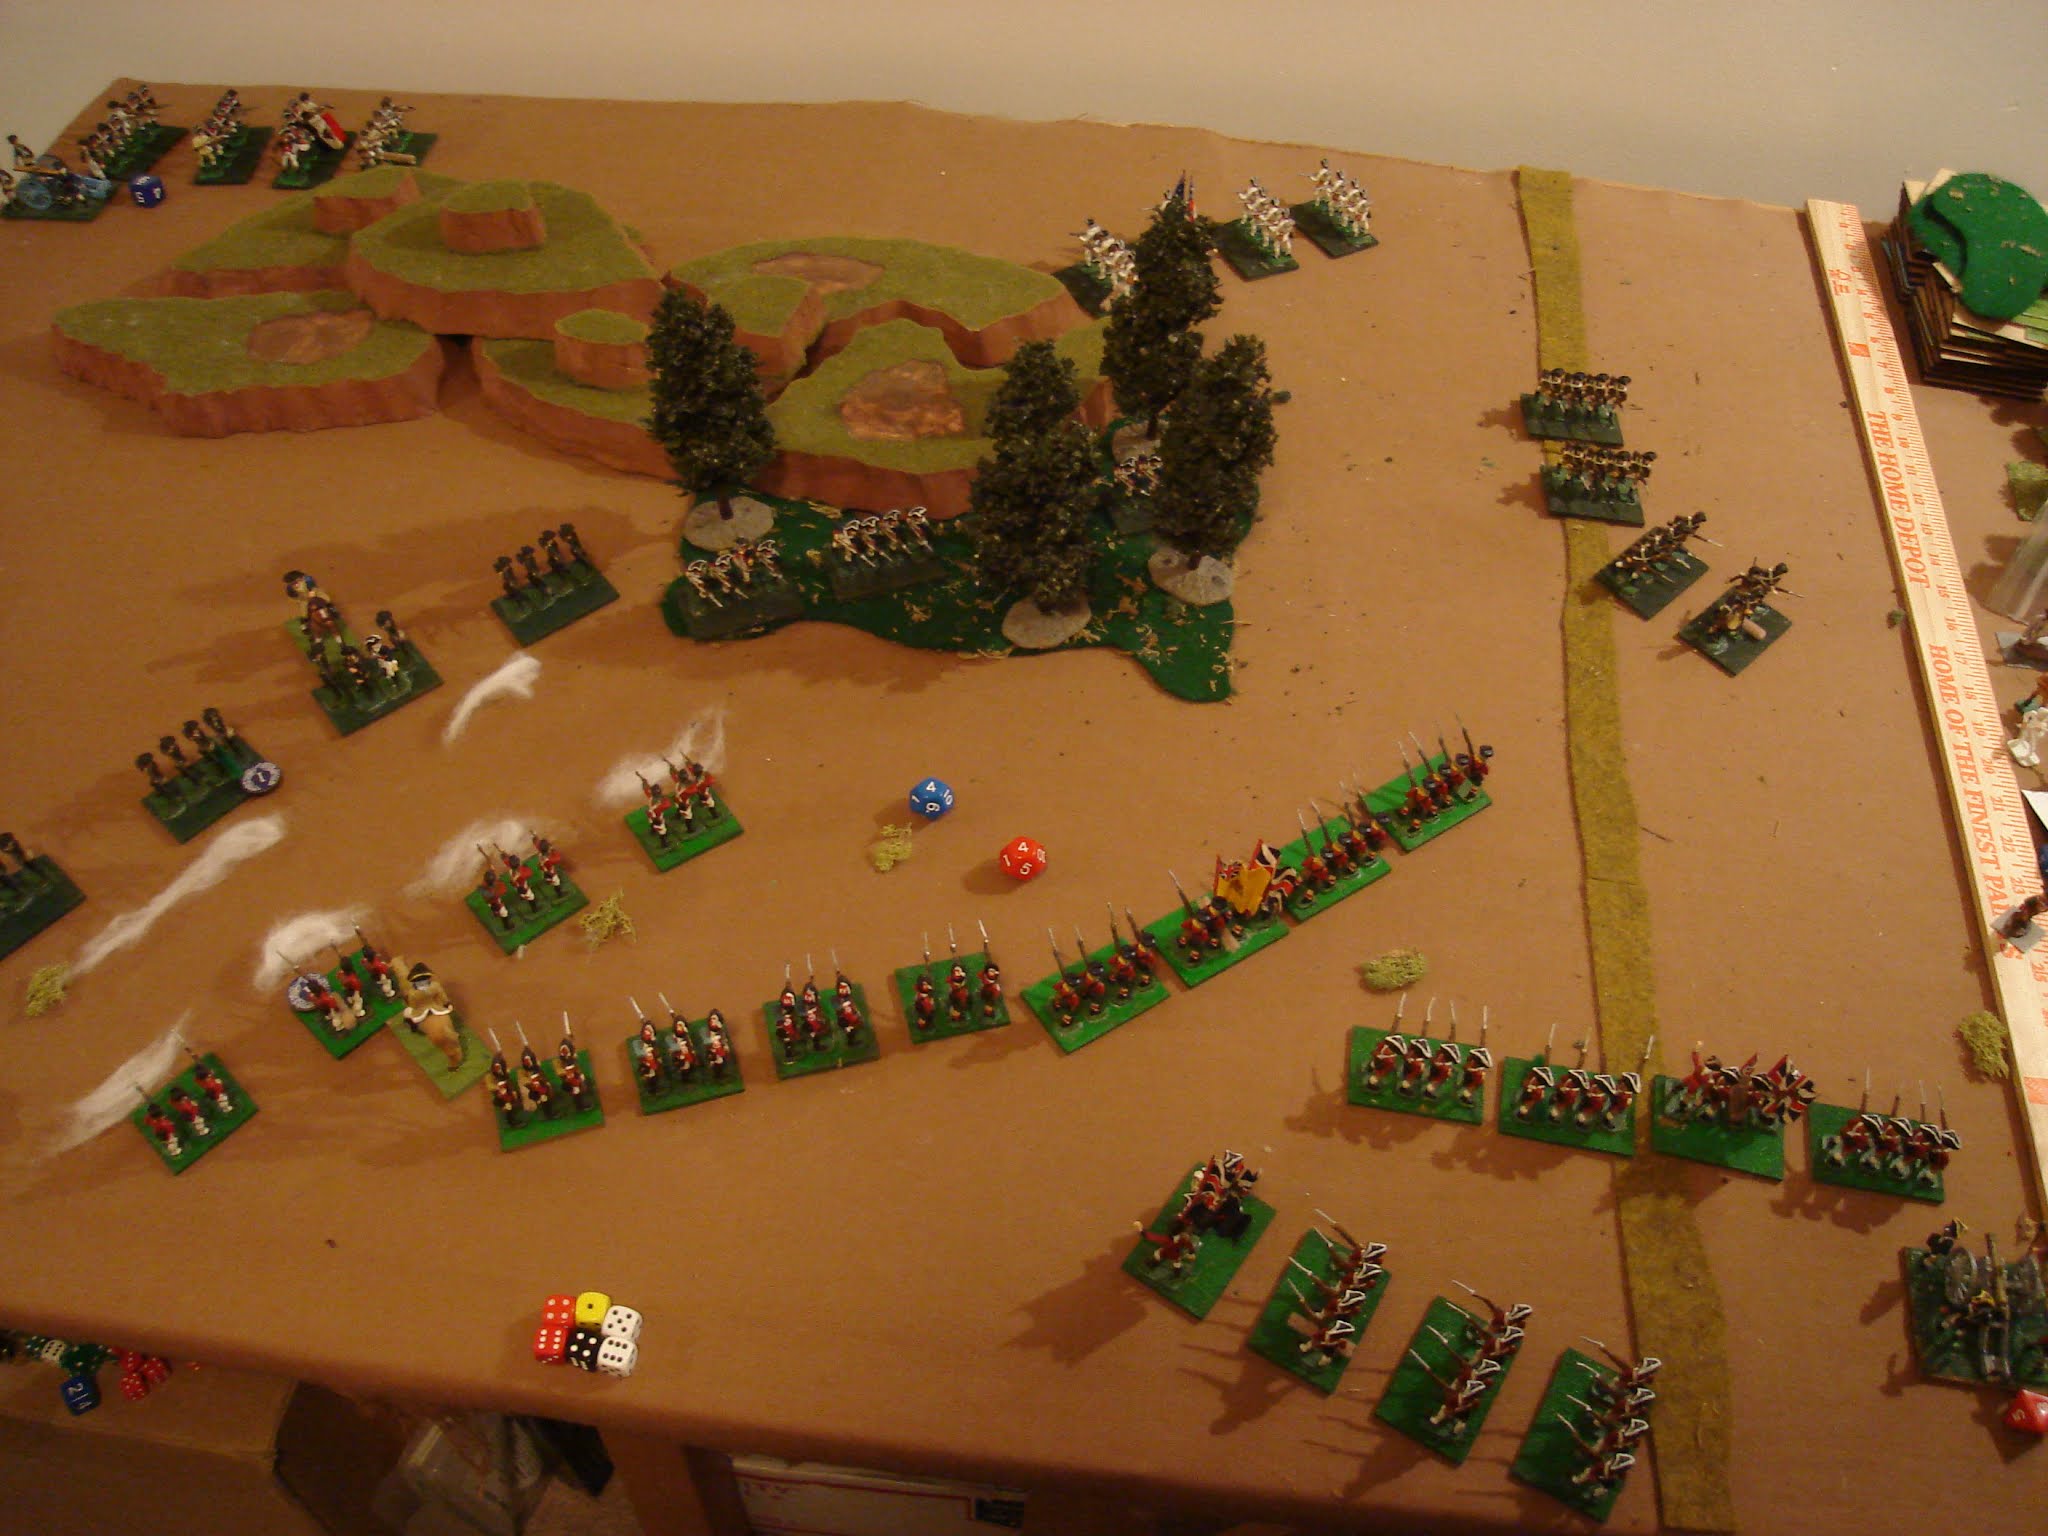
But...when the 6 pounder opens up, the Pennsylvanians realize that it "ain't no Quaker gun"!  They fail morale and take a permanent marker despite using their leaders to help, and fall back 12". 

The Scots and Tories repeat the same performance against the North Carolinians. They have cleared the hill on Turn 2!  

The Germans are positioning themselves in the road valley as planned. Protecting their right are the lights, who are preparing to run off the riflemen.

That's a lot of schnitzel-breath right there!

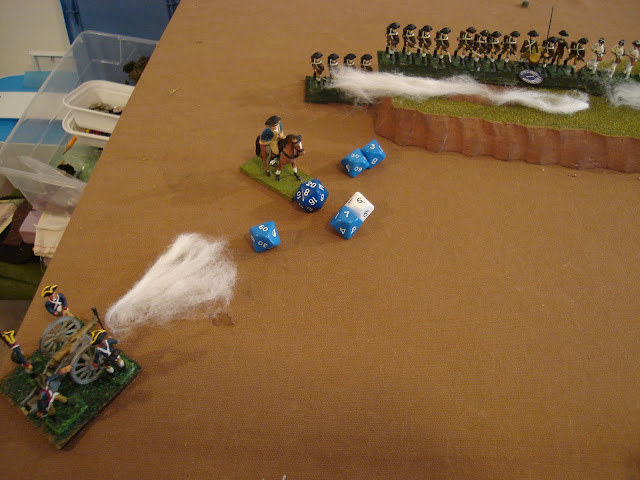
But on Turn 3, the Heroic Colonists roll high ['9'!] and get 4 Actions per unit. 
In PaL, you roll a d10 and if you roll average, you get the usual 3 actions per unit. If you roll high you get 4, sort of a bonus Action. It mostly makes you more maneuverable, and can certainly help change formations, etc. If you roll low, you get only 2 Actions, which is pretty serious - it halves the number of volleys you can Fire and makes it hard to change formation. Also, enemy units have a chance to sneak in a free volley. It's a mechanism that works but one can lose track of who has done what.


The 4 Actions allow them to move the gun, unlimber and fire it once. The Germans clearly left their courage in last nights pilsner, and fail both the morale and leader checks, taking 2 permanent markers [as a large unit, they can take 6 markers]. Fortunately for the Limey Oppressors, I forgot to retreat the Germans 12". This is a dubious event as...

The continentals form line and fire, inflicting yet another permanent marker! Meanwhile, the Rifles start to push into the woods and fire upon the Lights, who are Singularly Unimpressed.

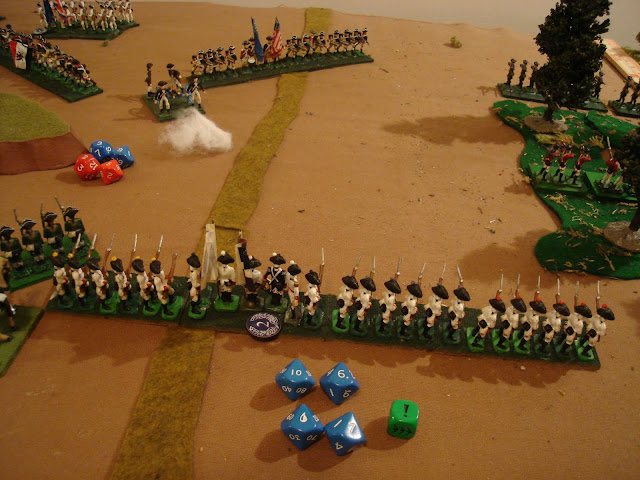
The 4 Actions enable both State Line Units to spend all 4 Actions on rallying, which they succeed in, as the large continental line unit forms up from column and passes them, heading for the hill.

Overview on the left.

All goes well until the British gun strikes again, routing the PA Line [who rolled a '2' on a d100] and fall back _another_ 12". They may as well go back to Tun's Tavern at this point. The North Carolinans want no grape with their PB&J, and reposition themselves in a column hidden behind the hill. Speaking of the hill, the Loyalists are now atop it with the Scots not far behind. The Revolutionaries really need to reform a line to oppose them, but space and the gun are cramping their style.

The Lights blast the Rifles, who role quite poorly and take two PM...
...and scuttle back to the glade from whence they came.

Overview at the end of the British turn - the continentals are holding on in the center, but both their flanks are looking weak: the left has Running Rifles, the Right has Fresh Air, and not much else!

And let's not forget the Irish, who are even now returning.
While on the right, well, the Lights are doing well. I think I know where the Irish have to go!

Americans may be solving their problem - they roll 4 Actions again on Turn 5!

Emboldened, the Continental Line move up the hill and blast the Loyalists with two close range Volleys!
Unfortunately, the Tories are highly motivated - they pass both the Morale and Leader Risk checks! Perhaps some of their land and goods were stolen by the Patriots?? "Death to Tom Brady!" they shout.

The Patriot Firing puts  another PM on the Germans. They're up to 6...
...and they are OUTTA here!

Whew!  A pretty intense first half to this game, I'd say. The Limeys had an initial setback with the Irish falling back, but quickly made up for it by driving all the Rebels off the hill and getting a foothold on it, not to mention driving off the Rifles. The American line is somewhat angled still, but with the Germans departing the table only the Loyalists are threatening the hinge. But with both flanks shaky and the center not so great, I'm uncertain the Patriots can pull this one off. 

The problem with the gun on the wide left flank instead of a battalion is that it doesn't have much capability to seize ground. The lights on the right are much more useful as they could exit the woods, form line and charge something.

So at halftime...it's a toss-up.  Part 2 coming soon!

Friday, January 1, 2021

OHW Scenario #8: Melee - Playesting AWI Rules, p.2

Returning to The Battle of Edgehill, Dec 7, 1777, aka OHW Scenario #8, we find the combatants locked in combat at Effective Range all across the table. What will happen? Will the forces of patriotic rebellion prevail against the lawful despotism of their King, breaking the shackles of a tyrannical taxation-fixated parliament's petty money-grubbing? Or will His Majesty's Forces in North America bring His rebellious subjects to heel, forcing them to contribute to the national plan of debt reduction?  Wait, is it 1777, 1877, or 1977??? Which representative government in the Western World is this???

Read on, Gentle Friend...

Turn 9 started off rough for the Lobsterbacks. The Artillery and the large Continental unit on the hill managed to lay in a lot of Fire and 8 Hits on the Grenadiers, none of which they saved - statistically, they should've saved 2-3, and they saved ZERO [remember my comment on the unlucky Grenadiers? I'm lucky they aren't Old Guard]. This put them from no Kills and one DM to 3 DM and 6 Kills. Plus they rolled terribly for morale and bolted.  Actually, I should've picked them up as over 50% but got distracted due to my emotional involvement and amazement at that Wargame Phenomenon, "The Cursed Unit".

Into the yawning gap, the Lights pressed on to threaten the Rebel Gun. The 105th formed up alongside the Scots, who managed to push the Marylanders back to 3DM with effective Fire. For their part, the Marylanders failed Quality on their firing and succumbed to Running Fire. Their time and Good Fortune was Running Out!

On the Right, Turn 9 saw the Carolinians struggle to reorder themselves, while the Pennsylvanians managed to finish rallying and reorder after their hasty retreat earlier.
But the British gun was well handled, rolling for 3 Actions and unleashing enough grape to make a cask of wine. The Carolinians were mown down like hay, losing some figures directly from failed saves and some from failing morale. They failed all saves, and all morale checks. Eventually, they got picked up... 

...leaving quite a gap on the right flank [below].

Turn 10 saw the Marylanders flee under strong pressure, and also evaporate, being over 50%. The Pennsylvanians were only 2 figs away from 50%, but changed into Open Order and boldly advanced. The German Continental BN shifted to oppose the Lights and cover their gun while it withdrew from the field. This wasn't such a great idea as when the Marylanders fled, the Highlanders still had 2 Actions left, and suddenly they were on the far edge of the wood, whoopin' and huzzahin' and skirlin' and, well probably drinkin' too!

The view from the 105th looks like the Continentals are ready to take them on!

Turn 11, the Germans plastered the Lights and Irish with Fire, but they weathered the storm thanks to average saves and solid morale. The Gun was out of ammo and withdrew to fight another day.

The Pennsylvanians advanced and took gun fire. They took both Hits as Kills [rolling a '2' for both], then rolled poorly for morale and lost a leader killed, putting them over 50% and...

They went to check and see if the wild rumor that the Carolinians had discovered a hogshead of wine was true - it lent wings to their feet!


Turn 11 saw the Scots and Lights converge on the unfortunate Germans, who had been deserted by the rest of their army ["Wait, isn't this the Marylanders job??" they asked]. The Scots hit one flank and the Lights the other. As the Scots will hit harder, I chose to resolve their Close Combat first as the Phasing Player.  Note, the Grenadiers...not really there...
First Close Combat card - Defender Fires! I gave them two bases at the Lights, and one at the Scots.

Second Close Combat card - Defender Fires! They managed a couple DM on the Lights, and one on the Scots, but nothing substantial enough to drive them off. Third Close Combat card - Melee!  I chose the Scots first - if they lost and fell back, the lights were the second option.


Totally up the modifiers, both sides ended up with a total of 10, or 2 Kills. However, as the Germans were hit on the flank, their total is halved. They still inflict one Kill on the Scots, but they are clearly at a disadvantage and fall back a total of 16"!  This leaves the hill completely open.

With the Lights, Irish and Scots well poised to overrun the hill, and the Germans unlikely to challenge them for it over the next 4 Turns, the American Patriots will have to concede.

Whew!  That was very tight until Turn 11, when the unrelenting pressure of the British finally drove off the Americans. For their part, they had a string of bad Action rolls, followed by bad Rally rolls [despite putting in as much Leadership as possible]. 

I admit, I messed up the Patriot Turn 3 reinforcements - I should've sent the Carolinians to back up the Marylanders, and put the Pennsylvanians where the Carolinians were. As it turned out, they PA troops were driven from the field and the Marylanders had no reserve to fall back on, or relieve them in place [which I even did the last time I played - Argh!].  Still, what do you expect from an enthusiastic Amateur General??

I hope that this has given some insight as to how the rules play, the friction and decision points, and the "driver's seat feel" of running a couple of battalions in with "Zeal and Bayonets". Having playtested it a bunch of times, I managed to run all 12 Units pretty effectively, altho recording, picture taking and pondering the rules does occasionally lead me to forget key things - like picking up the Grenadiers!

The Horse and Musket period is a great gaming period, and one of the most popular. It's heart and soul is the battalion, and the struggles of its Leaders to keep the men in line, ordered, and firing. Expressing this on the table is the intent of Z&B.

Wednesday, December 30, 2020

OHW Scenario #8: Melee - Playesting AWI Rules, p.1

Well, it's been a month since I posted, but a lot of gaming has been going on as I obsessively playtest my American Revolution rules. As I spent a lot of time closely reading Spring's "With Zeal and With Bayonets Only" and trying to incorporate the issues he raises for an AmRev commander, I'm tentatively calling them "Zeal and Bayonets".

My goal with the rules is to return to a pretty granular set that allows the player to make lots of the same decisions as the Battalion Commander.  At its heart, this is a BN game, altho most players will handle a small BDE or so. I like to think of it as a return to manual transmission after years of automatic - if you want to be in control of the decisions, this is the set of rules for you. If you want all lower level decisions abstracted so you can be the Brigadier - look elsewhere!  Perhaps "One-Hour Wargames"??  
:)

The drive train is largely inspired by Scott Holder's "Patriots & Loyalists", an AmRev game that I played upon its release and that still inspires me in several ways. Altho a few of the mechanics are way overengineered [like a whole page on supporting a melee] there's a lot of other things that are very evocative of the period. My favorite is Leader Risk. Basically, Holder uses a d100 system, and every time you are fired upon you have to check morale - and the BN leadership can help with 1-20%. However, the % help they give is also the % risk to themselves. You roll again after morale and if you used the Leader for 20% assistance bonus, you have a 20% chance of the Leader getting whacked and the Unit taking a Permanent Marker - once PM's = Stands the Unit is destroyed!  And Units are usually 5 stands at a 1/20 ratio.  I like this mechanic of gambling with the lives of leaders.

I also like the rolling for Actions. Holder has you roll by BDE on a d10 and you've a 40% chance at 3 Actions for every Unit, and a 30% chance for both 2 and 4 Actions. If you roll down to 2 Actions, your opponent gets a chance to act one Unit for every one of your Units. So an interactive IGO-UGO.

Of course, I didn't leave much as-is in the end, and stole some other fun ideas from elsewhere. Steve Jones' "Bloodybacks" inspired me to return to actual figure kills along with "Loose Files and American Scramble" [from which he probably got the idea]. But I like the mechanic whereby Disorder comes and goes, and can be fixed, while actual casualties are Permanent.

Anyway, those are a few thoughts for those who are interested in rules design. Ultimately my goal is to put on the table some of the friction and granularity that makes the AmRev the AmRev and the challenges its leader's faced the challenges the player faces.  I had one cold playtest with a local gamer who's great at getting into the nitty gritty and offering critique. I made several changes from his comments and my thoughts including another partial playtest solo. 

Let's see how this car runs!

Game Setup. The Rebels have two units on the hill at game start - to left is a rifle BN in Extended Order [skirmishing, basically] and to the right behind the trees is a line unit of Marylanders - so almost as good as British line [they just aren't quite as good with l'arme blanche]. These two Units have the first turn. Entering Turn 3 are two 2nd Rate Line BNs at top right, and Turn 6 another Continental Line with a 6-lb gun at top left. His Majesty's Royal Butt-kickers will enter with 3 Units on the road Turn 1, followed by 3 more Turn 4. The Victory is in being in exclusive possession of the hill by Turn 15.
Turn 1. Rebels roll high and get full 3 Actions each, so easily advance into the woods and off the hill. The goal is to fight forward enough that the hill is safe, and use the woods to advantage. Brits enter on the road, with Light Infantry at the front screening columns of Grenadiers and Highlanders. The Scots rolled up for 3 Actions so marched on for 2 then faced left into a line. The Grenadiers barely got on the table with 1 Action [this is probably a good time to mention...my Grenadiers are probably the worst performers in all my games, statistically speaking].
American Turn 2, the Rifles advance and give the Light Bobs a "volley by wings". In Z&B, you can divide up your firing sequence by Divisions [1 Base] or combine them into Wings [2 Bases]. Depending on the bonuses and how you estimate your fortune with the dice, there are advantages to dividing up your fire or combining it. Range and firing angle play a roll also. The Lights take a Disorder Marker [DM] from the long range fire.
British Turn 2, the Lights move up rapidly to give the Grenadiers and Scots some space. They needn't have bothered, as both roll only 1 Action and they lag far behind. Battlefield coordination was a constant challenge for all combatants in wild North American terrain. The Actions mechanic presents this nicely, altho the Americans aren't in a position to take advantage of it - where's a Heavy Dragoon squadron when you need it??
Turn 3, the rifles put another DM on the Lights. In return, the Lights hammer the Rifles by moving in closer and unleashing their Initial Volley. The Rifles take two Markers and a casualty, and in the process of using some Leadership take a third DM with a low Leader Risk roll - the yellow die. The green dice are the morale check.
Turn 3 ends with the Patriot reinforcements on the table, the North Carolinians in white headed to the hill while the Pennsylvanians headed straight at the Scots at high speed! Low Actions dice result in both the Scots and Grenadiers making slow, leisurely progress forward. Both are not quite in position.
Turn 4 the Brigadier dashes over to help, and the Rifles roll well for Actions. They then rally off their 3 DMs with some effort, and use their third Action to give the Lights an ineffective volley.
Turn 4 continues, with the British slowly advancing, and their reinforcements entering. To bottom is the 105 Foot, the Irish Volunteers. Above them is the 40th Foot, and a 6-lb gun. With the Lobsterbacks in their faces, the Pennsylvanians get a case of the slows and are barely able to maneuver. Fortunately for them, the British are in no position to exploit this problem.
Turn 5, all continue to deploy with the British faring a bit better. The Pennsylvanians have been beset with poor leadership and have only barely managed to get into some sort of fighting formation. Some disappointing Action Dice for both sides happened but where and when is impacting the battle plans of both sides. The British have been slowed while the American left is in a bit of a muddle.
Closeup: "Come and get some of this!" 
Scots in a bit of disorder but inflicting more on the Marylanders lurking in the woods.
Closeup Left: Light Bobs are screening His Majesty's Bearskin Wearing Butt-Kickers. Both need to oblique left to push toward the hill and the weak rifle unit.
Closeup Right: The 40th give lead generously to the Pennsylvanians, who fail at reciprocation - clearly a case of bad manners among the grimy farmers making up the Rebel effort!
Turn 6. The Pennsylvanians roll poorly for Actions, then blow their morale roll. They manage not to get a leader whacked, however [yellow die].
Turn 6 end. Pennsylvanians get out of the way with undue haste, and having lost a base as well. The pressure on the center and left builds slowly but surely. The British gun needs to get into action, but must've found a rut or two in the weeds as their Action rolls have been poor. American reinforcements enter - the German Continentals at top, and the light gun just upon the hill, still limbered.
Closeup from the bleachers on the right: Carolinians securing the left flank of the Marylanders who hold the key to the entire position - the woods at the base of the hill. Nice view down the British line.
Turn 7. Heavy Action in the Center. Highlanders fire wildly, and the officers lose control as the ill-disciplined bekilted Argylls succumb to the temptation to "Running Fire", where the men just start shooting as fast as they can. Altho the fire was largely ineffective, the Marylanders roll low on morale as well as taking a Leader hit, and a number of them slink off to check the parking meter. In game terms, the Marylanders failed morale but instead of running the BN stood its ground and took additional casualties. Sometimes heroism is good, and sometimes heroism is bad.  Here, the longer they hold the woods the better, so we'll call them heroes... Unfortunately, the General is knocked off his horse by a stray musket ball and has to get the wound dressed for a couple of turns!
Turn 7 on the left. The Grenadiers finally make themselves useful by providing some fire support for the Lights who tighten up from Extended Order to Loose Order and charge the hated Rifles. Close Combat is resolved in a separate sequence after all Fire, Move and Rally Actions. In the Close Combat Phase, to show the complexity and multiple possibilities of an infantry v. infantry charge, Z&B uses a card deck. Each card has a possible action or event, e.g. Defender Fires, Attacker Checks Morale, or Resolve a Melee. This is from Patriots & Loyalists, but the card mechanism is much older, going back to the Grant, Young and Featherstone era.  

[EDIT] The Lights draw a "Defender Checks Morale" card, and the Rifles need an '8' but roll a '4'. In Z&B my attempt at handling the unpredictability of morale is if you fail on an odd number you run away [a variable distance] and on an even number you stand but take figure kills of the difference [additional Soldiers slinking off, wounded or otherwise out of the fight]. The Rifles failed by '4', lose 4 figs [an entire base] but stand their ground.
[EDIT - note the second base with a splat marker] The next card is a Melee card, and the various factors are added up with the Lights getting to 16 and 3 Kills, while the Rifles only get to 5 and 1 Kill [they are halved for "No Bayonets"]. They lose...
...and execute a hasty retreat. Not only are the Rifles badly chewed up, but the hill is wide open! With the Unit at 50% effectives, I would usually remove it...
Turn 7 end. With the Marylanders making a stand in the woods supported by the North Carolinians, reinforcements arrive and prepare to hold the hill. The Rifles and the Pennsylvanians are in poor shape. Perhaps I was a bit TOO forward with the American defense? Some dice rolls have hurt them, also.
Turn 8. The Marylanders rally themselves a bit, while the Scots throw some weak, ill-disciplined volleys at them while the officers fail to restore order. They only need a 5+ to pass a Quality check and resume firing discipline, but they rolled a '3' on 2d6!  They still got a Hit, anyway.
This is followed by a second Running Fire that is ineffective, but the officers regain control with a '7' on the Quality roll. Some precious time was lost with ineffective volleys!
Turn 8 end. The Scots are a bit stalled in center, while the 40th and the gun beat up the Carolinians and the Pennsylvanians try to get themselves back in the action, but roll poorly for their rallying.

Turn 8 on the left. The Lights and Grenadiers sort themselves out to continue the push, backed up by the 105th Irish. Unfortunately, the Continental German unit moved quickly and is now in position, supported by the light gun. The Rifles are pretty much spent, and will have to find a safe place from which to peck away at officer's or something.
Well, the action has been pretty intense. At the halfway mark of the 15 Turn game, the British have torn up two Infantry battalions and damaged a third that is holding the critical ground of the woods. They certainly have the potential to push through the woods with the largely undamaged Argyll Scots. The Light and Grenadier Units are both a bit small to assault a fresh unit on a hill with artillery support, but perhaps the Irish will be of use?  

We'll see what tomorrow brings.

I hope the playtest is giving you a taste of some of the things that give the right "feel" for the period for me, as well as some rule sets that have mechanics I like enough to tweak and work with until I get the right blend. I think rules writing is mostly like cooking - you can check out a lot of recipes and taste a lot of food, but in the end you have to find the right recipe for you and those whom you will host!