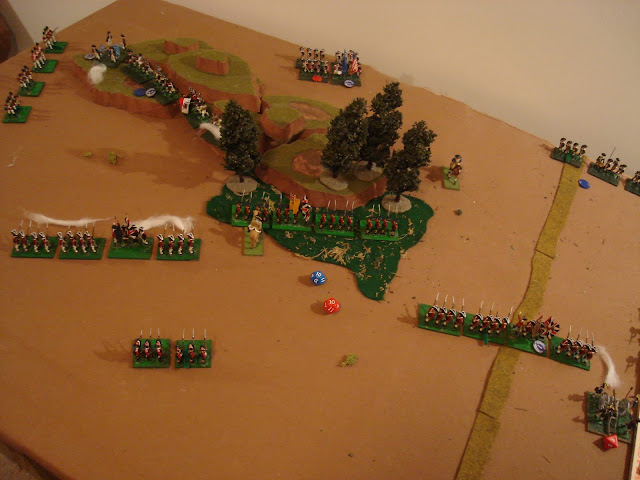
Returning to The Battle of Edgehill, Dec 7, 1777, aka OHW Scenario #8, we find the combatants locked in combat at Effective Range all across the table. What will happen? Will the forces of patriotic rebellion prevail against the lawful despotism of their King, breaking the shackles of a tyrannical taxation-fixated parliament's petty money-grubbing? Or will His Majesty's Forces in North America bring His rebellious subjects to heel, forcing them to contribute to the national plan of debt reduction? Wait, is it 1777, 1877, or 1977??? Which representative government in the Western World is this???
Read on, Gentle Friend...
Turn 9 started off rough for the Lobsterbacks. The Artillery and the large Continental unit on the hill managed to lay in a lot of Fire and 8 Hits on the Grenadiers, none of which they saved - statistically, they should've saved 2-3, and they saved ZERO [remember my comment on the unlucky Grenadiers? I'm lucky they aren't Old Guard]. This put them from no Kills and one DM to 3 DM and 6 Kills. Plus they rolled terribly for morale and bolted. Actually, I should've picked them up as over 50% but got distracted due to my emotional involvement and amazement at that Wargame Phenomenon, "The Cursed Unit".

Into the yawning gap, the Lights pressed on to threaten the Rebel Gun. The 105th formed up alongside the Scots, who managed to push the Marylanders back to 3DM with effective Fire. For their part, the Marylanders failed Quality on their firing and succumbed to Running Fire. Their time and Good Fortune was Running Out!
On the Right, Turn 9 saw the Carolinians struggle to reorder themselves, while the Pennsylvanians managed to finish rallying and reorder after their hasty retreat earlier.
But the British gun was well handled, rolling for 3 Actions and unleashing enough grape to make a cask of wine. The Carolinians were mown down like hay, losing some figures directly from failed saves and some from failing morale. They failed all saves, and all morale checks. Eventually, they got picked up...

...leaving quite a gap on the right flank [below].
Turn 10 saw the Marylanders flee under strong pressure, and also evaporate, being over 50%. The Pennsylvanians were only 2 figs away from 50%, but changed into Open Order and boldly advanced. The German Continental BN shifted to oppose the Lights and cover their gun while it withdrew from the field. This wasn't such a great idea as when the Marylanders fled, the Highlanders still had 2 Actions left, and suddenly they were on the far edge of the wood, whoopin' and huzzahin' and skirlin' and, well probably drinkin' too!
The view from the 105th looks like the Continentals are ready to take them on!
Turn 11, the Germans plastered the Lights and Irish with Fire, but they weathered the storm thanks to average saves and solid morale. The Gun was out of ammo and withdrew to fight another day.
The Pennsylvanians advanced and took gun fire. They took both Hits as Kills [rolling a '2' for both], then rolled poorly for morale and lost a leader killed, putting them over 50% and...
They went to check and see if the wild rumor that the Carolinians had discovered a hogshead of wine was true - it lent wings to their feet!

Turn 11 saw the Scots and Lights converge on the unfortunate Germans, who had been deserted by the rest of their army ["Wait, isn't this the Marylanders job??" they asked]. The Scots hit one flank and the Lights the other. As the Scots will hit harder, I chose to resolve their Close Combat first as the Phasing Player. Note, the Grenadiers...not really there...
First Close Combat card - Defender Fires! I gave them two bases at the Lights, and one at the Scots.

Second Close Combat card - Defender Fires! They managed a couple DM on the Lights, and one on the Scots, but nothing substantial enough to drive them off. Third Close Combat card - Melee! I chose the Scots first - if they lost and fell back, the lights were the second option.

Totally up the modifiers, both sides ended up with a total of 10, or 2 Kills. However, as the Germans were hit on the flank, their total is halved. They still inflict one Kill on the Scots, but they are clearly at a disadvantage and fall back a total of 16"! This leaves the hill completely open.

With the Lights, Irish and Scots well poised to overrun the hill, and the Germans unlikely to challenge them for it over the next 4 Turns, the American Patriots will have to concede.
Whew! That was very tight until Turn 11, when the unrelenting pressure of the British finally drove off the Americans. For their part, they had a string of bad Action rolls, followed by bad Rally rolls [despite putting in as much Leadership as possible].
I admit, I messed up the Patriot Turn 3 reinforcements - I should've sent the Carolinians to back up the Marylanders, and put the Pennsylvanians where the Carolinians were. As it turned out, they PA troops were driven from the field and the Marylanders had no reserve to fall back on, or relieve them in place [which I even did the last time I played - Argh!]. Still, what do you expect from an enthusiastic Amateur General??
I hope that this has given some insight as to how the rules play, the friction and decision points, and the "driver's seat feel" of running a couple of battalions in with "Zeal and Bayonets". Having playtested it a bunch of times, I managed to run all 12 Units pretty effectively, altho recording, picture taking and pondering the rules does occasionally lead me to forget key things - like picking up the Grenadiers!
The Horse and Musket period is a great gaming period, and one of the most popular. It's heart and soul is the battalion, and the struggles of its Leaders to keep the men in line, ordered, and firing. Expressing this on the table is the intent of Z&B.


