How Men of Quality Resolve Differences

How Men of Quality Resolve Differences
Pudel and Peper attacks - an ugly but inevitable part of any 17th C. British Civil War, "Oh! The Shame of it All!"

Thursday, November 26, 2020

It's Scruby - tastic! Gaming Thankfulness


http://vintagewargaming.blogspot.com/2011/09/helpful-hints-from-jack-scruby-1962.html [nice blog, btw!]

My very first miniatures game was about 38 years ago with North Penn Wargamers. It was an American Revolution game, and these are the figures from it!  They appear to be mostly Scruby, but there are some others that are different in style that I'll have to figure out over time. I remember being very excited about how it all looked and the prospect of battling it out on the table, but I did get crushed. The player was nice about it, however, and gave me some tips that could prevent that in the future...uncertain I learned them but he tried! 

As they moved around the area the name changed but amazingly most of the main hosts and visitors are still in the group. A few have rolled their final boxcars but one of the original hosts has been paring down his collection and among his offerings were these - now largely unwanted - old school figs. The group replaced them decades ago with nicely detailed and historically accurate [and proportionally sculpted] 15s and they've been collecting dust ever since.  I immediately jumped at the chance to have them, as I've been looking for an old-school project for a while, and it is especially great to have something with fond memories.  So "Thanks Dave" and I wish a wonderful Thanksgiving to all the group.

Well, "enough nostalgia" you are probably thinking, so let's see what is happening with the little loyal lead fellows!

Below is One - Hour Wargames' classic Scenario #4 "Take the High Ground". In this context, I imagine that the far right of the Rebel's line has been flanked, and two regiments of State Line were dispatched to hold the only piece of high ground dominating a road leading to the main army's baggage train. As they hold it, the main army has dispatched two Continental Line regiments, a Rifle regiment, and a 6lb gun to support them against the flanking force, that outnumbers them 3-1. 

How much of the patriot's blood will be spilt upon the Altar of Freedom today?

View from a nearby church tower - PA and NC State Line hold a gentle rise near the road. Gen Washington has sent reinforcements that are about to arrive on table.


Closer view

Rules are a variation on Neil Thomas' Napoleonic rules. Using D10 and the leader intervention and risk rules from Patriots and Loyalists. Argyll Highlanders and Anhalt Zerbst battalions engage the Rebels.

Fire at long range is exchanged.

Loyalists, the Royal Artillery and a composite Light Bn take up positions on the right.

Reinforcements rush to the scene as the State Line sees their flank being turned by the Loyalists.

The reinforcements head to the hill, letting the Lights keep the woods. Hill is the objective.

Fire continues as the rifles and gun secure the State Line's left.

Some intervention from Gen. George is needed to steady the State troops.

Loyalists doing their part - and rolling well!

The Scots fall back in confusion, despite intervention from their charismatic, hard-drinking former clan chief. The Hat Companies of the 105th move to replace them in the battle line with the gun.

Highlander's viewpoint from their disorderly mob.

Turn 4 sees a burst of activity for the Kings Army - they rolled to have more actions than the Rebels.

The lines continue to develop. At top, the Lights threaten the gun while the riflemen hold off the Loyalists. The large German regiment holds the center by itself, as the redcoats move to fill the left. The highlanders have reformed in good time to oppose the oncoming Continental Line unit.

Gen. Washington is pleased to see a burst of activity for the Cause - the water symbol is the "10" on these dice.

As the Lights close in, the gun lets loose a furious barrage of cannister getting four hits. But timely intervention by the British Brigadier steadies the men and they are ready to press on.

And he suffers no wounds, either.

Meanwhile, at the critical point, the Germans close in but lose a stand in the process.

The Battle on turn 6 or so. Loyalists and Lights have closed in against the left, while steady pressure continues against the High Ground, with the Scots having reformed their line. The Royal Artillery skip cannon balls into the flank of the Carolinans, but it is a narrower target than they thought.

Can the Loyalists break the Rifles? Perhaps a bayonet charge is in order?  Or is close range Fire enough? I am contemplating having the Lights overrun the gun, also.

A fully positioned army of rebels makes it unlikely that Gen. Washington's flank will be turned, today. But maybe some more opportunities will arise in the future?

Well, this was fun but I decided I definitely wanted to try out a couple of other sets of rules, including Andy Callan's "Loose Files and American Scramble" and Scott Holder's "Patriots and Loyalists".  It was great to put these guys on the table, and they will occupy it for the holiday weekend at least.

Good gaming from a better time!

So a happy Thanksgiving to all and for all our friends in the occupied zones:

"The Chair is Against the Wall"

"John Has a Long Moustache"

Friday, November 20, 2020

Wargaming a COA Analysis in OHW Scenario #12: An Unfortunate Oversight

So, in the last post, I examined one COA: assuming the French put an Infantry Unit in the town, was it worth opposing it with a Russian Infantry supported by two batteries of Guns? The answer was that the French Infantry would - just barely - be destroyed in four turns, with a badly damaged Russian Infantry taking the town on Turn 5. As the town is a good location to project Fire from, it seems like it might be a good Supporting Effort to the Main Effort - an attack against the hill. 

However, the following field exercise showed that the main effort will be in battle not later than Turn 4, possibly Turn 3 if the French are aggressive. They will almost certainly need the Fire of the Artillery to support them as their attack will most likely be at 1:1 odds, and as the Russians will be on the move the French will get the first shot.

An important fact to remember about OHW - Units are 100% combat effective until "destroyed". Destroyed really means "combat ineffective and withdrawn from the battle". A OHW scenario is a short, sharp encounter, that doesn't have time for Units to rally, reform, and get stuck into the fight again.

From that analysis in the last post HERE, the best Russian COA is to keep the guns as far from the town as possible, and push all their Infantry over the ford led by the cavalry. If the French decide to use a Unit against the Artillery, it will probably not destroy them before being destroyed itself. But let's see how it works when the opposition gets a vote!

The below wargaming of the COA used the OHW rules with necessary additions to complete them from this list HERE. Dice were D5 average dice, with 2,3,3,4,4,5 on them. This minimizes the chance factor to emphasize planning in this training exercise.

End of Russian Turn 1. The Artillery inflict 5 Hits on the French, while their Cavalry lead the way followed by the Infantry crossing the ford. The French in the town take only 1 Hit [and that only because ALL fractions are rounded up!].
End of French Turn 1. They are moving rapidly - more rapidly than the Russians crossing the ford! They inflict 3 Hits on the Russians fighting the town [a losing proposition for the Russkies] and the Cavalry. Their Lights are setting to oppose the Artillery. They rallied off 2 Hits on the damaged Infantry in the center. They certainly are starting strong!
Turn 2. Russian Infantry continues crossing while their cavalry take a beating from most of the French army. Still, the Cavalry and Artillery battered one French Infantry into retreating. I almost think the Attacker needs one Unit to start across the ford, or perhaps one more unit?
Turn 3. The battered Russian Cavalry have swung far out onto the flank, distracting the opposing French Cavalry and making space for the oncoming Infantry. Still, the French have the central position, and the Russians are too spread out to concentrate their combat power.
Turn 4. Well, that was a surprise! The Russian Cavalry destroyed the French, after supporting Fire from the Infantry and Artillery softened them up. Still, the Cavalry and one Infantry are on the rocks, while the Infantry opposing the town have left the battle and the French Lights have put the hurt on one Artillery Unit.
Turn 5. Unsurprisingly, one of the Russian Infantry folds. The French begin to advance against the Artillery from the town. If they silence the Artillery, the Russian's attack will be over. The French choices: play conservatively and husband their damaged Infantry while trying to finish off the Russian Cavalry and one Artillery Battery, or advance?
French vote for the wrong COA, apparently...leaving the flank of their Infantry on the objective open to a cavalry charge. [Obviously, the French staff were taking pics instead of doing their job!]. I probably should've just ignored my carelessness, but I love the drama!
BANG! Ouch...
Bye-bye...
Turn 6. French compound their error by rolling poorly on the shot that had a 5/6 chance of destroying the Russian Cavalry. Another bad COA!
Turn 6. Well, we officially have an even chance here. The French have two Infantry by the objective, while the Russians have battered Cavalry, a good Infantry, and Artillery support - altho one battery is about to go. I thought the French fought WELL in the Napoleonic wars??
Turn 7. Russians go for broke and charge, destroying the French Infantry. They lose one battery. Overall, this still seems like it is favoring the French...
Turn 8. The last French Infantry holding the objective is destroyed by concentrated Artillery and Infantry Fire. Plus the Cavalry were looking for more vichyssoise.
Turn 9. French Lights show they are made of stern stuff - they turn around and whack the Cavalry with sniper-like efficiency. They needed a '5' and got a '5'!
Time to return to Moskow, Ivan.
Turn 10. The firepower is very similar, but the French Lights are still rolling hot!  But they are in a crossfire. Meanwhile, the French try to wipe out the battery.
Turn 11. French lights decide they've done their share and head back to town - maybe the cafes are still open?  Time for a little joi de vivre!
Turn 12. Russkies reposition themselves to finish off the French.
Turn 13. They see them off - maybe they'll join the Lights in town? Russians still have two turns to be on the hill, and have two Units left - albeit somewhat battered.

Analysis
Well, it looked like the French had things well in hand. They made two errors:
  1. exposing the flank of their Unit sitting on the objective, and,
  2. advancing out of the town against the Artillery.
They should have shifted the town Infantry to the center to hold the objective.

Russians made the most of their firepower and altho it was rarely decisive on its own, it certainly had an effect in the long term. With its 48" range, it can cover the table for 1.5 Hits a turn per battery, which destroys a unit in 10 Turns. In 15 Turns of continuous Fire, the two batteries are capable of destroying three units, theoretically. I think the move with the Lights was good, taking out one battery helped.

In terms of the original question, the Russians made the right choice to keep using the guns against the objective and not be distracted by the town.

Overall, the Russians put together the best plan with the forces at hand. They stayed focused on killing units and taking the objective. They capitalized on French errors, and the French got a bit overconfident and spread out too far. I'd say that there was some good dice on both sides, but in the end the Russians won a hard-fought and well deserved victory.

Conclusion
I hope that these posts have given the reader some food for thought. It is essential if one is to edge out the opposition in a tightly contested game - and most of the OHW scenarios are pretty close - to develop a plan, evaluate a couple of the COAs and choose the best ones. Here, the Russians would have struggled to expand their bridgehead and seize the objective if they had invested too heavily in seizing the town, despite the firepower advantage they had.

Tuesday, November 17, 2020

COA Analysis and Training Exercise in One-Hour Wargames

"Based on our Wargaming - and my cool facial hair - this is the best COA, Sir"

fom https://warontherocks.com/
OK, but what would Neil Thomas think...?

In the 1:1 scale Army, a COA [ko-uh] is a Course Of Action. During the decision making process, COAs are wargamed to see what the likely outcomes are and evaluate problems. Wargamers rarely get into COA analysis for several reasons, IMHO:

  1. They don't know how and can't be bothered - it's just a game,
  2. They don't have the time. They'd rather just game it out. Arguably, that results in an analysis of the COA but it usually inaccurate due to it being a "success assessment" rather than "a probable outcome assessment".
  3. They don't know the rules well enough to perform an analysis,
  4. Related Point: Most miniatures rules take too long to play out and are too hard to analyze - they have so many variables, it would take almost as long as to play it out, anyway,
  5. Related Point. Most games don't know how to calculate the odds in their games.
But in  One-Hour wargames, there's A LOT more time to think, since the game plays much faster. Also, since the mechanics are simpler, it is easier to average out the results. The only variable is the combat mechanisms, which use a 6-sided die. The average roll is a 3.5, so to minimize chance for the thinking process, on an odd turn the dice could all roll 3's and on an even turn the dice could all be 4's. Units inflict d6-2, d6, or d6+2 Hits, resulting in 1.5, 3.5 and 5.5 Hits on average, depending on their attack ability. This example assumes we are using the OHW rules mostly as-is.

How do we visualize this in a scenario?
Take Scenario #12: An Unfortunate Oversight. This requires some important decisions be made regarding the base of fire and the maneuver elements of the attacking side.

One of the key questions the Attacker has to decide is what forces oppose the town, if any, and what cross the ford to attack the hill. Fire units - Guns, Artillery, Mortars, etc - are obvious choices to leave on the original side of the river, safe from a Defender's counter-attack, and doing what they do best, providing fire support. But seizing the town would provide an excellent, protected base of fire against the hill!  What to do?  A COA analysis, of course!

It should be noted that ALL fractions in OHW are rounded up in favor of shooter / attacker. So even a 1.25 or less is rounded UP. I'm OK with this since it takes into account fatigue and such related to being under fire at all, much less actually taking casualties.

In the Horse and Musket rules, the Fire of the various units is as follows:
- Artillery, Skirmishers d6-2 [average of 1.5 Hits/Turn, rounded up to 2]
- Infantry, d6 [average of 3.5 Hits/Turn, rounded up to 4]
- Cavalry have no Fire ability. However, they Charge for d6+2 Hits.

So, two batteries of Guns and an Infantry Unit, inflict an average of 8 Hits per turn, enough to destroy one Unit in 2-3 turns with a bit of luck [all Units have 15 Hits]. However, against a Unit in a Town, all Hits are halved. This averages out to 4 Hits/Turn, or four Turns to destroy an occupying Unit. 

Below: The Russian Artillery inflicts 1.5 Hits [green '1', black '5'] a turn. This rounds up to either 4 Hits against a Unit in the open [red '4' above] or two against the town [red '2' on ruler]. The Russian Infantry Fire for 3.5 Hits [green '3', black '5'] a turn, rounding up to 4 Hits halved against the town. Net is 4 Hits against the unit in the town a turn. The unit in the town will be destroyed in 4 Turns on average.
Above. Opposing them is a French Infantry Unit, which Fires at the Russian Infantry for full effect of 3.5 Hits/Turn [blue 3, black 5] rounded up to 4. This means it will inflict about 12 Hits on the Russians [who shoot first each turn] before being destroyed on Turn 4. However, with a bit of luck the French might destroy the Russian Infantry by rolling a little high, before being finished off by the Artillery.

Luck aside [I know, for some of you this is hopelessly optimistic!] This means that the Russians will move into the town on Turn 5, albeit with a battered infantry Unit with 11 Hits.

What will this look like as a training exercise on the wargame table?
Setting aside luck and rolling averages of 3 one turn, and 4 on another turn for all participants, we get our average of 3.5 for all dice - some of you may want to play all your games like this!

Turn 1. Cavalry spearhead the flanking maneuver across the ford, followed by two Infantry.  Guns and third Infantry inflict four Hits on French Infantry, while receiving 4 Hits on the Russian Infantry.

Turn 2. Russian Cavalry menace the hill's flank and rear. Infantry continue to advance. All Fire dice are a '3' and rounding give the Russians 4 Hits on the French while the French get 3 Hits. Note: the rounding up gives a slight advantage to having multiple units firing.

Turn 3. Russian Cavalry seize the hill [in this unopposed exercise] while the Infantry advance to support by Fire and seize the objective. The town fight has the French at 12/15 Hits, and the Russian Infantry at 11/15 Hits.

Turn 4. Russians are on the objective. If Opposed, they would be engaged a bit to the lower right by French occupying the hill. Still, we can see the timing involved. At the Town, the French Infantry are destroyed and do not Fire in their half of the Turn.

Turn 5. Russians advance into the town. Artillery may be turned onto the main effort against the hill.

Analysis
Seizing the town most likely takes too long, and requires too many resources - fully half the force needs all its firepower to advance into the town by Turn 5. Granted, with a little luck they may advance in on Turn 4, but that still has the Russian Infantry firing out from the far end against the French no sooner than Turn 6.

Meanwhile, the guns are not Firing in support of the main effort, having spent 1/3 of the game supporting what is only a Supporting Effort. At an average of 4 Hits/Turn, they could destroy one enemy Unit in the main battle by Turn 4 or so, or provide key supporting fire to their own Infantry and destroying a second with their supporting Fire.

The Victory Condition is the hill, not the town or the road. Note that if the victory condition WAS the town, or clearing the road, this would be the main effort. In this case the flanking effort at the ford would be only the Supporting Effort and perhaps have its forced reduced or its movement delayed.

Conclusions
In most gaming events, the players arrive at the hosts venue and see the table for the first time. The scenario is then explained and they've a few minutes to decide on a Course of Action. With a simpler game and scenario, it is much easier to distribute the scenario in advance, representing the staff and general evaluating the scenario as the force moves towards the battlefield. This in turn allows players to actually move the units in the battle space, or at least make some measurements to determine what the timing looks like. 

If players are familiar with the combat power of their units, i.e. the combat mechanics, they can still develop a plan based upon the known movement rates and likely combat results.

Finally
I think if more wargamers did this occasionally, they would be better wargamers, and they would also learn something about how real military staffs and commanders evaluate situations and develop Courses of Action leading to a Plan. With a quick-playing game like OHW, this is much easier to do. So collect your staff and get planning!

Sunday, November 15, 2020

EC-BC Playtest 2: The Eagles Wavre...

We will cross the ford, outflank the Наглец  Frogs and take the hill!


https://commons.wikimedia.org/wiki/File:Kutuzov_fili.jpg

The two sides face off again on One-Hour Wargame #12: An Unfortunate Oversight. This time the Russkies are on the attack. They've great Gun support with two massed batteries, but only three Infantry brigades and one Cavalry brigade.

The French have four Infantry brigades, one Cavalry brigade and a battalion of Lights.

Both sides have a general, the counter with two mounted fellows on it.


French set up first. One question for them is what to do with the lights. There's no rough terrain for them to work in, and the town can be Assaulted. If the Russians throw an Infantry battalion at it, they may not be able to hold it. In the end, I put Infantry in there since they are the most powerful unit and have the best balance of firepower and endurance in the game. As long as they are completely within the town, the Artillery can't see them unless they got very close. And the reverse is true.
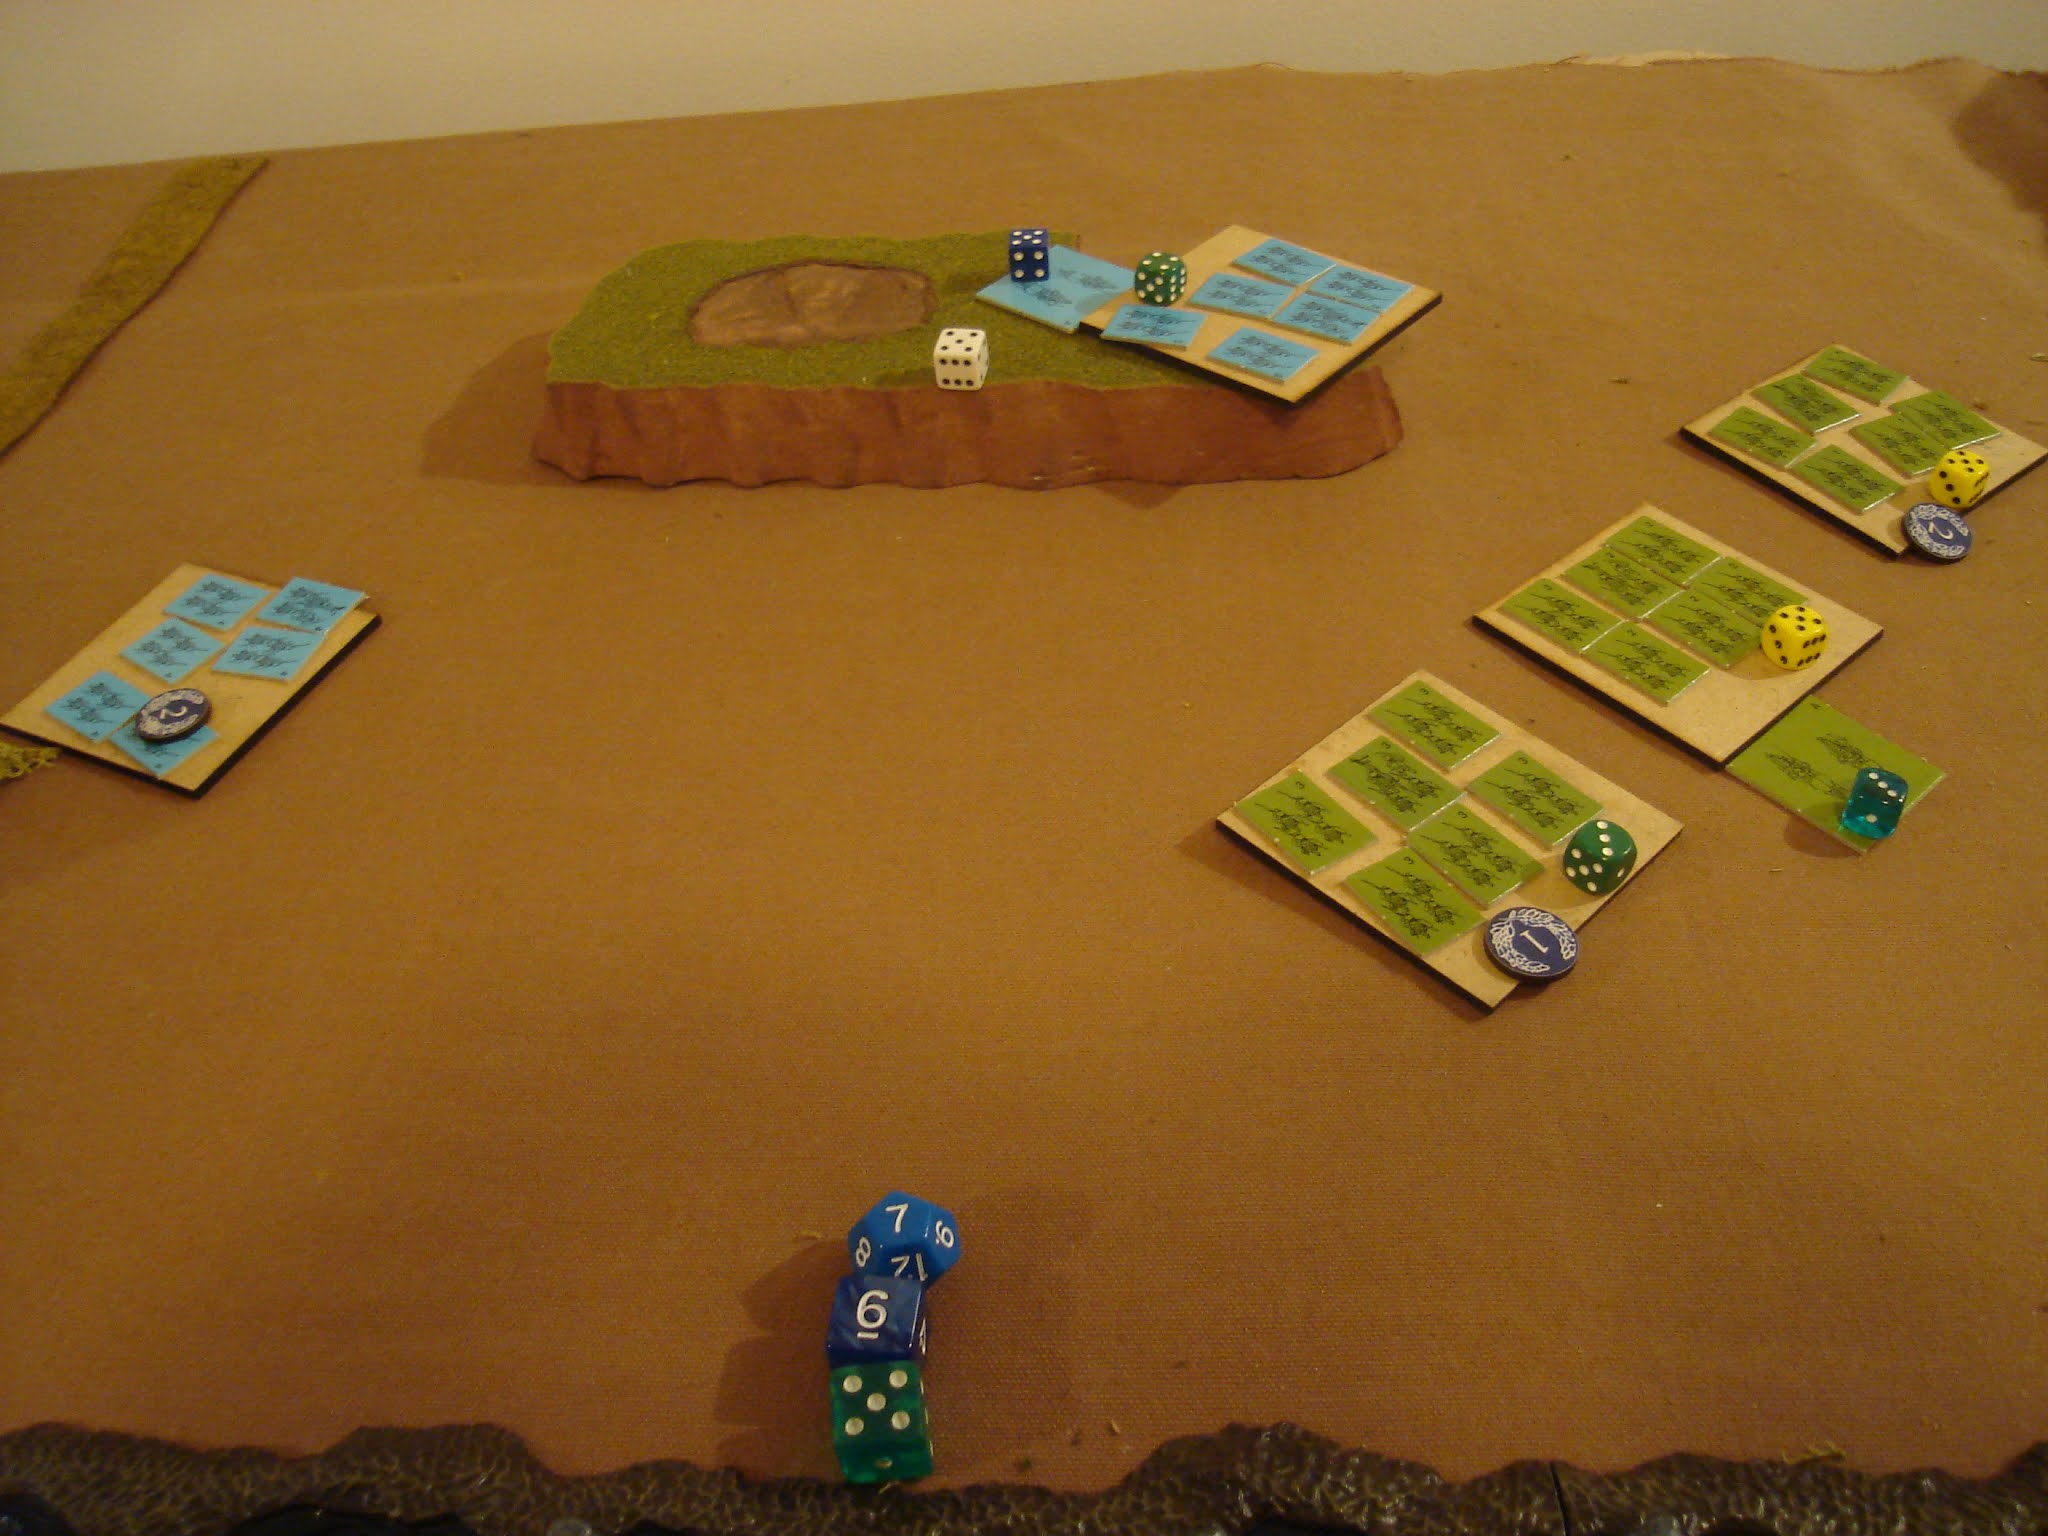
French setup is below. The hill is the victory objective, and the Cavalry and lights will take the outside flank, with three Infantry brigades on the inside to hold the hill itself. All Units must be "within" 12" of the town, which I take to mean the entire Unit is within 12", not just an edge.

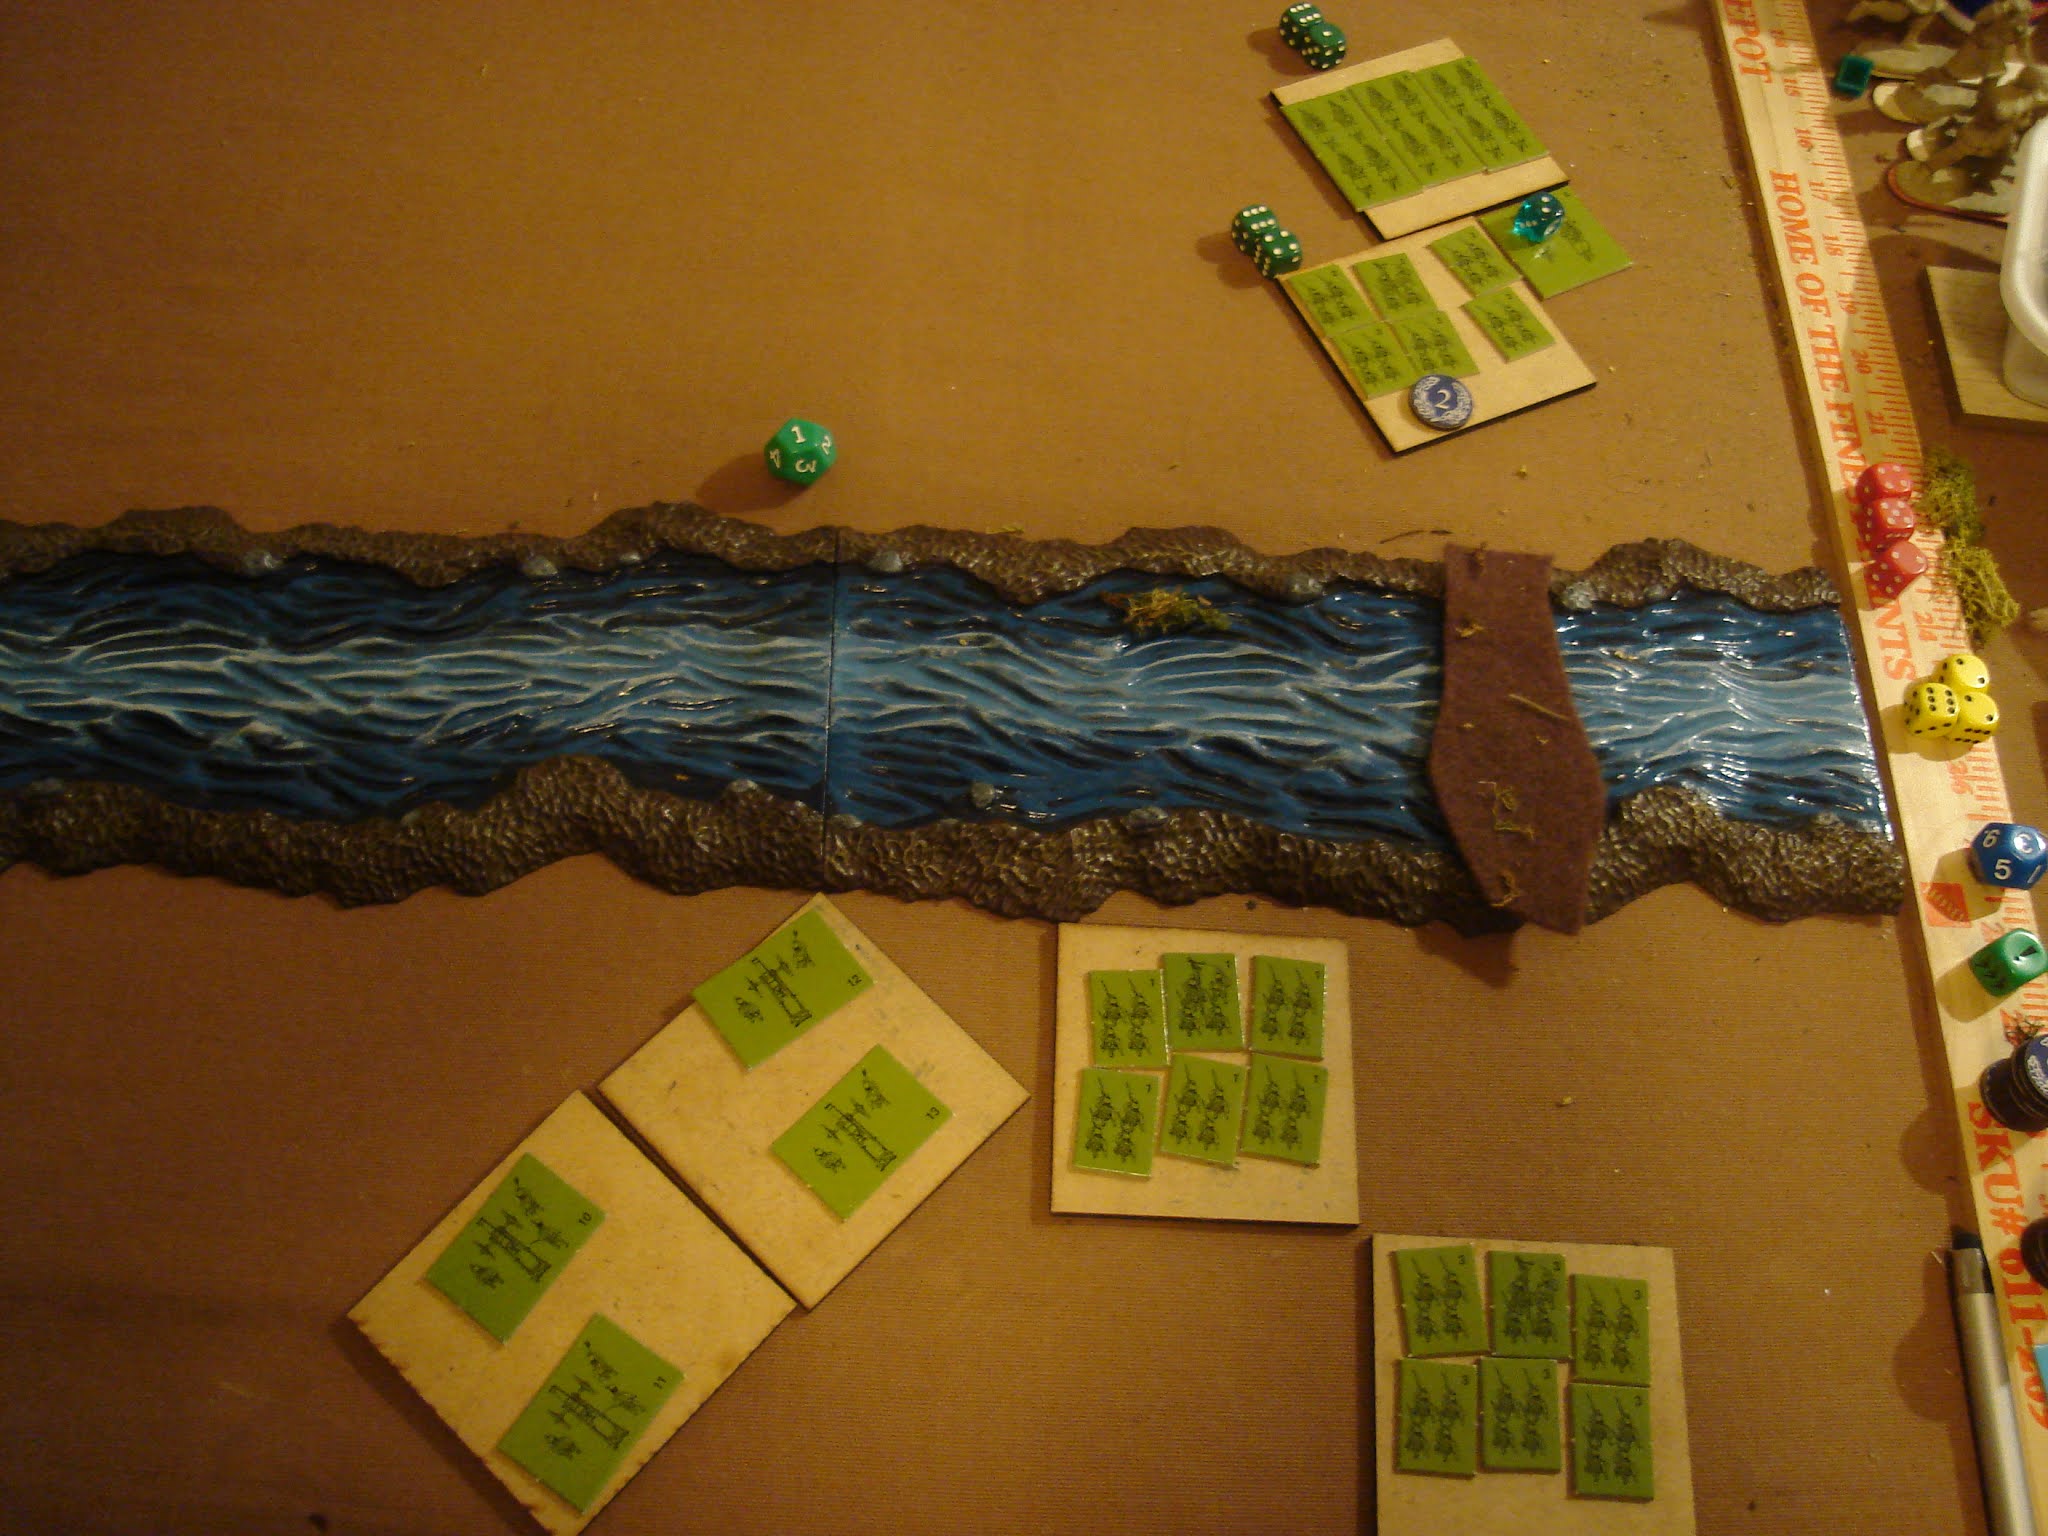
Russkies set up with their batteries close enough to Bombard the French force, and the rest prepared to cross as quickly as possible, lead by the Cavalry.
Russians have Initiative automatically on Turn 1 since they are the Attacker. As is often the case, they manage to blow the Order roll for the crossing - clearly, crossing the Ford is more difficult than I think! They roll a natural '1' which goes up to '2' since I always give the Attacking side a +1 on Order, to make up for the burden they have of movement. Now the question is - what to do with the Orders...
I could give the Guns Bombardment orders to soften up the French...
...but I feel time is of the essence and order one Infantry to follow the Cavalry which is being lead by the General personally, so counts as having the 2 Orders needed to March. Both roll quite well for the March, and it looks like the Russkies are off to a quick start!
The French outperform on Orders, and prepare their outer flank and first Infantry to March.
End of Turn 1, the french are on the hill, and have the outer flank covered.


Turn 2, Order rolls are both a '3', and Russkies retain IN. They push on while urging their other Units to move along and the Guns to Bombard - which causes 2 Hits on the French Infantry on the hill but one goes Low on Ammunition. In retrospect, I should have Marched the other two infantry while holding with the advance force...

French Action Phase, they charge in with the Cavalry, getting three Hits to two [I changed the Hit number for Cav v. Cav to 5+ from 3+, as they historically tended to engage quickly but not cause a lot of damage to each other]. As they got three Hits, the Russian Cavalry take a Permanent Hit as well.

End of Turn 2, the French look like they will easily hold the hill and possibly trash the Russian advance guard. Have I once again bolloxed things up for the Russians?? Where is Kutuzov when you need him??

To make things worse, the French seize IN turn 3. I think the French will win again...

At least the Russkies rolled for plenty of orders, they will need them. The French blow it with one Order. They decide on a very limited objective for the turn - finish off the Russian Cavalry. The Russians opt to March reinforcements, while pushing their Infantry forward to support the Cavalry and one Bombardment, also.

Despite the Order which give them a bonus die in the melee, the Russians are crushed by the French Cavalry who obey Napoleon's First Law of Wargaming - Roll Lucky! They get the two Hits needed to destroy the Russian Cavalry, who get no hits in return.

The Action Phases see the French repositioning themselves well, outnumbering the Russkies where it counts. The Russkies manage to roll a crazy march of 14" and have two Infantry in position. The third is getting along while the Bombardment results in another Hit on the French Infantry on the hill.

In the Fire Phase, the French blast the left Infantry for 4 Hits to '5', one Permanent. In response, they take only one Hit back. It's not looking good for Mother Russia, altho the French are a bit strung out they have four Units fighting on the objective, and the Russians are down to two.

OK, with a few detailed turns in there to give a feel for the game mechanics, we'll move a bit quicker now.

Turn 4, the French retain the IN while the Russians bring up their third Infantry brigade. The firing lines are set, altho the French are a bit weaker they've the Cavalry supporting. They really need their other two Infantry brigades in the Action, but are clearly more than holding their own as they may break the center Russian Infantry at any moment.

Turn 5, the French Lights break, while the center Russian Infantry is just barely holding on.

Turn 6, the French Cavalry have a go at the Russian Infantry, who miss completely with their defensive volley. However, they roll great in the assault, and almost destroy the French Cavalry who still manage to put the hurt on them in return. Still, with a tie the Cavalry retreat.

Turn 6 Action Phases end with the French rallying one Hit while the Russians roll amazingly well and rally two Hits off both their center and left Infantry. But the Russian Guns both hit and the French right Infantry is one Hit from oblivion...

In the Fire Phase, the Russians blast the French right to pieces, and getting the last Hit needed to destroy the cavalry, while the French plink away in return but unable to seal the deal and bag any Russian Infantry - frustrating!

Turn 7 starts with a lone French Infantry holding the hill. The French have three fire dice in the main battle line, while the Russians have seven - the French must bring up their reinforcements!

Turn 7 sees the French in motion. The Russians again manage to rally off two Hits from their center Unit, and take two Hits again in the exchange of Fire. The fresh French Infantry gets a bloody nose from the same sniper-like accuracy of the left Russian Infantry. The French are outnumbered in the battle, but have the Force where it counts, while the Russians are not always going to be able to use their Guns to support their firing line. Both lines overlap the other's left, but who will exploit it successfully is the question.

Turn 8, the French blow all their rally rolls. They successfully move up their right Infantry to a flanking position on the Russian left, where their Infantry are two Hits from destruction.

During the Russian Turn 8 Action Phase, they manage to - again - rally off two Hits in the center, altho none anywhere else. The French have 8 Hits on their three Infantry, the Russians 12 and the French will shoot first. This seems like the end of a hard-fought attempt to force the crossing for the Russians...

The Russian Guns even miss AND go low on ammo. Dasvidaniya comrade?

But, wait... First, the French let completely miss! Just rolling average would've destroyed their opposing Russian Infantry! The second Russian battery gets a hit but goes low on ammo.

The Fire Phase ends with the French getting the worst of it, losing the center Infantry and the attached General, while again not eliminating any Russian Units.

"Sacre Bleu - le centre est frappe!!" Or something to that effect. "Merde!"

Turn 9, the French lose the IN to the Russians. To make matters worse, the wily Russky general rolls enough Orders to do anything he may want to do...

The Russians again rally well, losing two Hits on the left Infantry and one on the center infantry! Their guns then beat the heck out of the near French Infantry [altho I think I made a mistake with all the pic taking - one was low on ammo, most likely].

Still, the French rally two off their left Infantry, altho none on the Right.

In the Fire Phase, the French lose their Right Infantry.

Well, this isn't what I was expecting a few turns ago! The French should pull back and find another Corps nearby to beat up this isolated Russian bridgehead, shouldn't they? They concede...

Well, with all the pic taking and note taking, I may have made an error or two, but the Russians played very conservatively in the mid-game, and brought up their Infantry support quicker than the French, who didn't seem to need it right away and were solidly in a fight on the objective they didn't want to lose. Amazing Russian Rally rolls helped them hold on in the center, while French Fire was a bit weak and just enough to cost them the fight, especially when the Russian Artillery made their influence felt.

Overall, I think the rules are playing very well. I have made a couple of tweaks regarding cavalry and lights, and will probably have to take a deep breath and revisit these again later, and see if a few things can be simplified out. But Napoleonic forces tend to be a bit more complex, with most sides having balanced forces and lots of command choices. I feel like I played both sides pretty well, and that in the end the Russians out rolled the French at a few critical moments, which turned the tide in their favor. A real nail-biter, to be sure!