How Men of Quality Resolve Differences

How Men of Quality Resolve Differences
Pudel and Peper attacks - an ugly but inevitable part of any 17th C. British Civil War, "Oh! The Shame of it All!"
Showing posts with label American Revolution. Show all posts

Friday, February 6, 2026

Zeal & Bayonets Playtest: Waverly Heights, 1777


Last post, I gave the historical background and one example of this fight, at the tail end of the 1777 portion of the Philadelphia campaign of the American Revolution. In this post, I'll give it a play using my "Zeal & Bayonets" rules, which I've posted about before [click]. These are in the later stages of playtesting, and are coming along nicely, if I do say so...

Below, The game begins with an Events Phase; the British Light Infantry enter, preparing to cross the creek and secure the right side of the road.  Each base is, in fact, the light infantry base of the four British line units advancing up the road.
After they enter, the Militia fire a volley at them [per historical account] inflicting a couple of Disorganization Markers [DM] on the Lights, mostly from surprise I guess.

Next, British Turn 1 kicks off. The British advance the Jagers onto the table left of the road and they Fire a volley. This inflicts a Kill on the militia who check morale and pass.

In a somewhat risky move, the Brits bring on the 105th Irish Volunteers [of Philadelphia!] and work on a flanking maneuver via the road.

The advance of the main British column, Line Infantry, does however cause the Militia to check morale, which they pass thanks to Leadership and Rear Support!  So they will stand their ground...for now. Leader does not 'die' thanks to a '3' rolled.
Leaders can intervene to help units fire, reform and pass morale checks - but there is a risk that they will become casualties and no longer available to be used. Also, I am using a "threatening" morale check for units that have enemy enter 12" effective musket range - clearly, they mean to fight not just peck away at a distance, so the defender needs to check and see if they'll stand their ground - in reality, a heavily outnumbered defender would begin withdrawing... but wargamers...!

On American Player Turn 1, Brigadier Gen. James Potter just barely rolls high enough for his units to have 2 Actions [the norm]. He can't modify it enough to grant 3 Actions per unit, so doesn't try!  Above, the Militia Fire upon the Jagers and Irish marching up the road.

Americans continue to play a "wait and see" game, since they are sitting on the objective; also, the scenario restricts the ability of the second and third lines to move. Most importantly, the militia ambushing near the bridge needs to slow the British down and inflict some losses upon them.  So far, they aren't...

In an experimental mood, I diced off for Turn 2 following the Turn 1 ambush, to see who would take the initiative - the British won. Henceforth, they will take Player Turn 1, and the Americans will take Player Turn 2.  It is an IGO-UGO turn sequence due to the high level of play where the Player is a Brigadier General and the subordinate Battalion Commanders.

British Turn 2 begins with Gen. Charles "No Flints" grey rolling quite high, enough for 3 Actions per Battalion. This is the best anyone can do! Clearly, he sees the urgency of the situation and intends to outmaneuver the militia and fight off the ambush.

The Jagers cause another Morale Check by advancing into Close Combat range, 6". This time the Militia used both their Leaders to pass the check, and then - in what can only be considered a *very* unfortunate roll - both 'die' [only on a '1'...only a '1'...] on the roll of 'snake-eyes'.
The Jagers Fire upon the leaderless Militia, causing a check that they just fail. They beat feet and Retire back behind the wall - a perfect Withdrawal. 
The 105th Foot and the Lights both advance, the 105th making a line along the road.  The Lights will clear the right side of the road and contest the exit point on the North side.  The Irish will have to drive off the militia with the help of the Jagers.

On American Turn 2, the Gen Potter rolls for an average 2 Actions per Unit.

They rally the Militia Disorganization Markers off with an amazing roll of '2'. Unfortunately, they are still weak with 3 figs whacked by Jager Fire.
The Militia then Reform, so remove the lost Base of 3 Figs, so as to take up less space along the wall.

The large militia unit Fires upon the 105th, causing a Kill and a DM. The Irish pass Morale with no problems, being a supported Line unit.


Turn 3, British start off with Gen Grey rolling poorly for Actions - he has to spend a point of Leadership to pass, with ensuing Risk, and he doesn't die. The Brits now have an average result of 2 Actions per unit.
The Lights continue their advance up the right, and the Irish Fire on the large Militia unit, forcing them to Retreat just beyond the Hill.  The Jagers hammer on the small Militia unit in front of them, behind the wall, and they Rout from the field.  Having cleared the area to his Left, Grey brings on his next Line unit, the 63rd foot, behind the Irish.  
The path to occupy the wall is now open to the Jagers.  This will allow them to clear the woods behind, and ultimately advance against the Hill.
American Turn 3, they rally the Militia, and advance Webb's Additional Regt. out of the woods and across the road, blocking it.

British Turn 4. Gen Grey exceeds his previous efforts, and max's out the dice, resulting in 3 Actions per unit. A great way to start of Turn 4!

British advance everywhere: the Jagers towards the wall, the 63rd moves to the left sharply to outflank the hill, the Irish begin working their way through the wall and other rough terrain, and the Lights rapidly advance to a flanking position on Webb's Conn. men. Altho it doesn't look it, the British are moving quickly with their 3 Actions

American Turn 4. Potter rolls poorly and has to use a Leadership point to get the Brigade to 2 Actions per unit. Fortunately, he doesn't die.

Webb's Regt. Fires at the Lights and at the Irish, but to little effect.  Behind the Hill, the Militia continue to reform and get turned around.  The Pennsylvanians on the hill are behaving like true Quakers in a fight, and doing...nothing.  
Well, that's a scenario rule, not their fault!

The presence of the Lights causes Webb's Regt to just barely fail a Morale Check [which I forgot to take on the British Turn - as Webb's Fire didn't affect much, I let it slide and took the important check]. While LtCol Sherman [yes, he's a cousin of *that* Sherman] could spend a point or two of Leadership to stick around, the position was quickly compromised by the rapid advance of the Lights.  It's better for his men to Withdraw, so he lets it happen.

British Turn 5. Grey and his troops must be tired - he rolls for 1 Action a Unit, and again has to spend a point to get them up to a normal 2 Actions per Unit. This time, he almost dies as he rolls a '2' on his Risk roll.  A near miss...

The British steadily move forward everywhere, the Lights against Webb's Regt, the Jagers and Irish up the middle, and the 63rd along the left flank. Grey finishes up by entering his next Line Unit, the 3rd "Buffs" to move up the road, which is now clear.

American Player Turn 5. Potter exceeds himself and rolls for 3 Actions per Unit!
This is a tremendous opportunity, as the Americans need to significantly reorganize themselves against the British pressure.  The Pennsylvanians maneuver sharp to their right to oppose the 63rd and prevent them from outflanking them.  Webb's Regt reforms and reorganizes all their Disorder Markers off. The Militia will need to take up the center [!] where one can only hope that they hold.

Well, that's the first phase of the skirmish - the American ambush, and the British maneuvering against it and the other supporting Units.  So far, it is playing out the way that history records it [not a ton of detailed info, but still] in the excellent Whitemarsh Driving Tour by the Phil-Mont Christian Academy Seniors 
[CLICK].

The rules are playing out well. There's note-taking and questions along the way, and I'm occasionally forgetting things which I then wing as best as I can.  I feel like the rules are delivering what I want: a "real feel" for what a battalion and brigade commander does in these fights: manage Fire and Maneuver, keep the unit properly Formed from Disorder.  There's plenty of tough decisions and Leader Risk, which I really enjoy as it is an unusual mechanic for a Horse and Musket game.

The One-Hour Wargames Scenario #26, Triple Line, is also doing well. While the restrictions on the movement of the defenders can be a bit annoying, it is likely a good fit for the poor leadership shown by Potter, Sherman and Reed in this fight, historically. The troops were confused by conflicting orders when Reed took over [perhaps not with the authority to do so] from Sherman and Potter.  That's enough to say that the scenario rules are not what one might normally choose but appear to be historical. Simplicity is working out here, once again!

Part 2. The Grand Finale
Got busy for a few days, then was finally able to get back to this exciting game.

British Turn 6 saw Gen Grey roll nearly enough for 3 Actions. He used a point of Risk, avoided becoming a statistic, and raised his roll to '10'.
This allowed the thin red line to maneuver and Fire effectively against the Americans. The 63rd advanced, faced right and Fired on the Pennsylvanians. The Jagers advanced to the wood's edge and Fired, the Lights Fired while the Irish negotiated the rough going.  The British column advanced up the road with the intent of exiting one battalion at least, to set them up for a clear win after the hill was taken.
American Turn 6 saw them Reforming and Firing as they held their ground.

British Turn 7, Grey rolled for 1 Action per Unit, used a point and *almost* became a statistic, or rather "posthumous medal winner". Anyway, 2 Actions is enough to keep the pressure on the Americans.
This allowed the Irish to advance into the gap between Webb's Regt and the Militia on the hill, delivering an effective volley. Unfortunately, a second Leader became a casualty as he lead them forwards.  Elsewhere, Fire was brought to bear.

American Turn 7 saw Gen. Potter rolling enough for 2 Actions.
The Americans Fired as much as possible, causing some casualties and disorder to the British redcoats.

British Turn 8, Grey continued to be average, which is all one can ask, really.
Fire from the Irish Routed Webb's Regt!
Fire from the Jagers Routed the Militia [they need to *stop* rolling like this!]!
The Militia run off the board, Webb's Regt, is close to 50% effectiveness, and the Pennsylvanians are not far behind due to the steady Fire of the 63rd and Jagers. With some grumbling, the Pennsylvanians withdraw over the hill while the getting is good!

Ultimately, the British were slowed by the terrain and took some casualties, but not enough to prevent them from driving off most of the Americans while maintaining a viable offensive force.

The Americans got too spread out, trying to take advantage of transitory positional advantages when it would have been better to stay close together to present a solid firing line. Overall, the American force needs to be a bit stronger, with a larger militia unit replacing the small one I used.  I'd say that keeping the figure numbers equal, but giving a distinct quality edge to the British is reasonable. 

The British will likely have to fight off a greater number of Americans with a portion of their force while the rest exits the board. They may need to have one less Unit to make them feel the pinch of the dual victory conditions - seizing the hill and getting units off the board. I leave that to the host's discretion. While the British units are set, one can ignore the guns like I did, and leave a couple of the Line units as non-combatants who are marching off the board.

Play balance is always tough to get *just right* when you figure out sensible victory conditions.

Historically, Gen. Grey felt the urge to get moving up Limekiln Pike so he could engage and distract the American center. He therefore needs to both push past the American ambush and clear the high ground of Waverly Heights so the Americans can't interdict the rest of the column behind him.  Thus the victory conditions of 6pts for the Hill being captured, +1 Point per British Unit off the North Edge by Turn 12. British need 7 points for a win, 10 for a decisive victory. Any delay prevents the maximum opportunity for the British to engage Washington's main battle line during the short winter day.

The rules needed a bunch of tinkering, trying to get just the right "feel" for the problems of battalion command in this unusual period of small thin units fighting over rough and wild country.  I am also trying to keep them pretty simple and quick playing so they are easy for new players to learn.  

The Actions Mechanic I like, as it presents more choices for the player as to how and when to perform the various types of actions required to Maneuver, Fire, and get stuck in to Close Combat.  However, I think instead of a random mechanic, I'd like to have a fixed number of 1, 2 and 3-Action cards, so the Brigadier has to choose how to spend his men's energy and ammunition over a 12-turn game.

Another playtest is needed, one with simpler terrain...

Thursday, January 29, 2026

Whitemarsh 1777: Scenario #3, Waverly Heights


 Col Joseph Reed  "Tastes Great"      Gen Charles Grey  "Less Filling"
An ugly scrap that should have been settled in Tyson's Tavern

All wisecrackery aside, the Battle of Whitemarsh, 5-8 DEC 1777, which ended the 1777 season of the 1777-1778 Philadelphia campaign, is an interesting "almost-battle".  Gen. Howe did everything except make a final assault on the American positions; if he had, Whitemarsh would be as well known as Germantown.  

An excellent on-line reference document about this relatively unknown "battle" is here [CLICK]. It is a driving tour of the battlefield, which is better defined as the large area over which Howe maneuvered to try and outflank Gen. Washington on Militia Hill / Camp Hill [both named for the locations of Washington's militia and main camp, respectively. Camp Hill is actually a lengthy ridge running along the southern side of the modern PA Turnpike. Fort washington State Park is there, which has a fair amount of information about this battle].

During the British maneuvering, Washington made made two probing attacks to locate Howe's forces [on the 5th] and two spoiling attacks to harass and delay their outflanking maneuver [on the 7th]. My intent is to present a scenario for all four of these attacks, beginning with the two spoiling attacks that had the most action.

The chronology is:
1) 5 DEC 1777: Gen. Potter's Pennsylvania Militia Brigade plus Ltc Isaac Sherman [and his Conn Regt, Webb's Additional Regt, most likely] probes the British pickets at Germantown Ave, near the foot of Chestnut hill [now the location of a lovely bridge and Chestnut Hill College].  They send a scouting force across Wissahickon Creek and are countered by the Hessian Jagers supported by Hessian troops. They decide discretion is the better part of valor and withdraw.
2) 5 DEC 1777: Irvine's Militia probes the northeast base of Chestnut hill [now the location of Phil-Mont Christian Academy and Enfield Elementary]. They cross a bridge over Paper Mill Run and get a a fistful of the British Lights to the face while getting organized. They take about 70 casualties including Gen. Irvine who loses a horse, some fingers, and his dignity.

* Break * 

6 DEC 1777: Howe rests his forces, forages, and reconnoiters Washington's position, mostly in the area of Hope Lodge and St. Thomas' Episcopal Church. Deciding that Washington's position here - his right - is too strong to assault [quite correctly - the hill is very steep and overlooks Hope Lodge and Bethlehem Pike, the only way to approach it], Howe decides to move East to turn Washington's left flank, which is hanging out in the air. During the night, he organizes his army into a vanguard [Cornwallis] main body [Knyphausen] and a rearguard [Grey]. 

Howe's lengthy late night / early morning march was well South, so Washington lost contact with Howe and wanted to regain it. He sent Potter and Sherman towards Chestnut Hill, and Morgan and Gist towards Edgehill. Meanwhile, the three British forces took up positions along three roads all heading North / Northwest: Susquehanna Rd [East], Jenkintown Rd [center] and Limekiln Pike [West].

* Resume Action *

3) 7 DEC 1777: Waverly Heights.
The rearguard under Gen. Charles "No Flints" Grey was supposed to await word from Howe that it was time for him to advance to Tyson's Tavern and demonstrate against the American center on the Camp Hill ridgeline. However, he became impatient when no word had come to him and around 1130 began his march up Limekiln Rd. After crossing the Tacony Creek, Grey was ambushed by the same American force under Potter and Sherman that had probed the Wissahickon Creek at Chestnut Hill and run into the Hessians.

4) 7 DEC 1777: Edgehill ridge between Jenkintown Rd. and Susquehanna Rd. 
Gen. Knyphausen's main body advanced to the pass [saddle] between two steep portions of Edgehill ridge where Jenkintown Rd. crosses it. Cornwallis' force does the same at another saddle in the ridge where Susquehanna Rd. crosses. At this point, along the general line of modern Easton Rd at the foot of the ridge, they deployed their forces in a long line and advanced up the steep slope of the ridge. Unfortunately, Gen. Daniel Morgan's riflemen and Mordecai Gist's Marylanders had already occupied it, so were waiting at the top of the steep, heavily wooded slope. A lengthy fight ensued, with the British eventually forcing them off the ridge but requiring several battalions and some artillery to do so.

So the next post will be about this heavier fighting along Edgehill ridge, East of Waverly Heights.

Returning to Howe's flanking movement, outlined above, he had decided to maneuver against and outflank Washington's left [somewhere on the hill above the modern Fairway Shopping Center].  This was a sound decision as the Camp Hill ridge is lengthy and it was definitely possible to find a portion uncontested by Washington and then advance along the ridge, rolling up the American line. Camp Hill Ridge levels out near modern Welsh Road, in the Willow Manor neighborhood by Willow Grove Baptist Church.

To pin the Americans in place, he sent Gen. Grey "up the middle" along Limekiln Pike, straight at the center of Washington's force. Meanwhile, his main effort under Knyphausen and Cornwallis went farther east to Jenkintown and Susquehanna Roads, as shown below with the three red forces all heading North / Northwest:

As their march took longer than planned, Grey got impatient and decided to advance north up Limekiln Rd before noon on the 7th.  

His column was spotted from the westernmost portion of Edgehill [a long ridge about a mile south of Camp Hill / ridge] by Gen James Potter , Col Isaac Sherman, and Col Joseph Reed. They decided to perform a spoiling attack against the marching British [so really, an ambush] in a heavily wooded and hilly section of Limekiln Rd.  They moved their forces over Edgehill South to the best landmark, "Twickenham", the estate of Thomas Wharton Jr. [which is still partially extant today as two now separated houses!] and began forming up.

They apparently sent some forces ahead while they formed the main body and then advanced Southeast, parallel to the line of Church Rd., and over the Waverly Heights hill, just North of the Tacony Creek. This road was mostly likely bridged as it was [and is] a major highway between Philadelphia and the northern farm and quarry lands.  Grey's force was crossing the Creek when they came under Fire from lurking Americans in the woods.

Below, I've blown up the portion that shows Waverly Heights and the Twickenham estate.  It doesn't mark Tacony Creek which is below where the crossed sabers are.

Pages 31-33 of the Battlefield Tour are all about the Waverly Heights fight. Suffice it to say that Grey opposed the Americans in the woods then moved around their left flank [so farther up the road] towards the Heights themselves, pushing the Americans back in some confusion. A wild brawl ensued in the area of Waverly Heights between the advancing PA Militia and 2nd Connecticut / Webb's Additional Regt [it's unclear if Webb's is the 2nd Conn or they are separate units and both were present]. The Connecticut Continentals regrouped, likely on or past the Heights, while the Militia was in the process of retreating to Edge Hill.

In an interesting command problem, Col Reed intervened and began issuing orders much to the chagrin of Col Sherman, the commander of Webb's Additional Regt. Sherman later stated that Reed's orders caused more confusion as they contradicted his.  Later, there was much acrimonious ink spilled over this. Col Joseph Reed was an Aide-de-Camp of Gen. Washington's, and not actually in the chain of command [nor was he ordered to take command]. However, it can be argued that he was intervening to bring some order to the disorder, altho this happy result doesn't seem to have happened.

Reed's horse was shot and he was nearly captured / killed, but was rescued by some dragoons under Cpt. Allen McLane an enterprising Scottish emigrant from Philadelphia. The entire force retreated over Edgehill, and eventually back to Camp Hill, being pursued by some of the British forces most of the way. 

All the piss'n vinegar wasn't taken out of those Rebels, however!  An hour later, the same force made a foray against the Guards Light Infantry. They were repelled with the help of the Jagers and Queen's Rangers.  

Interestingly, a lot of the adjectives used to describe these actions are suspiciously vague and sometimes ill-suited. It does make one wonder not only what really happened, except for the final result of "they went back to their camp" or something that is more definite.  The good news is that it leaves plenty of space for gamers to shape a scenario that is based upon the history but suits their available resources and their temperament. 

Grey continued moving the 3rd Brigade up Limekiln Pike until he made contact with and formed upon Gen. Knyphausen's main body near Jenkintown Rd. The fight then broke out to the East, along Edge Hill.

WAVERLY HEIGHTS FORCES INVOLVED 
[all from Greg Novak's AWI Guide vol1 - now reprinted by Old Glory Miniatures]:
British - 3rd Brigade under Brigadier General Charles Grey.
15th [280], 17th 250], 42nd [600] and 44th Foot [300]. 
Attached and in the Lead: 
Guards Light Inf Cos [?], Queen's Rangers [300], Hessian Jagers [360].
2 x 12Lb Guns.
Total 2100+ men, two guns, 60 mounted Jagers.
Generally, all the British Line should be regulars. All the rest - Lights, Rangers, Jagers, Artillerists - should be veteran, perhaps Elite for the Guard Lights.

American - forces from Major General John Sullivan's Right Wing.
Pennsylvania Militia Brigade - Brigadier Gen. James Potter [2173]
Webb's Additional Conn. Regt [320]
Total 2493 men.

The Battle as Wargame.
Hopefully, I've provided enough direct information and enough additional information to look up, that you can make your own scenario about this fight. It's important to turn the history into a game, and this is where many well-intentioned hosts fail. Scenario balance is tough, and players always manage to think of things to do on the table that you didn't consider. 

Because of this, I like to start with a scenario that I've played before as a starting point. I chose my ever-useful tome  One-Hour Wargames to give a likely scenario. If you have the book, you can likely pick 2-3 scenarios that all make sense given what we know about the battle, and any might be true to history.

I chose #26 "Triple Line". The scenario demands that the advancing Blue army attack successive lines of Red army units, in the style of "The Cowpens". 
The scenario is not based on Cowpens but the somewhat pathetic battle of Bladensburg in the war of 1812.  Actually, I think The Cowpens is a better representation of this scenario than Bladensburg... but what do "I" know??

Additional reasons why this scenario was chosen out of several:
- Defenders are outnumbered by Units 6-4 [but in my game they had 84-64 figs].
- Defenders are restricted to relatively immobile lines. I feel this takes into account the leadership problems of Reed, Sherman and Potter without complicated rules.
- Bridge is the crossing point [altho Tacony Creek is certainly fordable, having the men get their feet wet in December is a bad idea; plus there are the two 12lb guns].
- Victory condition: take the hill, which clears the route of the road, also.
I took the liberty of tilting the road 45 degrees to the right, and having all the American forces and the hill objective to the left of the road.  Now the hill is to the top left, and the road is heading scenario North-South.  This doesn't change the reason for the victory condition to be taking the hill - it is close enough for small arms fire on the road, and certain artillery fire.  From the point of view of advancing Blue Leader, Gen. Grey [no pun intended], the Waverly Heights must be cleared or else the rest of the column will be fired upon as they march North on Limekiln Rd.

Victory Conditions [at present] are:
- 6 Points for possession of the hill, 
- 1 point for each British Unit that exits off the North side on the road. 
Thus, if the British just march all six units off the road North, the best they can get is a draw.  If they take the hill, and exit even one unit, they win with 7/12 points. I'd say that a decisive win would be 10/12 points, or exiting four Units North, the minimum needed to make a credible demonstration against Washington's Center.

Setup and Entry
To save time with player puzzlement, start the game with the jagers and gun on the road, the Queen's Rangers to the left of the road and the Guards Light Infantry companies to the right of the road - they should all be past the bridge. The "ambush" should then be set up openly, at around maximum musket range to the Rangers or the Jagers, whichever target the American player prefers. 

The Americans have one Unit forwards in Ambush, a main line of two, and a final unit on the hill, representing their approach. Distance from the hill is 12" to the main line, and another 12" or so to the Ambush line. This could easily vary with table dimensions.  Perhaps the best way to say it is the distance between lines is 100yards, or effective musket fire distance. The American front unit should be about 8-10" from the bridge, again, just within effective musket range.

As there is no clear account of who is where, use an American force that has two low-quality, large Militia units, a medium sized Green unit, and a medium sized Regular quality unit. Then let the Americans put one unit out as the ambush, two concealed units in the second line, and another concealed unit on the hill.

Reinforcements
British may enter one unit in column on the road during the move phase of their turn, per turn.

Game Length
With a table that is around 6 x 4', I'd have the British enter in the center of a wide side. They have four feet to cross and exit the board. It should be about 6 turns of movement, or 4 distances of effective musket fire, across from the bridge to the north road exit.

In my Zeal & Bayonets, a unit can typically move 10" in column and Fire 12" effectively. Thus it is 4 Moves across the table. My time length is 12 Turns.

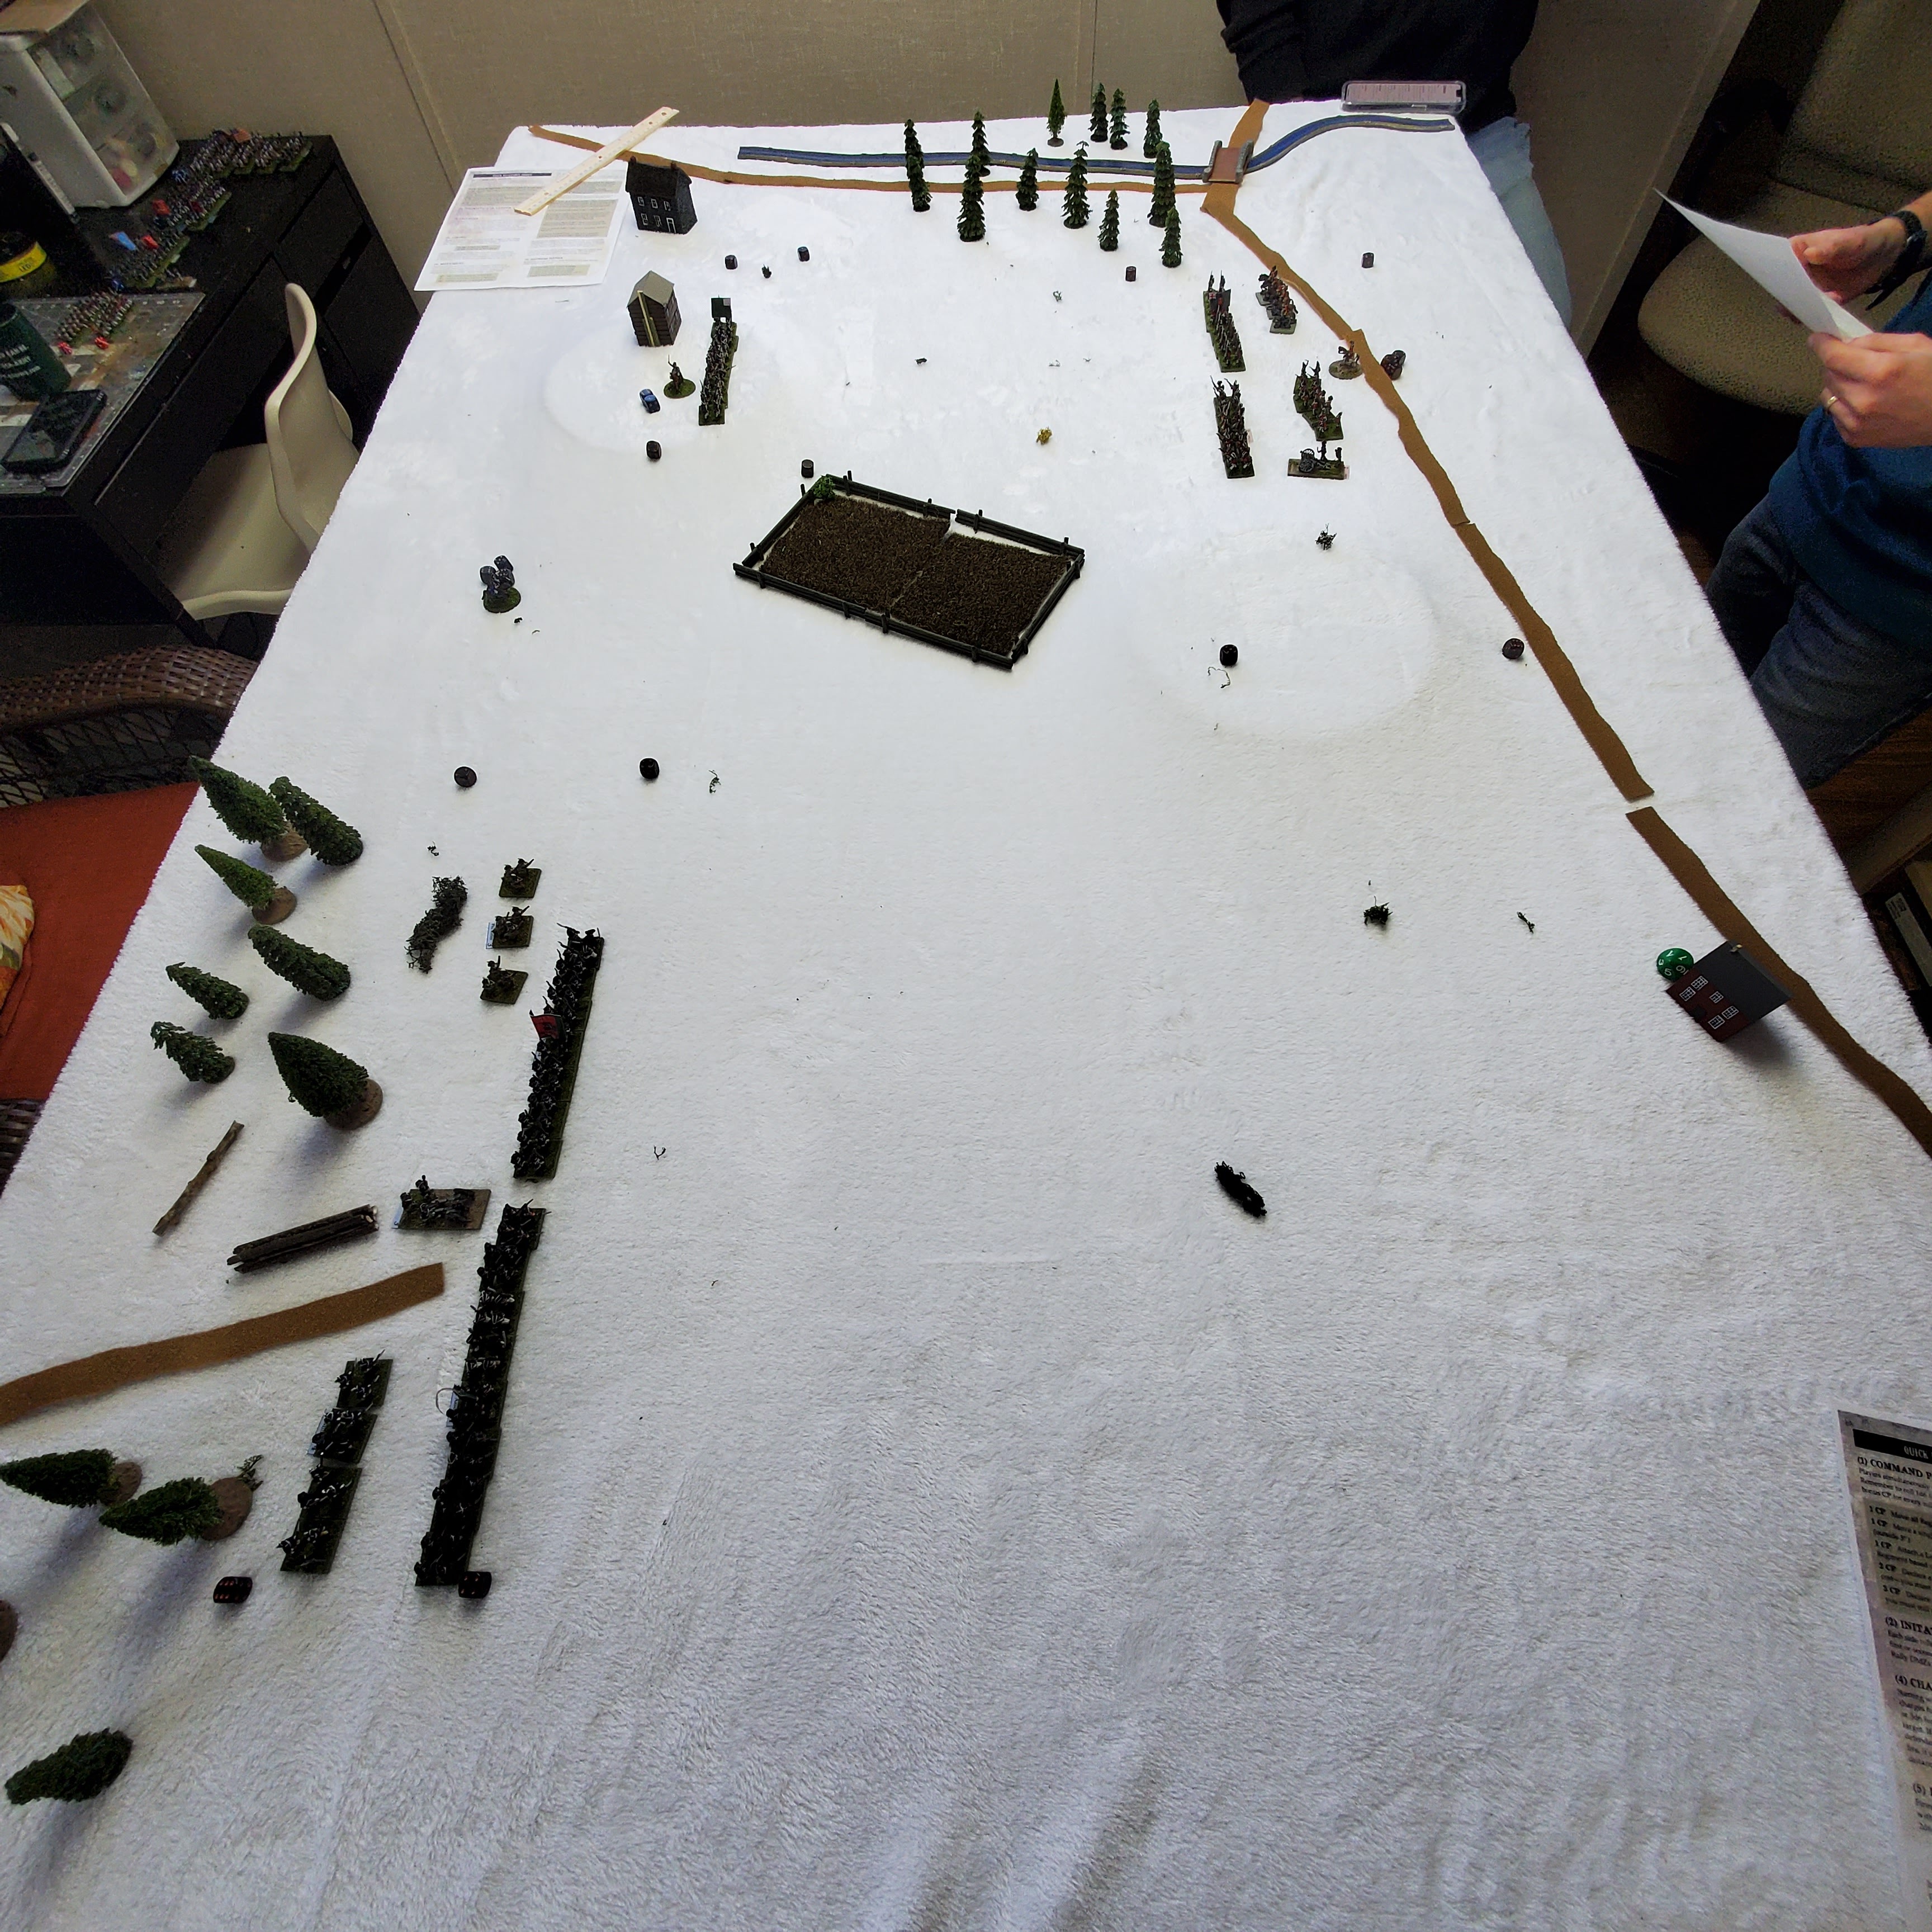
Below is the table as I've constructed it. It has a lot of terrain I've been meaning to use for a while! As a nod to Twickenham, I put some snowy walls up. No proof that he had walled or fenced enclosures at any edge of his property, or that his property bordered the road, just an "historical flourish" at this point but I feel they are likely to have been there.  As they help either the attacker or the defender they are "scenario neutral" overall, with the main effect of reducing speed and casualties as they're Cover, and count as an Obstacle to cross in "Zeal & Bayonets".

Below, the "Grand Parade" of troops before the game. 
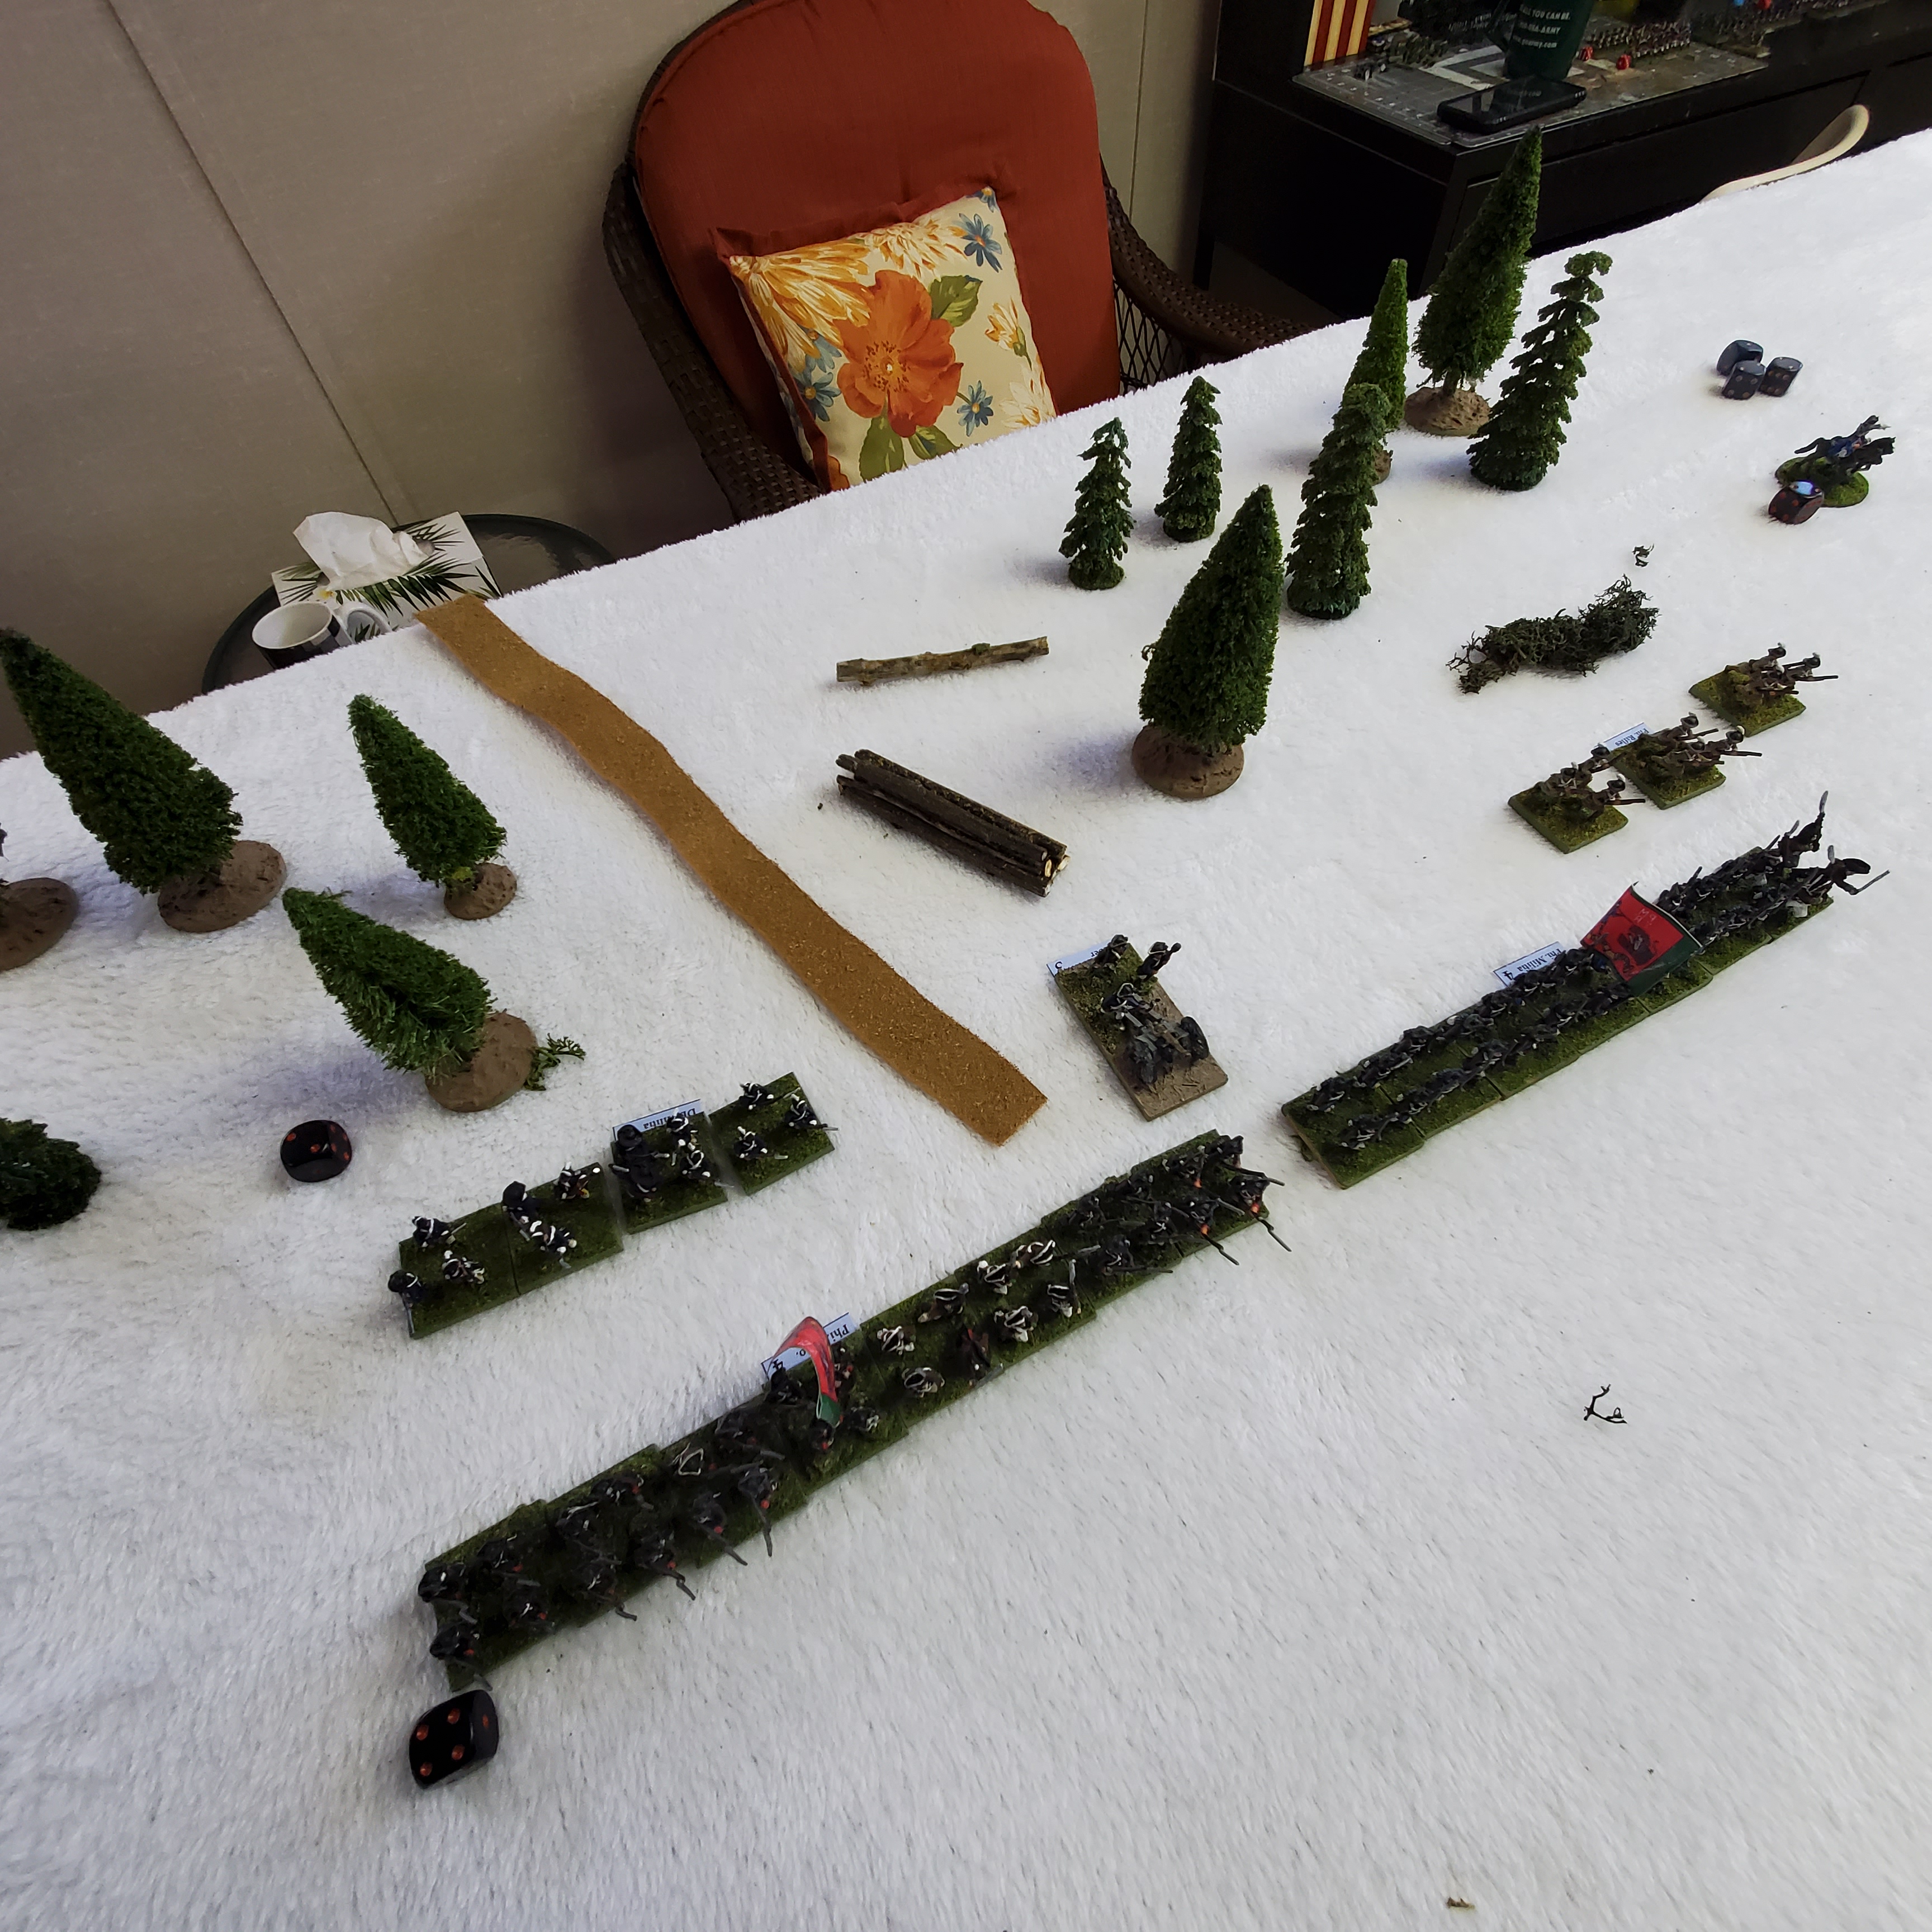
All Patriots are in position in three successive lines 45 degrees to the left: first line is one Unit of Militia [12 Raw] in the woods near the bridge; second line is two Units at the wall - a large Militia [24 Raw] and Col Samuel Webb's additional Regt [12 Veteran]; the third line is one Unit of the First Pennsylvania [16 Green] on the Hill.
All British will either be entering at the Road by the South bridge or alongside it. Entering along the road in column are the Line Units: 105th Irish Volunteers [16], the 63rd Foot [12], the 3rd Foot "The Buffs" [16], and the 40th Foot [16], all rated average.  Entering alongside the road are the Hessian Jagers [9] and the Lights [12] both rated as Veterans. 

I'm ignoring the guns as they weren't mentioned in the fighting. My guess is that the dense terrain resulted in the British quickly becoming intermingled with the Americans, so there weren't any targets
.
These Units are from a collection kindly donated to the cause a few years ago [click]. The Line units are not the historical units above. But I prefer to use my units and their names.

View from the Patriot's side of the field.  

I hope this reorganizing and editing of the original post makes the scenario adaptation more clear, and inspires you to make up your own.

How does this scenario play out?  We'll see in the next post!

Monday, February 20, 2023

Christmastide thru New Year 2023 Gaming

Many blessings this Christmastide!

We had a joyful time at Christmas, and with a budget even more modest than usual we still had many opportunities to enjoy the prosperity with which God has blessed our nation over many years - Praise the Lord! Most importantly, we remembered that most important gift, the coming of Christ Jesus, King of Kings, Lord of Lords, hallelujah

For us, we observe the traditional Christmas of 12 days - Christmastide - and it starts on Christmas Day and runs for 12 days [hence that fun little song...]. We give a bunch of the bigger gifts and the stockings [little gifts] Christmas Day, but you get one gift a day for the other 11 days, usually small but fun things. This works really well, putting less pressure to have all gifts ready for Christmas Eve and Christmas Day, which is also full of family events.

One of our biggest gifts was our puppy, Laird Montrose Duncan MacGillivray, a ruby red King Charles Cavalier Spaniel.  Here, he is clearly overcome with Christmas festiveness and passed out after missing his afternoon nap!

He has been a very good doggy, and I can definitely recommend the breed. My son correctly observed that one of our old ornaments clearly resembles Monty!


For Christmas loot,  my mom gave me "Undaunted Normandy", which I hadn't heard about but looking at BoardGameGeek it has very high ratings and great reviews, so we will see about playing it soon...

The Nostalgia Trip to 1982 continued with some purchases. Once again, an ornament provides an appropos reminder:
One of my oldest ornaments that has survived the years... Anyhow, I scored a bunch of Traveller 1ed. LBBs in a large purchase...32 altogether for about $5 each.  Couldn't resist saving time and money, so got them all at once from one vendor I bargained with a bit. All are original artifacts from around 1977-1985!
...also, several classic Traveller board games with 14 more books, including all 8 Alien supplements...
...the games look quite old-school, but with the hard science outlook that makes them worth diving into.  Perhaps the gravity tech is a bit optimistic, but they have rules for zero G anyway!

The below game I bought at the dollar store - for $1.25 [inflation...everything's $1.25 in the store now!] as a stocking stuffer, and my daughter has really enjoyed it.

There's a Mickey, Minnie, Donald and Goofie piece, and they have to go around the board.  Each has some food for the picnic basket [ice cream, hot dogs, Mickey Burgers] and each time you land on a "Who's Hungry?" space you put one in the basket.  First to put all their food in the basket is ready for the picnic and wins. If you land in a mustard space, you slip in it and have to take back one piece of food from the basket.  That's it!
Louisa Jean things slipping in the mustard is hilarious, and isn't very concerned about winning. She enjoys playing it nearly ever day [more than dad] and it's a fun father-daughter pastime. She is learning how to roll the [paper] die and read the numbers. Shoot...I'd have paid as much as $2.50 for it, now that I see it in action.  LOL.

All smiles as she's ready to play in her ballerina outfit.

In the middle of Christmastide, we celebrated the Boar's Head Feast, an annual event thrown by a Roman Catholic friend - does a great job every year!  I stuffed myself on fresh pork bangers and mash, and some port to wash it all down.  It was a feast I did not mind in the least!

Shortly after, I enjoyed a great scenario at "Sound Officer Call!" Steve's house, played with "Live Free or Die" rules, which went quite smoothly except for a couple of questions.

Below, the setup with the Revolutionaries on the left, lead by Gen. Washington Himself, and the Loyal Royals on the right, lead by LTC Charles Mawhood. The scenario had the Brits needing to keep an exit road open to right or left flank [top right, bottom right in photo below] and to inflict more losses on the Revolutionaries than they took.  A tricky scenario as they are quite heavily outnumbered, at least 2:1 or so, altho all Gen Washington's forces are not on the table at battle start - over half are reinforcements.

British at top right face Gen Mercer at top left.  Gen Washington at bottom left with a brigade.

The generals prepare for a tough fight, and are showing their years in the field. Mercer up front, the British in the distance.  The time to strike is now!

Gen Washington and a large brigade of Pennsylvanians prepare to advance and secure the road ahead of them - British reinforcements will come down the road shortly...

A few turns later, The British are standing their ground while the revolutionaries push ahead.

The terrifying spectacle of sloppy drill and ragged uniforms advancing!

No wonder the British reinforcements immediately flee down the road!
A few of the entire battle at mid-point.  What happened to the glorious advance of the continental army? For the conclusion, you should visit the host's blog [HERE].

What are the secret ingredients to my Winter Wassailing Punch?  Revealed below!  Guaranteed to cure aches, pains, heartbreak, cold feet, and creaky backs as long as you sing loudly until pushed along to the next house!

Soon after, we again gathered at Steve's for a playtest and fine-tuning session of a battle he wanted to run at a 'con: Ulianovo, East Front WWII Flames of War. German platoon defends field fortifiactions against a battalion of Russkies, four Companies - zulu, zulu, ZULU! 

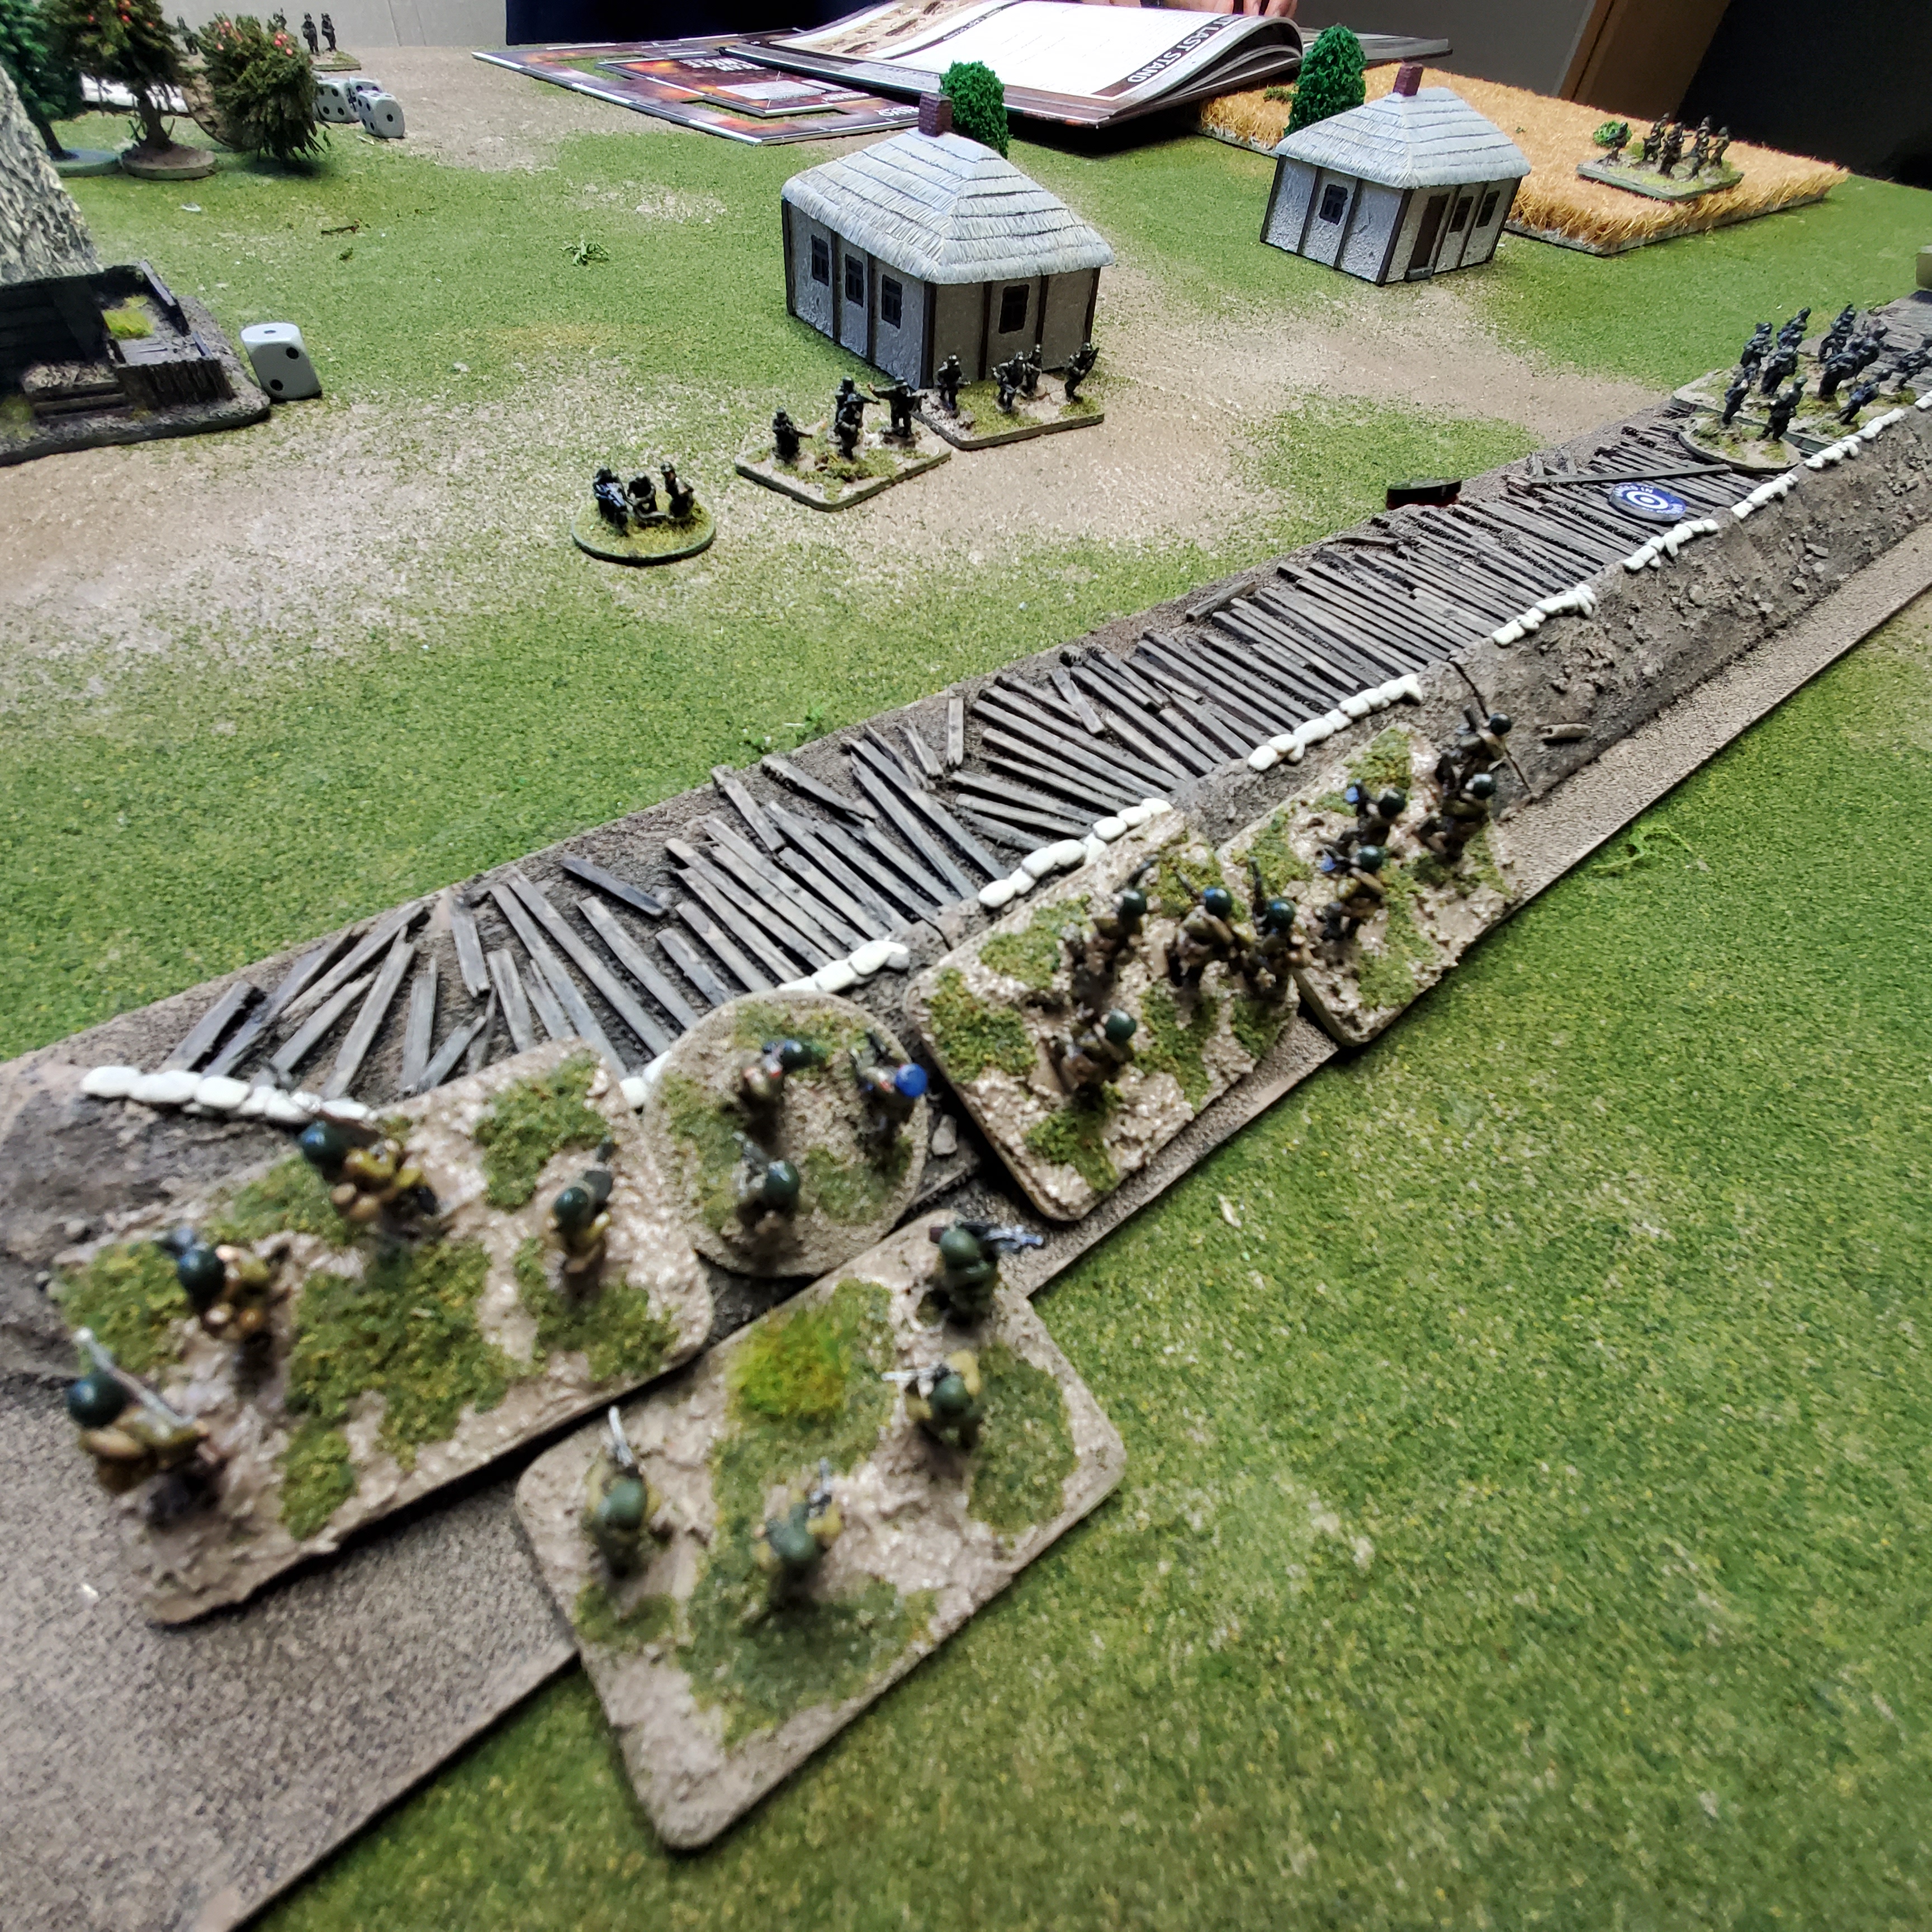
Below, a rapid advance by all is very close to assaulting the fortification.  BUT, they must get beyond it and capture the house with the sector CP in it - but which house is the CP???  Time to do a Battalion Recon and find out!

Germans getting thinned by Mortar bombardments...

Ivan secures the right flank!

A squad tries to hold the trench line, but they are almost surrounded!

The German reinforcements arrive - but will they be enough to save the CP? Ivan has already secured the trench and one house!

How does it all end??  Head over to the hosts's post [HERE]!

As Christmastide ended, a question regarding John Edwin "Jack" Scruby's birthday came up.  After some back and forth over at the Tabletop Talk Fb page, I went by my library which has free Ancestry . com membership, and found the likely date.  We'd have to confirm from records, but the guesses were off by a year and October 24th is the day.  I'm looking at a Scruby-minicon event for October, in my mind...
Stay tuned!

As the holiday season ended, and superbowl season entered, I played an enjoyable game of Panzer Korps adapted from the computer game to the tabletop and a game buddy's house.  It was 1941, and the Germans had to break thru the Soviet defenses [band of units down the center, bordered by the two roads diagonally] from the photo left to photo right.

My stalwart defender's of Mother Russia prepare to halt the invaders in the hills and dales, backed up by several artillery batteries.

Farther town the line, to my left flank, the Germans put heavy pressure on our center, mostly by-passing our far left flank which then attacked!
At 1030, the game was called and undecided - while the Germans were breaking through in the boundary between me and the center, there was a pile of Russians headed that way - too bad, was an interesting fight but Wednesday eves are tough to stay out late for almost everyone.

Also amazingly and importantly, the host - from whom I bought my Franco-Prussian War armies - found all the missing horses, and another 34 infantry battalions, a dozen artillery batteries, and several cavalry squadrons!  Will have to get this on the table again very soon.

Well, not a heavy gaming season, but glad to have fit some in what was a busy time.

I hope your holidays and New Year's were a joyful time and that you have made good resolutions regarding gamingfor 2023...I'll post on that another time!