Welcome back to the continuing saga of "Eagles Cheaper than Brain Cells", a grand tactical set of rules that are something of a spin-off on One-Hour Wargames Horse and Musket rules and Volley and Bayonet.
Some key changes from last time
- Artillery a bit less effective due to shorter range and lower Hit number. This puts it more in line with the original Hit ratio from OHW. Altho it has amazing range in all One-Hour Wargame rules [it is always longer than the board itself!] it varies in effectiveness from low to medium to high ability to inflict Hits, resulting in an average of 10, 5, and 3 turns to destroy a unit. It should be noted that both game length and board size in OHW scenarios are directly related to the RAW OHW rules, so this needs to be taken into consideration when using the scenarios with modified rules.
- Cavalry should have more options after a charge, especially to continue a successful charge. However, it should usually be more prudent to rally back! I am looking to achieve this by a combination of simple options [a breakthrough charge, similar to Volley and Bayonet] and the lower strength of the cavalry units than Infantry Brigades.
So this time we have One-Hour Wargames Scenario 21: Twin Objectives, an interesting scenario based upon Lobositz. I've always found this very difficult to win for the defense as they are outnumbered 6-4 and any reasonably competent attack should - at the worst - grind the defense down. The OHW rules are all attritional, so even one unit difference can be significant with a "last man standing" mechanic.
Also, the objectives are the town at the North end, and the hill at the South end, so the two are not mutually supporting. Only cavalry and artillery have a reasonable chance of supporting the hill objective at all. Knowing this, I accept that the main fight is over at the town and don't try to relieve the hill which is usually doomed to fall with its one Unit, while the "main battle line" by the town has the other three.
Interesting question - does the attacker wait and overwhelm the hill defenders, then move on the town? Or attack both simultaneously? Best to try a quick run-through and test the theory!
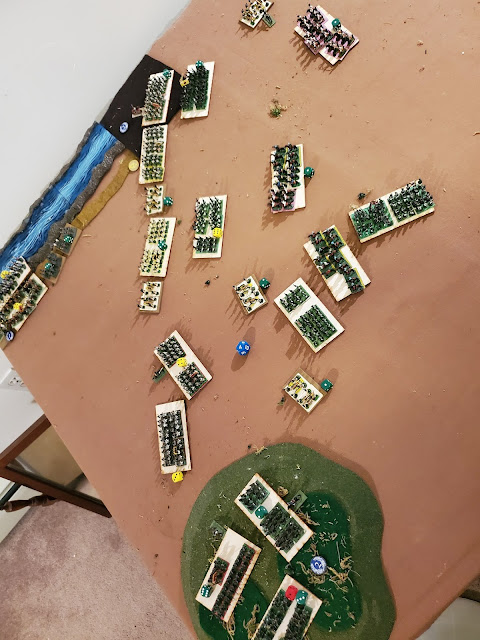
Below, I have a 12-8 game set up ["Eagles Cheaper than Brain Cells" has Units that are a bit small for a OHW table so I double the number of units]. The defending Austrians have four Infantry and two Cavalry on the right, with one Infantry and a Light battalion on the wooded hill.
Facing the hill are two Russian Infantry brigades and a Light battalion, while 5 Infantry, three Cavalry regiments and a battery face the North objective. The thought is that the Russians attacking the hill will reinforce the North attack after wiping out the hill. The hill offers cover against shooting and an advantage to defenders being charged ["Assaulted" in EC-BC].
I decided to try this out and ended up with an infantry fight at the town and a cavalry melee in the center, which is the opposite of the traditional battle with infantry in the center and cavalry on the wings. Made for a pretty fluid and wild battle!
In the end, the Austrian Infantry was overwhelmed at the town, while the cavalry was unable to effectively contest the open space being outnumbered 3-2.
Having had an interesting playtest of one defense, I still laid out and visualized a couple of other possibilities [post on visualizing a wargames plan HERE]. Below, I was wondering if with a slightly larger game I could fight for both objectives and threaten the Russian right flank if they attacked straight against the line:
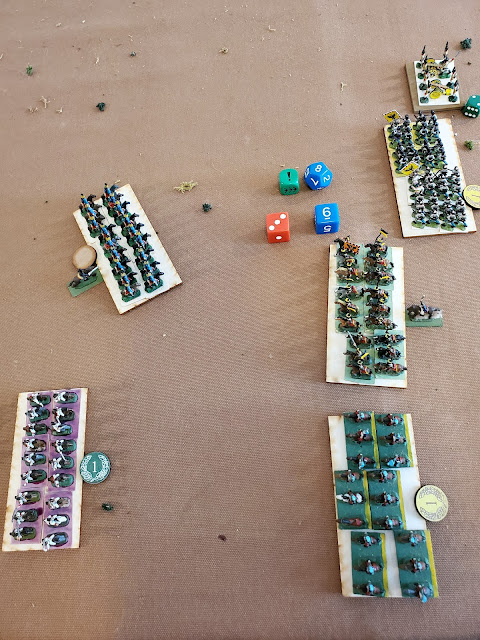
The Infantry brigades pushed right up close and the center got bashed as the Austrian grenzers inflicted max Hits, which also resulted in a Casualty Hit [permanent damage to the brigade]. The other Russian got a hit and rolled low on ammo. Fortunately, this attack is pretty well supported!
Elsewhere on the battlefield, the Russians rolled well and advanced aggressively. The Austrians did the usual Austrian thing - historically speaking - and responded sluggishly so the Russians have once again driven a wedge between the two objectives. Their two cavalry are also supported by a third cavalry and a horse battery, but uncertain it will be enough to clear that flank!
...the Russky Hussars continued their charge into the flank of the Austrian Hussars! The Russians only inflicted one Hit, but the Austrians inflicted none, so they also fled to the board edge and were destroyed.
Wow! So partially my fault for being near the board edge, but the Russian Hussars are definitely the star Unit today, clearing out the right board edge and eliminating the flank threat.
Greatly encouraged by the cheering on the right flank, the Russian left presses onwards, and is promptly punched in the kisser again. Between the Infantry and the Lights, the center Russian Unit is wiped out [barely]. Fortunately, they prepared in depth for just this situation and the second line is ready to move up.
End of Turn 2, the Austrians hold both objectives but the plan to defend them on a united front is pretty much shot. I should've put the Austrian cavalry in the center like last time...maneuvering with plodding Austrian infantry is never wise!
Turn 3, the Russkies clear the two flanking Light units with a brigade assault on the left and the guns on the right, forcing the grenzers to retreat and re-orient their Front. This objective is almost clear - the Austrian defenders need some help!
The fight for the town is going better. The Austrians manage to make a shorter but stronger battleline with plenty of Artillery. The Russians overstretched themselves a bit, but they still have a strong mobile force of cavalry trotting around which actually makes the wide spacing possibly helpful - interesting...
Turn 4, the Austrians seize the Initiative!
First order of business - run over the Russian battery holding the left flank of their battle line. The battery defends itself by inflicting max damage and not running low on ammo. Never let it be said the Russkies can't handle their guns!
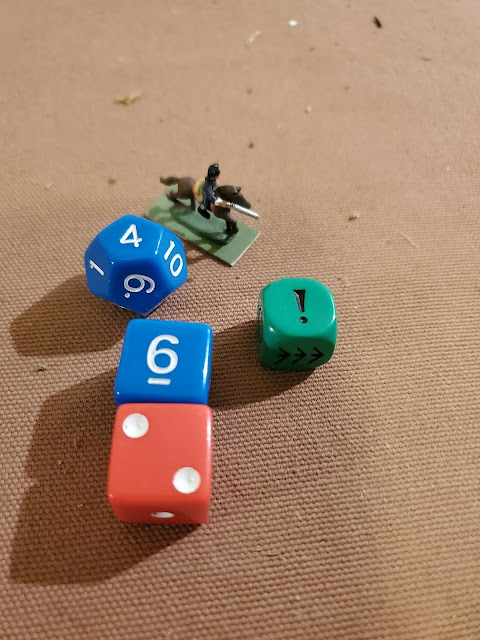
The Austrians follow up by rolling poorly and having to retreat. Violating that rule of tabletop war "when in doubt, roll well" is always a poor choice!
Turn 4 sees a strong Austrian firepower destroy half the Russian battle line. They managed to position themselves well in response to the Russian advance, and ended up with local advantages in a couple of critical locations. The Russian attack is too piecemeal, due to the commander's distractions and some poor command rolls, lowering the orders available at a critical moment and resulting in a traffic jam in the Russian rear area.
Turn 5 sees a resurgent Austrian force begin by attacking with their Grenadier brigade, hitting the flank of a Russian brigade and wiping it out!
Despite a conservative repositioning after their Assault, the Russians are able to counter-attack the fatigued Grenadiers with the cuirassiers...
...wipe them out and continue into the guns! These valiantly defend themselves to the last bucket and swabbing brush. The Cuirassiers attempt a final rally, but fail. The Austrian guns are taken and spiked, but the cuirassiers are done for the day...
...and they are removed. The Austrian defense is looking a bit sparse now.
With some more cavalry handy, and considering the successful cuirassier attack, a composite cavalry brigade attacks the weakened infantry in the Austrian center and manage to destroy them, albeit at the loss of a couple more Hits.
They also continue into the nearby guns, and their fortunate ends with destruction just like with the cuirassiers. This time, they do not destroy the guns, however.
Still, the Austrian line is shattered, and the Russians have reserves on hand.
Turn 5 ends with a somewhat scattered Austrian defense holding onto both objectives, but with few strong units left to hold out. Most importantly, the Russians have five healthy Infantry Brigades on the field, while the Austrians have only a couple and they are widely separated.
And on Turn 6...the Russians seize back the Initiative! This will allow them to keep the Austrians from reorganizing an effective battle line before they can push into their battle space.
The Russians Assault and destroy the last defender on the hill. They position an infantry brigade and the horse battery against the town with its isolated defending Austrian infantry brigade. They also put their heroic Hussar regiment in the flank area of the battery as reinforcements move up against the town.
Wow! So partially my fault for being near the board edge, but the Russian Hussars are definitely the star Unit today, clearing out the right board edge and eliminating the flank threat.
The Hussars finish by facing the town, preventing the Infantry from maneuvering out of it to re-organize their defense.
Four Russian brigades are lined up, but there are gaps in the line and their batteries are still on the move. Overall, a poor job by the Russians, especially since their left battery is being threatened by an Austrian infantry brigade! Still, the cavalry are coming to the rescue to prevent the Austrians from carrying off the guns.
Hmm, that sounds familiar somehow...
The Austrians follow up by rolling poorly and having to retreat. Violating that rule of tabletop war "when in doubt, roll well" is always a poor choice!
...wipe them out and continue into the guns! These valiantly defend themselves to the last bucket and swabbing brush. The Cuirassiers attempt a final rally, but fail. The Austrian guns are taken and spiked, but the cuirassiers are done for the day...
...and they are removed. The Austrian defense is looking a bit sparse now.
With some more cavalry handy, and considering the successful cuirassier attack, a composite cavalry brigade attacks the weakened infantry in the Austrian center and manage to destroy them, albeit at the loss of a couple more Hits.
They also continue into the nearby guns, and their fortunate ends with destruction just like with the cuirassiers. This time, they do not destroy the guns, however.
Still, the Austrian line is shattered, and the Russians have reserves on hand.
Turn 5 ends with a somewhat scattered Austrian defense holding onto both objectives, but with few strong units left to hold out. Most importantly, the Russians have five healthy Infantry Brigades on the field, while the Austrians have only a couple and they are widely separated.
Turn 7 starts with a divided Austrian army that has the majority of its remaining units no where near the town objective - clearly bad generalship!
Retaining Initiative, the Russian hussars charge the battery and wipe it out, but take some serious Hits along the way - fortunate they they were still a fresh unit.
...so they disappear leaving a damaged Infantry brigade just hanging on.
Yeah, I'm really thinking that 1.5:1 odds is tough on the defense here. Perhaps 6-5 in the original OHW, and 15-12 for EC-BC will play better. Also, I should try not to lose Austrian units and get ambitious with relieving the hill objective. For starters!
Continuing on with their breakthrough charge, the hussars defeat the Infantry brigade, but take just enough hits that they have to Rally back a Hit to stay on the board - but if they do, they can eventually regain much of their strength after resting and rallying...
...unfortunately, a '1' will not do it......so they disappear leaving a damaged Infantry brigade just hanging on.
The Russians would like this unit to disappear, so get one hit with their guns, they Assault with their fresh Infantry Brigade! The Austrians take three Hits from the Assault, which means a second Casualty Hit, but just enough to destroy them anyway. Note that at top right, the Austrian infantry in the town are in trouble.
Yeah, I'm really thinking that 1.5:1 odds is tough on the defense here. Perhaps 6-5 in the original OHW, and 15-12 for EC-BC will play better. Also, I should try not to lose Austrian units and get ambitious with relieving the hill objective. For starters!
I think the rules played just fine. The cavalry was impactful but ended up "destroyed" [really, horses blown and too tired to fight any longer], which turned out to not be a problem as the poor positioning of the Russian infantry ended up making it easier for them to maneuver in from the reserve and counter-attack the successful Austrian attack that heavily damaged their battle line.
The weaker artillery was still useful for a Hit here and there, and when charged often rolled well and defended itself - note that one cannot always rely on rolling well, and it is smarter and safer to keep your Artillery far enough away that it contributes to the battle but is not over run!
Generally speaking, I think that this phase of playtesting has been very successful - I streamlined a few rules and cut down on needless differentiation and that also allowed me to get rid of a few exceptions to rules. Yet, the game play felt quite historical, with each of the three key units making their contribution when well handled, but Infantry still being the Queen of the Battlefield.
The next question is should Artillery and Light Infantry battalions be weak enough that they are half as effective as Infantry Brigades? This would mean that when one rolled them using the OHW force composition charts on p.64, you'd get two small Light battalions or two small artillery batteries instead of one that is almost as strong as an Infantry Brigade [but not quite as strong]. That will be something to work on next go around.
Another issue is that altho I like the simple "DBA-esque" system of Orders, I feel that some units showed enough initiative historically that they shouldn't need an order all the time, like Lights and Cavalry. I'm thinking that maybe a different order system should be used, one that is a bit more complicated but that will feel realistic. Will make for a nice Advanced Rule in EC-BC.
So it has been a great series of playtests, and I'm very pleased with the old-school 9mm Scruby figs, so there is some work to be done on this project in the future.


