"Toupees made to order - Satisfaction Guaranteed!"

The battle of Jomonville Glen, now a park in SW Pennsylvania, is a classic ambush. The real battle appears to have been pretty lop-sided considering the result and casualties, which was the French force taking almost all the casualties and surrendering. As a military OP, it was very successful, and a first success for a young officer named George Washington, who would go on to be better known in later years.
There's a bunch of articles on it, due to GW's involvement, but beware - some only adhere to the present academic and journalistic standard of our time, which is halfway between gossip and rumor, and Fake News, sprinkled with some facts. Fortunately, the Wikipedia article surmounts that standard and addresses the particulars pretty well [CLICK]. There is also a good post here - Jumonville Glen Battlefield Post - that has additional information. Enough said!
As a wargame post, the main concern here is how to game an encounter where one side had total victory. They key is to recognize that altho that was the historical result it was not a sure thing. The French could have had better and / or more sentries out, could have scouted better, or taken routine precautions to avoid the disaster that happened. Presenting the full array of possibilities to both sides and allowing the Wargamer to make his own decisions is the best game plan.
Ergo, we set up the battle per the below diagram, which seemed accurate enough:

Table was about 5 x 10 with the hills camp nestled in the valley between the steep hills and open forest. The scale was 54mm plastics from Armies in Plastic [CLICK] and the hills were purchased while the trees were a mix of railroad and aquarium pieces, some in 54mm large and others were smaller. The smaller trees were provided by the host and denote scrub and bushes, which count as Area Terrain denoted by the circular dark green felt bits on which they stood - the trees themselves only served as a marker. Robb K provided lovely painted figs and the terrain including tents. Results are below, with a view from the "North" of the above diagram:
 Above, the French defend their camp from a motley collection of frontiersmen sniping from the woods and rocks.
The French set up in the general area of the camp, but had some choices to "weight" the area where they placed them. They also had options to put out sentries who would automatically fire when the enemy became visible. The trade-off was that there was a good chance that the sentries would be overwhelmed and killed, so that had to be taken into account.
The colonist under GW and their Indian Allies under Tanacharison "The Half King" - a ferocious character, it seems [click] - chose to mainly approach from the diagram "Northwest" and "Northeast" corners, using the Indians under Terrible T to close the bag from diagram "South". This put them in close mutual support, which is a good idea considering that they only outnumber the French by about 52 to 35, and splitting up for an encirclement invites being defeated in detail. The main problem was that if the entire French force ran against the Indians, they would heavily outnumber them and the Indians were not closely supported.
RULES
The rules used were a modified version of Neil Thomas' Skirmish Rules from "Wargaming: An Introduction". These provide simple, effective mechanics as a basic platform for any gunpowder era conflict. I have also used them for medieval fantasy encounters including Chaos v. Empire and the Lord of the Rings [HERE].
EDIT 12DEC2022: As these rules were originally written for British in 1899, I had to modify them and pull them back in time - this AAR then got posted in my "Up the Blue!" blog [CLICK] which is for modern warfare [basically, repeating rifles and beyond]. But it really belongs here, thematically.
I find them pretty smooth but I still streamlined them a bit and wrote up a new set based upon the RAW that decreased the weapons to FIW only, and I eliminated the wounding mechanic - if you hit and target failed to save they took a wound, period. They took two wounds if their save was a natural '1'. I do like their mechanics for cover and saves also, which make it easy for players to decide on how they are deploying their figures in relation to desired cover - the best way to stay alive!
Another key change was that each side made an Initiative roll, with the winner able to go first. However, as this is a skirmish game, command and control has a lot of friction in real life at this level. I took this into account by using some interesting dice from another game, that have 0, 1, 2, 3, 4 & 5 on the 6-sided cube.
Each player on the side taking a player "impulse" rolled the die and that was the number of figures they could activate. On a "0", only a leader could activate [each player only had 1-2 so careful decisions had to be made!] but they could also activate some figures with them using a "Lead" action. The net result is an IGO-UGO turn sequence that varies the number of figs you can activate in any given impulse. If you roll low and have a bunch of unactivated figs left after your opponent is finished, you can just activate them all. The tactical tension is that it is usually better to shoot first, and move second! Ah, decisions...decisions...
As for the battle, after a quick explanation of the rules, the players were off and running!
Diagram East, groups of British colonists pressure the French, who are very thin on the ground. At top center in red, i s a group of about 8 led by GW who have just assaulted a small group of French regulars.


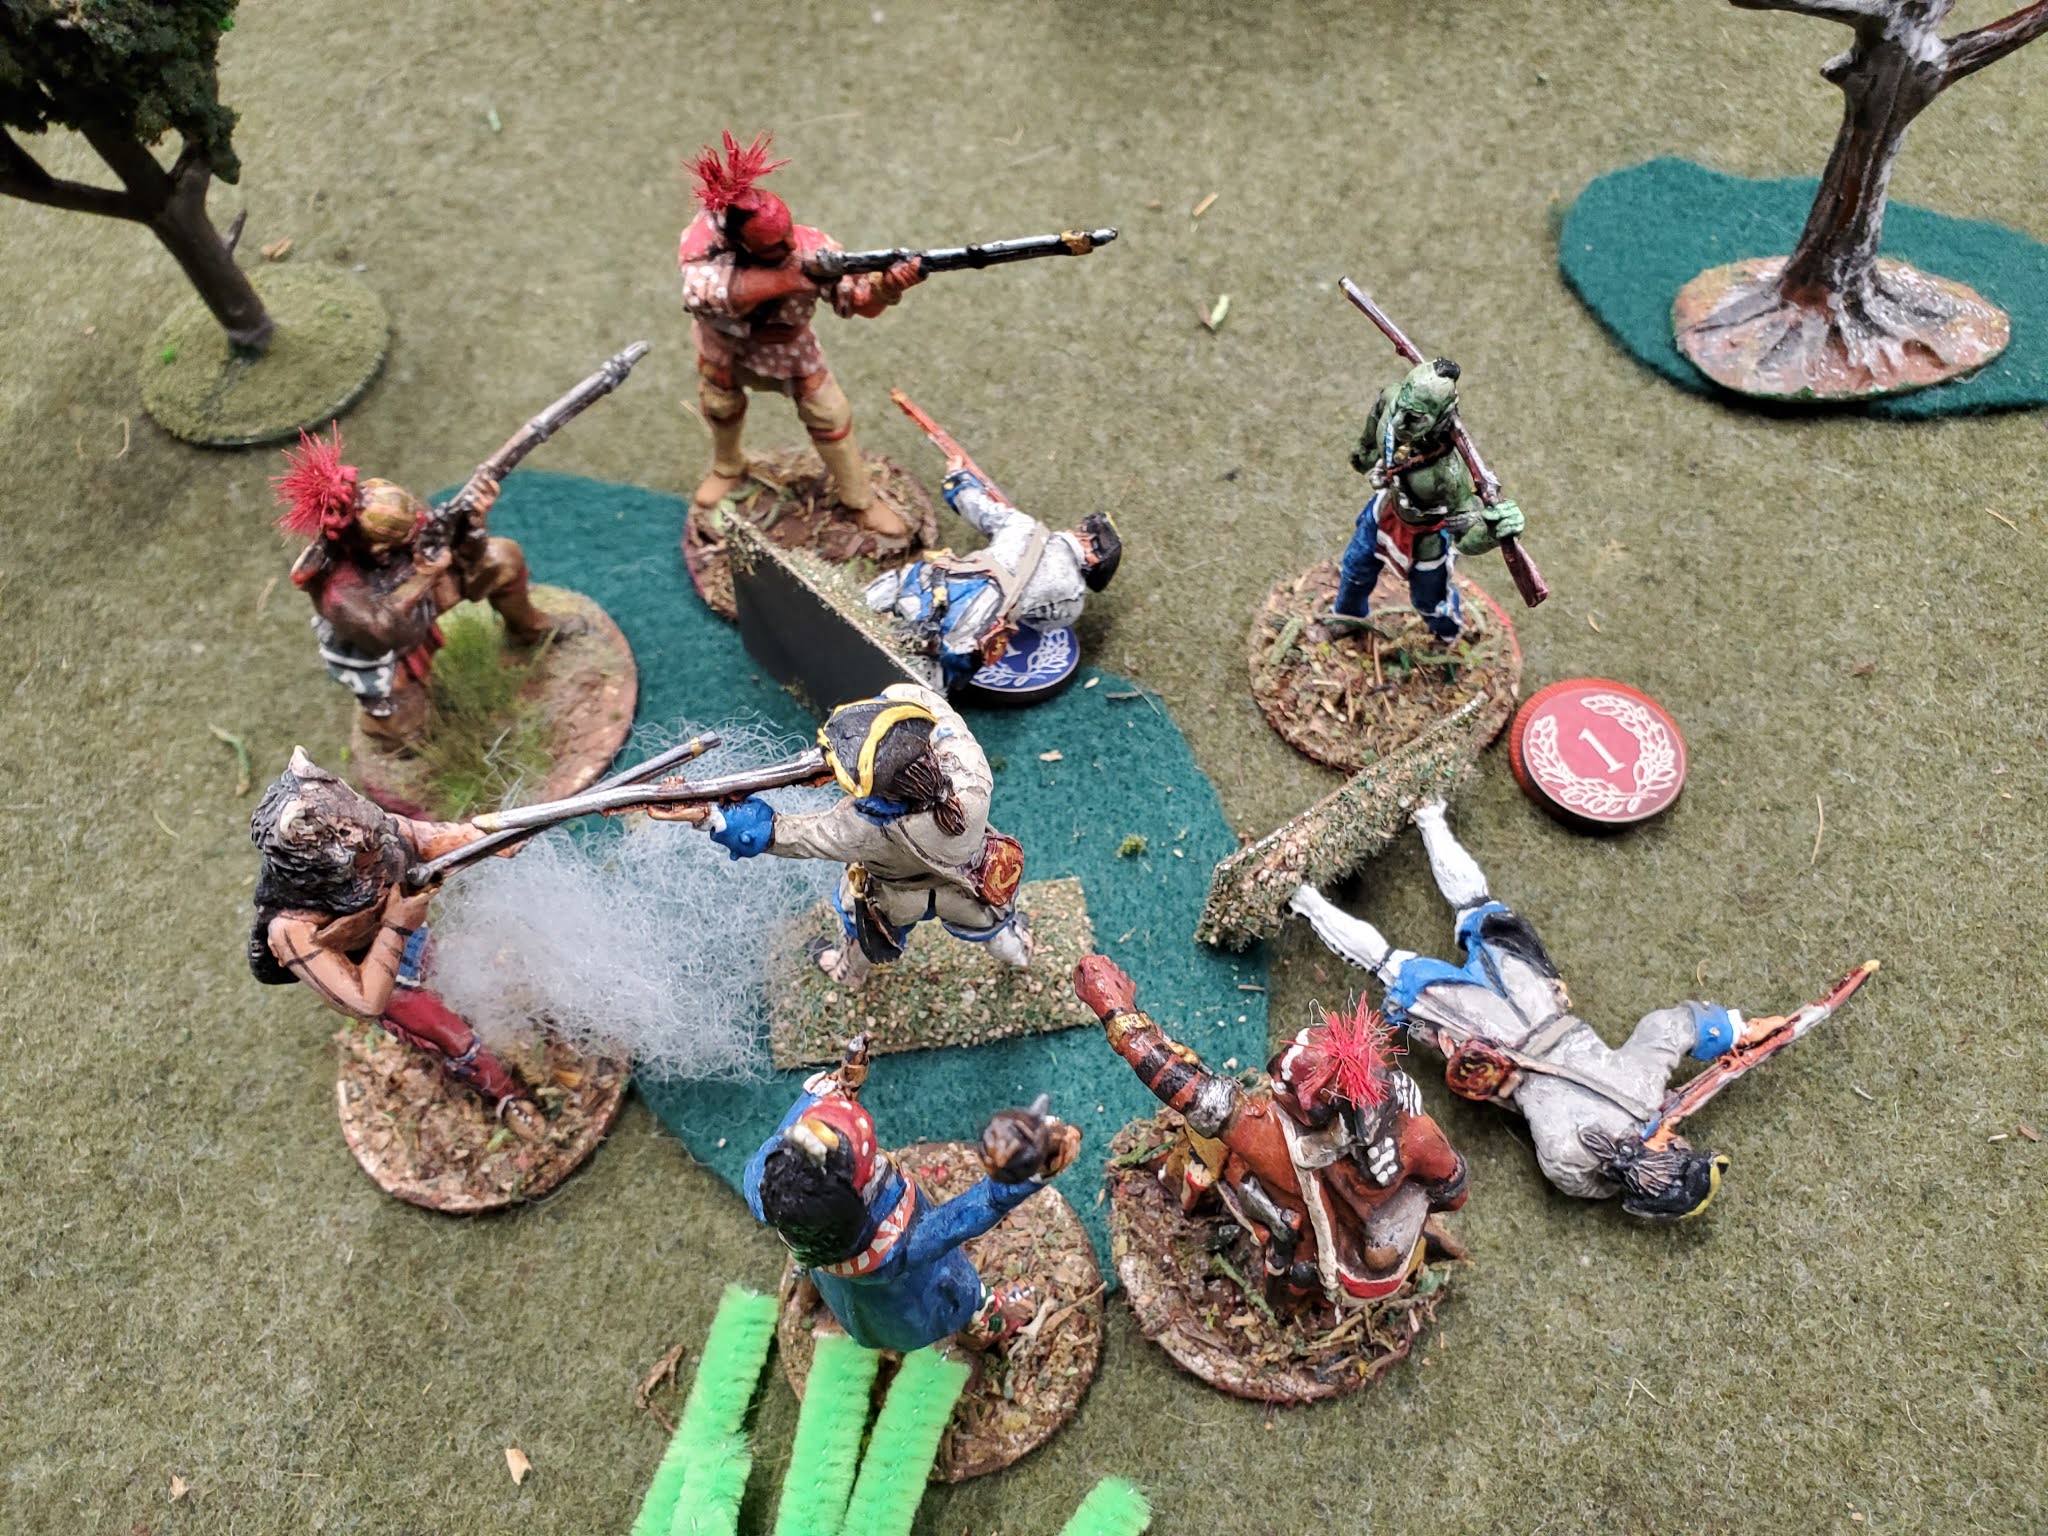
Two of the French succumb quickly, but the third is much more determined! He holds off the Indians, including a Green Goblin warrior!

But, the force directly led by GW has successfully assaulted and is now into the East side of the camp, slowly confining the French at the top. Indians are visible at the top left of the pic.

Amazingly, the lone Frenchman - clearly a desperate and wily fighter, breaks free from the crowd of Indians and makes a run for it! However, the Indians were prepared for a runner, and their overwatch element snipes and pins him.


The rules worked well, with very few questions and only a couple of changes needed for future games. They are a painless set of traditional mechanics that are easy to pick up for any experienced gamer, resulting in the players being able to focus on the battle instead of the rules. Careful playtesting and use of the terrain as visual cues for terrain mechanics also made it run smoothly. As these are not in the rules, I made them up myself and was glad to see them work well.
I can strongly recommend these skirmish rules as a great platform to modify for your own tastes and purposes as all the mechanics are obvious an intuitive. They are not always dynamic as written, but it's easy to make them a bit more exciting with simple changes.