How Men of Quality Resolve Differences

How Men of Quality Resolve Differences
Pudel and Peper attacks - an ugly but inevitable part of any 17th C. British Civil War, "Oh! The Shame of it All!"
Showing posts with label Neil Thomas. Show all posts

Thursday, November 2, 2023

Return to Colomby-Nouilly


From George Hooper's work [CLICK]

This was a medium sized action involving around 80,000 Soldiers total, fought on 14 August 1870. Short article is here [CLICK]. Also called Borney - Columbey, it reminds me of Quatre Bras in that it was a shaping action that was followed by other significant battles, these being  (Mars-la-Tour and Gravelotte) which resulted in France's main regular army being trapped at the famous fortress of Metz [CLICK].

From the gaming stand point, it was a relatively indecisive battle, which makes it perfect for the gaming table. Yes, you heard me... an indecisive throw-down always makes for a better table top game than some famous blow-out victory; after all, who wants to fight the side that lost? Gamers want to have at it and give as good as they got.

This battle made it into the "1870" rules by the great game designer and great guy Bruce Weigle [may his Scotch never sour], with many battles presented in the back [CLICK]. Whether you play the rules, or are just inspired by them and his outstanding research and bibliography, I can strongly recommend you buy them!  Anyway, the map is below: 
As you can see, this is an excellent rendition of the battlefield, better than the top map. However, it is a bit busy to create a table out of, so I did a hand tracing below:
The gradations are still a bit unclear, so to create the ground for the game, I did another version with slope lines:
With level 4 being highest, you can see that there's a series of valleys that drain into a river at level 1.  The Prussian army is attacking East to West from the spurs and heights against the French who are mostly in the valley - an unenviable situation against an army with superior artillery!

Below is the same view, South to North, of the table being created out of insulation styrofoam. The host, Kevin K, has a great system for his 12x6' table.  take the 12 x 6 table, cut 3' squares of insulation styrofoam, and each piece cut makes two cut and shaped pieces, each still stacking into the 3' square for storage [could even be stored upon the table...!].
Above, "S3" is a medium curve hill, after the cloth is upon it one could also put a stream in the beveled "ditch". Nice!

Even in the raw, you can see the valley taking shape, and the heights and spurs to the right:
From East to West, at the South end, the heighest height:
From center, again East to West:
North end, same direction: long ridge towards 
View from the North to the South:
The blue painter's tape helps secure the layers from shifting, and it easy to remove [and doesn't damage the insulation].

     *     *     *

Below, the table covered with a cloth, view North to South. Unfortunately, the cloth doesn't show the contours well in the lighting. Over a few days, the cloth will settle a bit, too.


Upon the large [13' by 7' or so] cloth is laid the network of towns and villages, woods and streams. The single house may not look just like a town, but it gives the table some depth.
Above view, South from the North edge, French side.
Below view, West from the center East, Prussian side.

Finally, cultivated areas [orchards, brush, fields, etc] are shown with brighter green fabric with little patterns.  This catches the eye.  In tactical terms, it provides covered avenues of approach, important in a firepower-strong period.

Below, French view of oncoming Prussian divisions!  There's one per wooden tray, more or less.
Up close, the Imperial Guard infantry to left, cavalry to right.

South end of French sector, view of Prussian line of advance.
View South to North, from the French side - Prussians to right.

The above took just under two hours or so. This was mostly driven by the host having a system in place. I provided a certain amount of delay by not being fully prepared about a couple of things I overlooked, so I went morning of the [evening] game to finish them up.

In terms of scale and battle level, the rules are 1" is 100m, so the table is 14.4 kliks long by 7.2 kliks wide . The battle will involve around 1,000 figures, with each Regiment represented by 16-20 foot, 12 Cav. By comparison, Waterloo was 4x4 miles [6 kliks] and had about 140,000 men, so was twice the men in half the battlefield!

In terms of the rules, I did a bit more streamlining, and switched from a MU [Maneuver Unit, e.g. "Unit"] being a Battalion to being a Regiment. This only changes the mechanics of infantry units a little bit, basically making them more flexible. I'm excited as it overall suits both the period and the operational level of rules I'm looking for, which really captures the flavor of the period better than a low-level tactical set, IMHO.  We'll see what happens next!

Friday, December 30, 2022

Jumonville Glen: French & Indian War in 54mm

 "Toupees made to order -  Satisfaction Guaranteed!"

The battle of Jomonville Glen, now a park in SW Pennsylvania, is a classic ambush. The real battle appears to have been pretty lop-sided considering the result and casualties, which was the French force taking almost all the casualties and surrendering.  As a military OP, it was very successful, and a first success for a young officer named George Washington, who would go on to be better known in later years.

There's a bunch of articles on it, due to GW's involvement, but beware - some only adhere to the present academic and journalistic standard of our time, which is halfway between gossip and rumor, and Fake News, sprinkled with some facts.  Fortunately, the Wikipedia article surmounts that standard and addresses the particulars pretty well [CLICK]. There is also a good post here - Jumonville Glen Battlefield Post - that has additional information.  Enough said!

As a wargame post, the main concern here is how to game an encounter where one side had total victory.  They key is to recognize that altho that was the historical result it was not a sure thing.  The French could have had better and / or more sentries out, could have scouted better, or taken routine precautions to avoid the disaster that happened.  Presenting the full array of possibilities to both sides and allowing the Wargamer to make his own decisions is the best game plan.

Ergo, we set up the battle per the below diagram, which seemed accurate enough:

From here [CLICK].

Table was about 5 x 10 with the hills camp nestled in the valley between the steep hills and open forest.  The scale was 54mm plastics from Armies in Plastic [CLICK] and the hills were purchased while the trees were a mix of railroad and aquarium pieces, some in 54mm large and others were smaller. The smaller trees were provided by the host and denote scrub and bushes, which count as Area Terrain denoted by the circular dark green felt bits on which they stood - the trees themselves only served as a marker. Robb K provided lovely painted figs and the terrain including tents.  Results are below, with a view from the "North" of the above diagram:
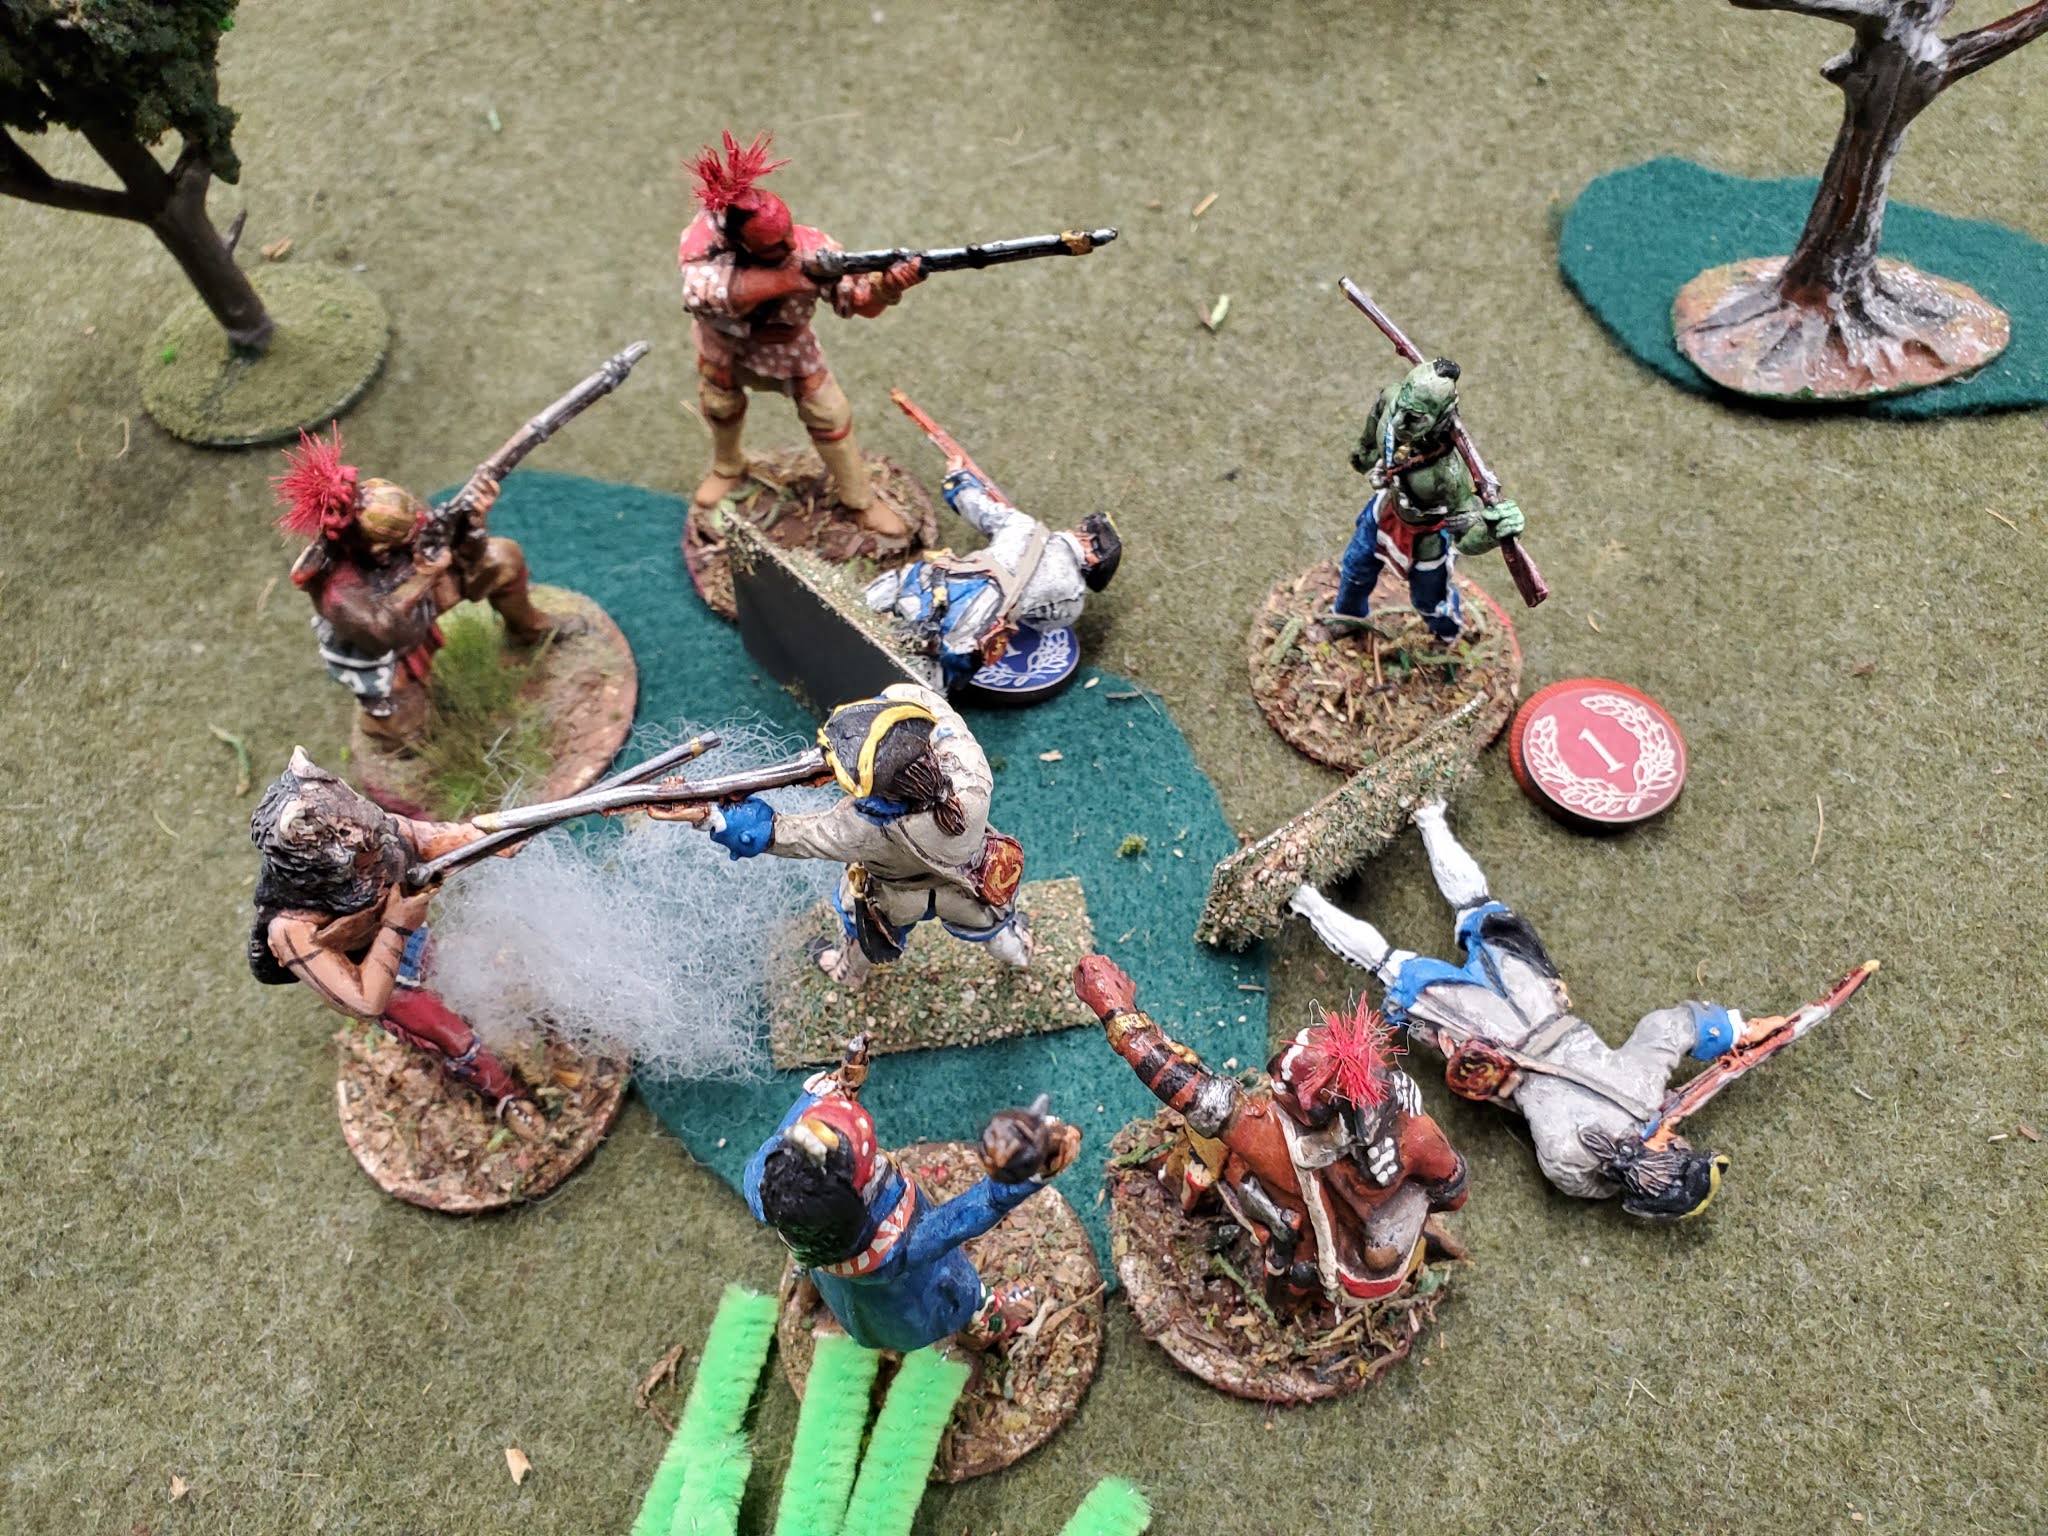
Above, the French defend their camp from a motley collection of frontiersmen sniping from the woods and rocks.

The French set up in the general area of the camp, but had some choices to "weight" the area where they placed them. They also had options to put out sentries who would automatically fire when the enemy became visible. The trade-off was that there was a good chance that the sentries would be overwhelmed and killed, so that had to be taken into account.

The colonist under GW and their Indian Allies under Tanacharison "The Half King" - a ferocious character, it seems [click] - chose to mainly approach from the diagram "Northwest" and "Northeast" corners, using the Indians under Terrible T to close the bag from diagram "South".  This put them in close mutual support, which is a good idea considering that they only outnumber the French by about 52 to 35, and splitting up for an encirclement invites being defeated in detail.  The main problem was that if the entire French force ran against the Indians, they would heavily outnumber them and the Indians were not closely supported.

RULES
The rules used were a modified version of Neil Thomas' Skirmish Rules from "Wargaming: An Introduction". These provide simple, effective mechanics as a basic platform for any gunpowder era conflict.  I have also used them for medieval fantasy encounters including Chaos v. Empire and the Lord of the Rings [HERE]. 
EDIT 12DEC2022: As these rules were originally written for British in 1899, I had to modify them and pull them back in time - this AAR then got posted in my "Up the Blue!" blog [CLICK] which is for modern warfare [basically, repeating rifles and beyond]. But it really belongs here, thematically.

I find them pretty smooth but I still streamlined them a bit and wrote up a new set based upon the RAW that decreased the weapons to FIW only, and I eliminated the wounding mechanic - if you hit and target failed to save they took a wound, period.  They took two wounds if their save was a natural '1'. I do like their mechanics for cover and saves also, which make it easy for players to decide on how they are deploying their figures in relation to desired cover - the best way to stay alive!

Another key change was that each side made an Initiative roll, with the winner able to go first. However, as this is a skirmish game, command and control has a lot of friction in real life at this level.  I took this into account by using some interesting dice from another game, that have 0, 1, 2, 3, 4 & 5 on the 6-sided cube. 

Each player on the side taking a player "impulse" rolled the die and that was the number of figures they could activate.  On a "0", only a leader could activate [each player only had 1-2 so careful decisions had to be made!] but they could also activate some figures with them using a "Lead" action. The net result is an IGO-UGO turn sequence that varies the number of figs you can activate in any given impulse.  If you roll low and have a bunch of unactivated figs left after your opponent is finished, you can just activate them all.  The tactical tension is that it is usually better to shoot first, and move second!  Ah, decisions...decisions...

As for the battle, after a quick explanation of the rules, the players were off and running!

Diagram East, groups of British colonists pressure the French, who are very thin on the ground. At top center in red, i s a group of about 8 led by GW who have just assaulted a small group of French regulars.

Below, a closeup of GW's successful assault on a couple of Frenchies holding a key wood position on the edge of the camp. At top right is the main part of the French force.

Below, the French are fighting for their camp, which provides some concealment from enemy fire but the tents are not bulletproof. The Indian commander sits at the far end of the table, and a few of his Indians may be seens near him.

Below, another view from the colonist militia positions. GW to top left, French above them. Using Concealment and Cover properly was the key to success.

Way off on diagram South, Terrible T's Indians whooped it up and frightened the Frogs into believing there were many more Redskins about - the occasional shot kept the sentries under pressure for a while, but as an escape route, it was pretty open.

View from Diagram Southeast.  Terrible T has concentrated some of his men who are now enough of a threat to have Jumonville send three more precious regulars to hold them off. They are dreading a close action provoked by the Indians - they have such lovely, long hair!

But eventually Terrible T saw his moment. He managed, with a bit of difficulty, to finally get an overwhelming group of seven Braves to nearly encircle the three Frenchmen. The defensive fire has no effect - jitters?
Two of the French succumb quickly, but the third is much more determined!  He holds off the Indians, including a Green Goblin warrior!

Meanwhile, back at the camp, the French have concentrated a large force of about 14 Soldiers to try and gain local superiority. The bodies of ambushed French lay near the colonist militia who are crowded into a small wood.
But, the force directly led by GW has successfully assaulted and is now into the East side of the camp, slowly confining the French at the top. Indians are visible at the top left of the pic.
Amazingly, the lone Frenchman - clearly a desperate and wily fighter, breaks free from the crowd of Indians and makes a run for it!  However, the Indians were prepared for a runner, and their overwatch element snipes and pins him.

Back at the camp, the French advance and assault the militia hiding in the small woods. The attack doesn't go well, partially because of strong defensive Fire which pins some of the French. They make contact with about 10 French against 6 militia.

In the end, it was not enough to break free. However, the French did better than their real-life counterparts.  If anything, the missed opportunity may have been to take the entire force against the Indians and try to break out in that direction. This would have provoked a running battle but may have resulted in more French escaping the noose. Hard to say, and worth another go!

The rules worked well, with very few questions and only a couple of changes needed for future games. They are a painless set of traditional mechanics that are easy to pick up for any experienced gamer, resulting in the players being able to focus on the battle instead of the rules. Careful playtesting and use of the terrain as visual cues for terrain mechanics also made it run smoothly. As these are not in the rules, I made them up myself and was glad to see them work well.

I can strongly recommend these skirmish rules as a great platform to modify for your own tastes and purposes as all the mechanics are obvious an intuitive. They are not always dynamic as written, but it's easy to make them a bit more exciting with simple changes.

Monday, April 25, 2022

Post-Beaumont Playtesting, p.4: Mechanics, Tactics

As you design or puzzle out a game, you have to line troops up and try out basic mechanics.  This example is a straightforward Brigade v. Brigade attack, two regiments of three battalions each, with some nominal support units affecting tactical decisions, e.g. two batteries of Krupp guns, some jagers in a town.

The game mechanic - or real-life tactic - being tested here is how to handle an attack by an opponent that outranges you. In the Franco-Prussian War, the Prussians had to solve the problem of their Dreyse "needle-gun" being outranged by the French Chassepot. 

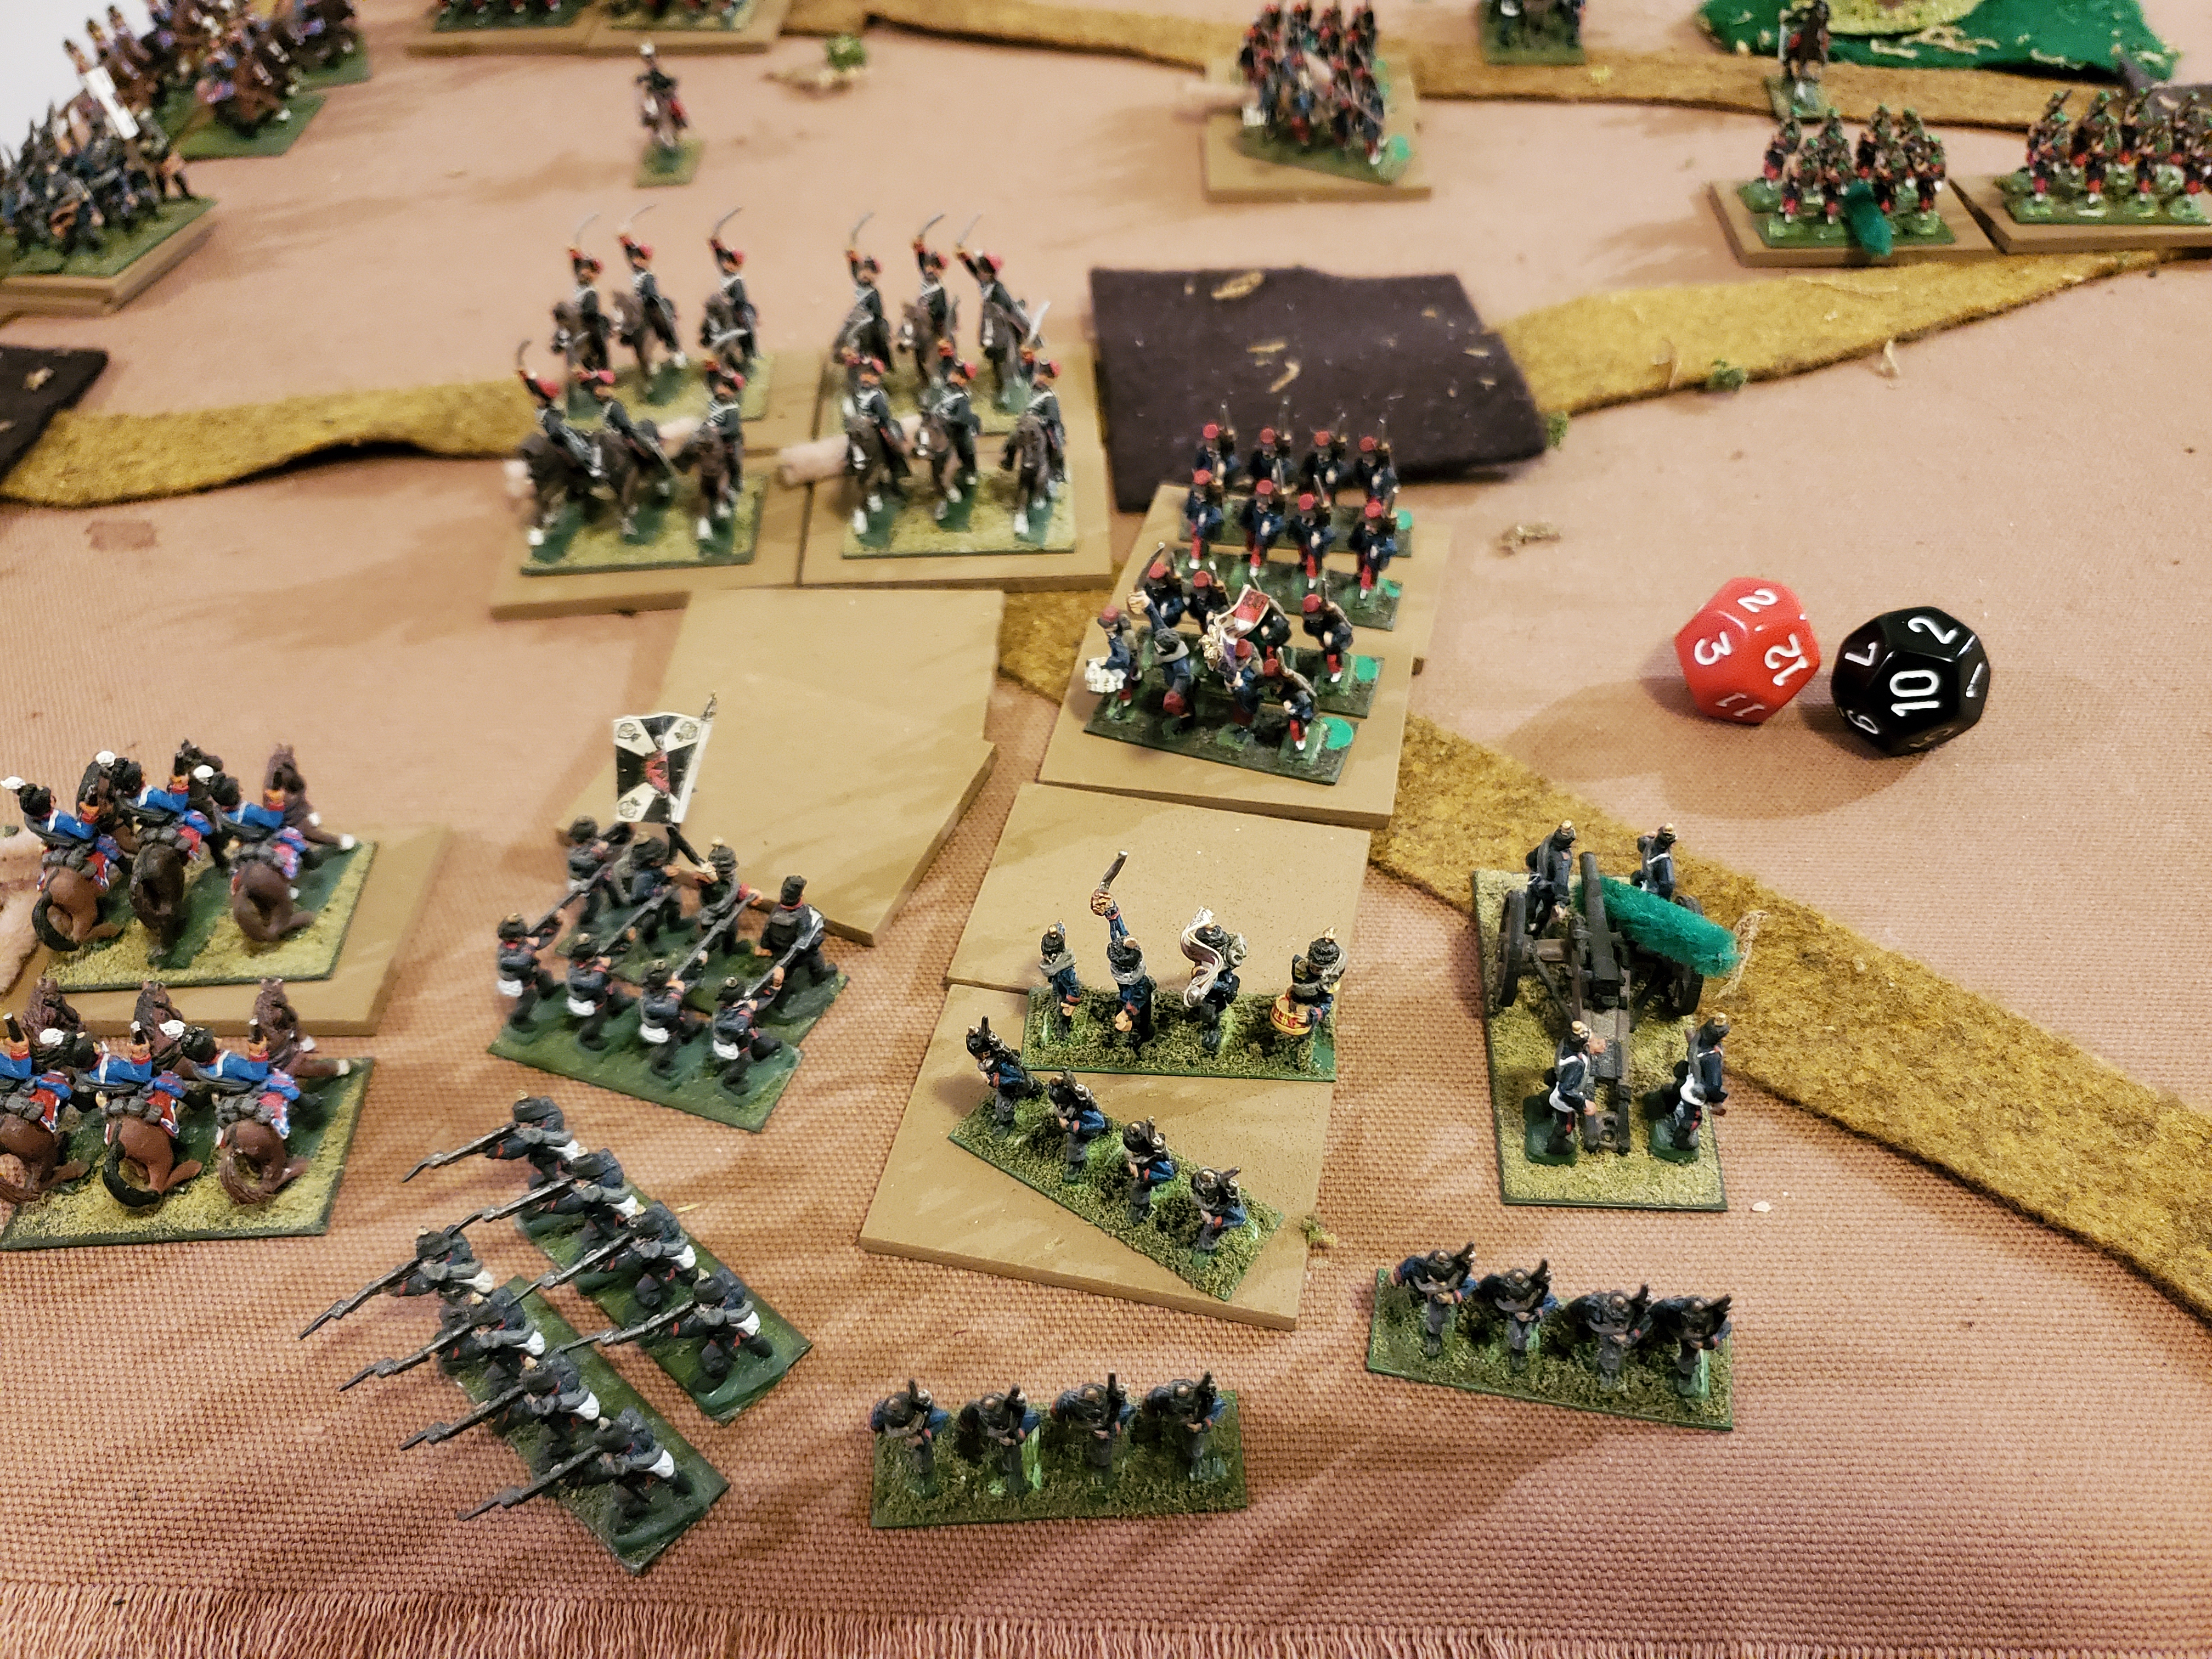
In the below example, six French battalions [two regiments] are advancing against six Prussian Battalions [also two regiments] who are defending a town. The town is held by a few companies of Jagers, with support from two batteries of Krupp guns. The Jagers have a max range of 9" and the battalions a max range of 6". The French battalions have a max range of 9", thus heavily outranging the only unit that can effectively respond to their fire. 

As denoted by the dark green felt, the French have chosen to use a covered approach through the woods out of line of sight of the Krupp batteries.  
Shown above are the 6" and 9" distances of the Prussian Units: this leaves a 3" range band where the French are in range, and the only Prussian units that can respond are the Artillery and the Jagers. As these have only about half the firepower of the three leading French battalions, eventually the French will force a decision in their favor altho the combined firepower of the two Krupp Batteries and the Jagers is greater than the top-most French battalion by itself.  The French could choose to sacrifice that battalion, but instead choose another course of action.

Below, the French move up a unit of their light infantry, which can effectively threaten the batteries, forcing them to engage the light infantry instead of supporting the defense of the town.

Given this situation, we can see that the French have mitigated the Prussian defense plan through cover and concealment, and with a support unit of their own. 

The Prussians, with their inferior range, have a few obvious options:
  1. Use Terrain so as to reduce the effect of incoming Fire,
  2. Rely on support units that are NOT outranged to engage the enemy.
  3. Close with the French,
  4. Withdraw
But, as can be seen, there is no terrain to mitigate the French battalion's firepower; also, the Prussian support units were insufficient to drive off three battalions and have been countered by an opposing French support unit. 

The only good news is that the Prussians are not within the 9" of the woods that would give the French continued cover as they engage the Prussians. So keep this in mind when you are fighting against a covered approach - either occupy it yourself, or start within line of sight and fire range so you can cover it with sufficient firepower to deter attack!
The French continue their attack plan by moving out of the woods into range - they are still out of range of all Prussians except one jager company in the town. 
Withdrawal is not an option, so the Prussians immediately move up to close into their 6" shooting range before the French can fully deploy into line.
For this one [French] Player Turn, the French have deployed into line and will have a 2-1 Firepower advantage. Such is life.
On Prussian Player Turn 2, the Prussians deploy and the exchange of Fire will be even.

As I was playtesting mechanics, I stayed very close to average dice rolls, so Fire and Saves and Morale Checks were pretty average numbers. In French Player Turn 3, they managed to outnumber a Prussian Battalion in bases, charge and just barely weather the Fire and drive back the Prussians. Fortunately, the Prussians have properly deployed a second line and the French battalion is now facing a fresh Prussian one.
Fire between the two sides is generally attriting everyone.
Prussian Player Turn 3, they charge with their Fresh battalion and drive back the French breakthrough.
The Prussians Pursue the French, taking up a position in the main line of battle.
Turn 4, the French advance a supporting battalion from their second line into the gap where the Ligne battalion charged then was counter-charged and fled.

The status quo of two even battle lines has been maintained, with both sides having 5 Units in the fight, and 1 unit rallying / reforming in the rear.

I was very satisfied with how my mechanics worked - they are closely based upon Neil Thomas' "Wargaming 19th Century Europe" rules, which are the best developed of his "4-Base" system of rules that started with Simplicity in Practice [which is actually half-baked, but free].

The key thing to remember is that in real life, troops density was about double what Wargamers normally put on the table. All lines would have about half the force up front and another half behind, ready to support the first line. This should translate to an attrition battle with very close results if both players are playing equally well [or poorly] and the victory conditions are fair.  I'm fine with this!

To summarize, neither in real life history, nor on the table top, is outranging the opposing Infantry with your Infantry a decisive advantage. It typically means in game terms that for one turn, the side with shorter-ranged weapons has to advance into their range band [unless the side with longer-ranged weapons is in a situation where they have to assault, in which case there is nearly zero advantage to having a longer-ranged weapon!].  Thus there should be no problem fighting Dreyse v. Chassepot, Springfield v. Smoothbore ACW, Enfield v. Smoothbore Crimea, etc.

Tactically, the side with the inferior range, has to:
  1. Use Terrain so as to reduce the effect of incoming Fire, e.g. defilade.
  2. Prevent an attacker from using terrain to engage them with an even bigger advantage: firing out of their range from cover and / or concealment!
  3. Use support units NOT outranged to engage the enemy, e.g. artillery and rifle armed units, jagers, etc.
  4. Maneuver into firing range of the enemy infantry.
  5. Counter-attack with second line supports - these will be well within range right off the line.
  6. Withdraw - this is an option in certain scenarios.  Cover from one's Artillery and light infantry will be helpful in this instance, just like in 3 above.
Hopefully, this little tactical posting will help wargamers, both players and scenario designing hosts, to realize that just because the forces are a bit asymmetric it doesn't really matter and you can have a fair fight. Generally speaking, it is more interesting to have a fight with asymmetric forces than identical sides, altho both can be fun battles.

Wednesday, March 30, 2022

Post-Beaumont Playtesting, p.3: Mars-la-Tour

The fine-tuning continues and I am pleased with progress. I even figured out how to clean the heads on the printer thanks to a YouTube video - this helps with printing clean drafts. Each draft becomes a fresh look at the rules and the little changes that make things go smoother, and hopefully more historically.

Fortunately, I am on limited duty as I recover from a surgery to fix a few things that went wrong with the old frame - if I was a car, I'd be an antique! I have been able to spend regular time at the game table, albeit wearing a brace, and also spending some time reading Bruce Weigle's "1870", Roger de Mauri's memoir "The Franco-Prussian War" [edited by BG Peter Young, no less...] and Brent Nosworthy's "The Bloody Crucible of Courage" because Bruce Weigle says we should in his bibliography; and yes, a little red wine, also.

This time I repeated the forward deployment and the flank attack options of the original scenario framework; I felt like I had learned a few things for both sides that I wanted to play out. I liked the Prussian selection of forces: both Cavalry and one Skirmisher, the latter to seize the small but important central wood.
Table South above, and table North below.
The French force has both Ligne Infantry and the Guard Voltigeurs [Skirmishers] seizing the large woods as an avenue of approach against the two North towns, and the important central town. Marching against the central town are two Guard Infantry, one Cavalry, and both Artillery batteries - classed as "smoothbores" altho one is a Mitrailleuse. Again, I don't know where the flank march will enter, or for certain the Turn.

Turn 1, the Forward Deployment and faster Operational Movement [my idea] get the Prussians situated at Table center quickly. The only real estate that is owned by the French is the Bois du Nord, which is key terrain for them.

Turn 3. The Prussians have a strong central position, but are limited due to the Flank March - if they get too ambitious, they will be too spread out to support themselves properly. This is OK since four of the towns form a compact wedge just to Table South and West, and they can contest at least one other.
Table North, the Prussians pull back a bit, anticipating the arrival of French flankers at any moment! The Voltigeurs engage the Prussian Jagers who are protecting the Krupp batteries.

Turn 4. Both forces are engaged at longer small arms range - indecisive usually. The Prussians are firming up their defense of the four towns they need for a win!
French Turn 5. Preparatory Fire against the central town occurs from both chassepot and smoothbore Artillery. 
And then the Flanking Force arrives from the North! Hussars, a Ligne battalion and the Mitrailleuse. Despite Prussian preparation, it is awkward to receive guests at this hour and from this angle...
Prussian Turn 5, their Jagers depart the field, having lost a base and failing their Morale Check. The French Ligne are advancing with the Voltigeurs to their right.
In what can only be described as a poor showing, the French Hussars rout from the field! Looks like it'll be up to the PBI as usual. Fortunately, the Ligne Battalion and the Mitrailleuse are already in a good position to deal with the dragoons on their way towards victory conditions further south.
After a few more Turns, it was clear that the few Prussian Infantry were not going to be able to handle multiple avenues of attack and hold on to all four towns. As the battle was winding down and starting to get a bit "gamey" due to the units being very spread out, I called it a day for the Prussians.

My main issue with the scenario system is that with only 10 Units a side, and only up to 6 being Infantry, things can get very spread out. It is hard to concentrate force anywhere, and the historical approach of supports won't really work. Altho I think that the book's scenario system works well in presenting some ways to throw a game on the table, the following grains of salt should be sprinkled:

1) The table is large enough that it really needs almost double the number of Infantry, so 8-12 per side.
2) Whichever side has the most Infantry Units should automatically be the attacker.
3) Use the Events for ideas, but be prepared for them to overwhelm a good game - plan ahead to tone them down so that if 3 Units are lost in traffic, you might change it to 1-2, and then that smaller force automatically is the defender and gets the Forward Deployment to compensate, for example.
4) Use the historical "bathtubbed" scenarios for ideas, either steal the map or the entire scenario - there are some interesting challenges.
5) Some of the historical special rules are a bit over the top. They may need to be put to the "common sense" test and modified.

I hope that has been helpful for readers of this blog and owners of this book!

*********************************************************************************************

Moving right along...
The culmination of the playtesting will be the bathtubbed version of Mars-la-Tour from Neil Thomas' "Wargaming 19th Century Europe". Scenario systems are all well and good, but let's get back to history! 

The scaling is interesting when compared to the full-sized scenario in "1870". 
The below is from the wonderful and highly recommended set of rules and guide to the period by 19th Century European warfare guru Bruce Weigle:
This has about four French Corps engaging two Prussian, more or less. The table is about 5' x 9', so if played without any scale-down, I could only fit in Vionville to Rezonville and south to Bois de Gaumont or so with a 3x4' table that's in my office. Which would be a nice battle, anyway.

Neil Thomas takes this corps-level action and reduces it to about a dozen units a side, about a division and a brigade! Below is NT's game table:
This is for a 3'x4' table. The French have about a 2:1 advantage in the best Unit in the game, Infantry battalions. They get significant reinforcements from point A at table North. The Prussians get a few reinforcements at C and D, about half as much. Victory is to the French if they clear the road from Rezonville to Mars-la-Tour a pretty demanding victory condition. The key to this is Vionville and its adjacent woods. Of secondary interest is Tronville which is close enough to the road to need to be cleared. 

Overall, this is a pretty typical "clear the path/road" scenario. I would re-phrase the victory condition to read that the attacker must clear the road of Fire from infantry weapons; this would necessitate a 6" corridor against Prussians, and a 9" corridor against defending French if one flipped the scenario. 

The single most unusual special rule for this scenario is that all French Units move and fire at half effect, except for 1-3 diced each French Player Turn. This is to represent the indecisiveness of the French commander Marshal Bazaine. While I am OK with the snail-pace of movement [some armies are notoriously slow to maneuver including the Austrians and the Russians] I have a problem with the firing at half effect. NT justifies it by saying that they are conserving ammunition. 

My rules have a modified Player Turn which gives more nuance by separating Close Combat from the Fire and Maneuver phases. Ergo for my purposes, I will only prohibit French Units from charging or entering Prussian Close Combat range unless they are one of the diced units.

Below, after a few turns, the French have [slowly] advanced. As they outrange the Prussians, simply moving them within 9" is enough to challenge the Prussian defensive line [do they take Hits without replying and wait the clock out?]. My solution was to advance the Prussian Infantry into their 6" range, so they could fully engage the French line, but not into the Close Combat Range. Still, it ended with the loss of a Prussian Infantry and a couple of Krupp batteries. One Prussian Infantry had to hide out of Line of Sight behind the town - they jumped back in when the French were in their range of 6", and lasted quite a long time.
The French Infantry develop a strong attack on the town and woods at center. One Krupp battery has been shot down by long-range chassepot fire, and an Infantry battalion had to bravely threaten the French left to slow their advance.

Prussian forces needed a boost about halfway thru - I tossed a few extra units onto the reinforcement schedule. Then, I advanced von Bredow's cuirassiers to give the French Hussars a chance to redeem themselves after the previous battle.
And this time they did quite well, beating back the Elite and heavier Cuirassiers! These pass morale and fall back a few inches. 

Again, the French hussars beat back the cuirassiers, who are disorderly but plucky. Above them the Prussian dragoons are advancing upon a unit of Voltigeurs - Skirmishers - in the hope of wiping them out and then charging the damaged French Ligne Infantry battalion behind it. That would really help their defense, and it is statistically possible as both French units are a bit weak.

The Dragoons in the top left corner managed to - barely - destroy the skirmishing Guard Voltigeurs. They turned to present as many threats as possible to as many French as possible. Meanwhile, the Cuirassiers lost 3-1 but pass morale to Fall Back in an orderly manner.
But, the French Hussars pursue them and the Cuirassiers lose melee again, then  fail morale. They rout from the field...
...and the Hussars turn to face the Prussian dragoons behind them, as well as the flank of the Prussian Jagers. 
"Take that von Bredow! May this Death Ride be your last!"
Now the Dragoons are unable to attack the French line, as they could end up with their rear facing the Hussars if they lose.

Flush with victory, the French Hussars charge the dragoons - odds favor the dragoons. BUT! They beat them also, 3-2, and the dragoons fail morale with the black '3'. This leaves them in a weakened state and a bad position.

At table center, the French have a wonderful base of fire built up, and a Ligne unit about to charge into the woods to clear them. The Prussian Infantry re-occupied the town when the French were within 6", which is their Range.
This operation is successful, and the French Infantry envelop the woods and seize the town. The Prussians still hold one more that needs to be cleared, however.
Guard, Ligne, and Voltigeurs advance!
At center, a strong French force is preparing to launch the next phase of the clearing operation. In the back left/top, the French reinforcements are s-l-o-w-l-y advancing onto the table. I need the few diced full moves in the battle area.
This Prussian General deserves special mention - he was Hit a couple times rallying Prussian Infantry, but kept returning to the field [needed a '6'!].

After a few more turns, it is clear that the Prussians are "kaput!" The careful use of French Cavalry charges and Infantry counter-attacks have broken up the last Prussian defense and the town has not only fallen but is secure from counter-attack as the last Prussian Infantry have been destroyed and it is Turn 14.

Over in the central area, the French have cleared the woods and the town and are closing in on the last surviving Prussian Infantry.

An interesting battle, but one that seems easy for the French to win, despite the slow advance. They have the numbers and all the French player needs to do is get into chassepot range and the Prussians have a difficult choice to make. If the French also fired at half effect, I don't think it would be much of a game at all, and would probably allow more French units to dice up to full fighting capability.

The victory conditions as they stand demand that the Prussian force be nearly wiped out, as it isn't very hard to keep a couple of units able to interdict the road through Fire. This is the main challenge to the French, but I think they have the turns to do it.

Hope you have enjoyed this look at the Wargaming 19th Century Europe book by Neil Thomas, and have a better appreciation for its strengths and weaknesses. Overall, I'd say that this and the Napoleonics book are the culmination of his 4-base horse and musket rules that began with Simplicity in Practice, progressed through Wargaming: An Introduction, and then resulted in these two books.