How Men of Quality Resolve Differences

How Men of Quality Resolve Differences
Pudel and Peper attacks - an ugly but inevitable part of any 17th C. British Civil War, "Oh! The Shame of it All!"

Monday, March 7, 2022

Post-Beaumont Playtesting, p.1


Wanted to play out a pretty straightforward game using the book's "Pitched Battle" scenario on p.51. There are three others: Meeting Engagement, Rearguard Action, and Flank Attack. I rolled up the two forces getting:
French: 5 Infantry [2 Elite Guard], 1 Skirmisher [Elite], 2 Cavalry, 2 Artillery
Prussian: 4 Infantry [all Elite], 2 Skirmishers [Elite], 2 Cavalry, 2 Artillery

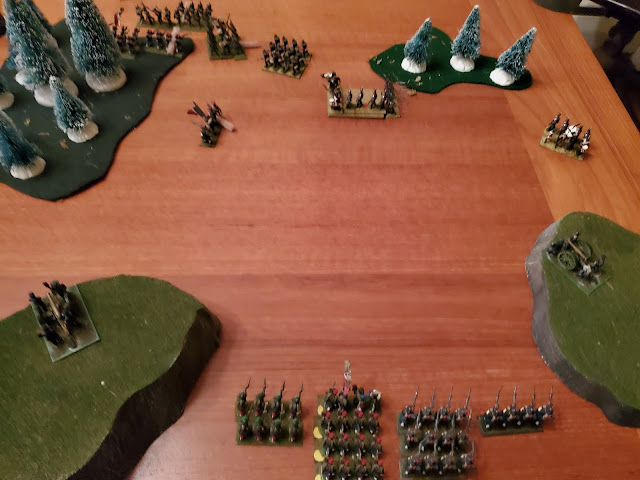
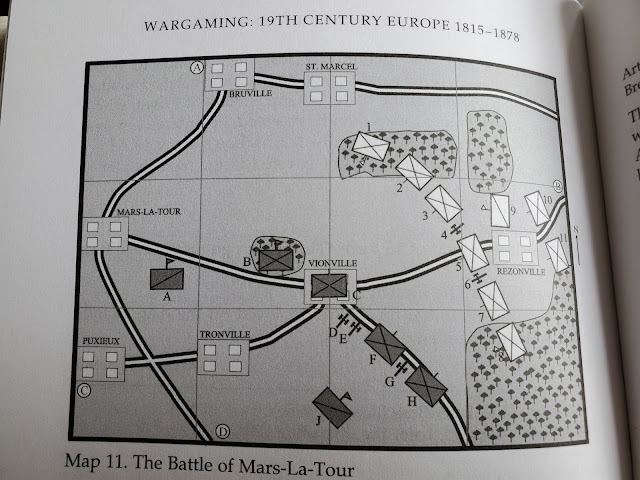
With the roll-off, the Prussians won and chose to Defend, rolling to Defend the West end of the table. Interestingly, this has more of the towns [black squares] so is perfect!  Pre-battle events result in both sides getting "Bogged Down" and losing a couple of units, so I decided it cancelled out and ignored it - the only effect would have been some extra table space and a shorter game, which didn't interest me!

Despite this being an "Attack / Defend" scenario, both sides get the same table set-up space, which is 5" deep on their end. This is a bit tight, so I made it 6". Anyway, Both will have to rush to take towns as victory goes to whoever holds 4 of the 7.

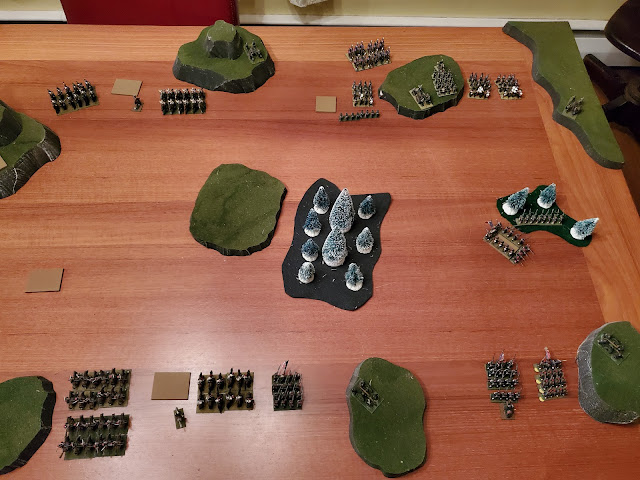
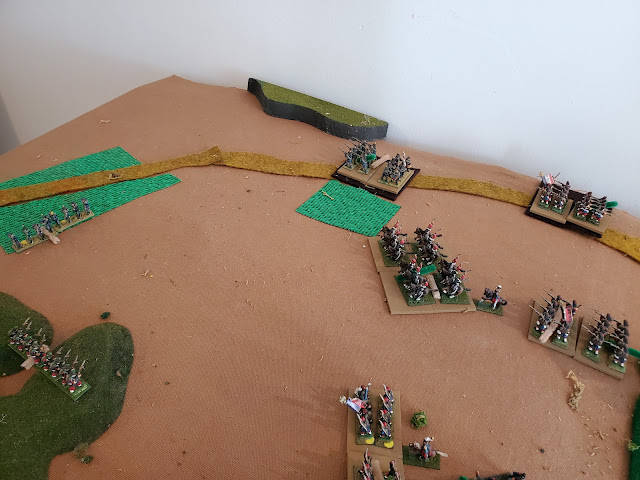
Below, the table at set-up:
An adaptation of Neil Thomas' adaptation and bathtubbing of Mars-la-Tour, aka Rezonville, below, obviously from his book:
I picked this table to play as a straight scenario as it saves me the trouble of setting up a new table later.  His "suggested" table layout is a bit sparse in scale to me.

Prussian Left Flank force: 2 Infantry, 1 Skirmisher, 1 Cavalry. Their job is to secure at least one town to their front and hold the one behind them.
Prussian Main Effort: 2 Infantry, 1 Skirmisher, 1 Cavalry, 2 Krupp Artillery. Their job is to support both advances with the Artillery, while securing at least one town to their front. I picked this as the main effort, because the next town has a wood next to it, so a covered attack for the Prussians, or a delaying point, as needed.
Overall, I think that the four towns are in the bag for the Prussians - they just have to hold them. No problem, right??

Below, the French deployed second [and get the first turn!] and put their Main Effort on their right, opposite the Prussian's weaker flank: 2 Guard Infantry, Voltigeur Skirmisher, 2 Cavalry [they are actually Prussian Hussars...I'm very short of French Cavalry that's ready to go, turns out!]. Their job is to drive forward at top speed and delay the Prussian advance with the Cavalry, while securing BOTH towns with the Guard. Pas de probleme, Monsieur!

French holding force on the left - their job is to hold the town to the rear, and take the one dead ahead, and hold it, preferably by occupying the woods. This should be doable if the cavalry can dominate the center for a turn or two. It has:
3 Ligne Infantry, 1 smoothbore Artillery, 1 Mitrailleuse Artillery. Goal is to take the ground then hold it with the awesome firepower at their disposal here.  
I should make up some fun rules for the Mitrailleuse, but for now they function just like a smoothbore gun, short ranged and low firepower until very close up - then much more dangerous.

For the first few turns, everyone dashed ahead. Below, the unopposed Prussian dragoons quickly threatened the advancing French left. In the distance, you can see the French horse doing the same to the Prussians, with the Guard behind.
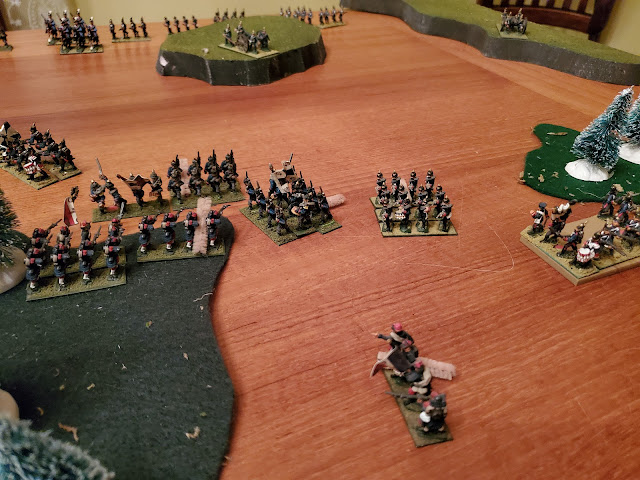
Prussian column eating the cavalry's dust - as usual! Krupp guns get to the top of the gentle slope, guarded by the other dragoons. In front, the Prussian Skirmishers [these are Landwehr figures, but they really LOOK like they are skirmishing, so...]. In the distance, you can see that the Prussians barely got to the first town before they had to slow down due to the French cavalry. 
The French cavalry made an awesome delaying force - they enabled the Guard to take the first town unopposed, and get part way to the second. The cavalry then threatened the Prussian Skirmisher, supported by their Skirmishing Voltigeurs.
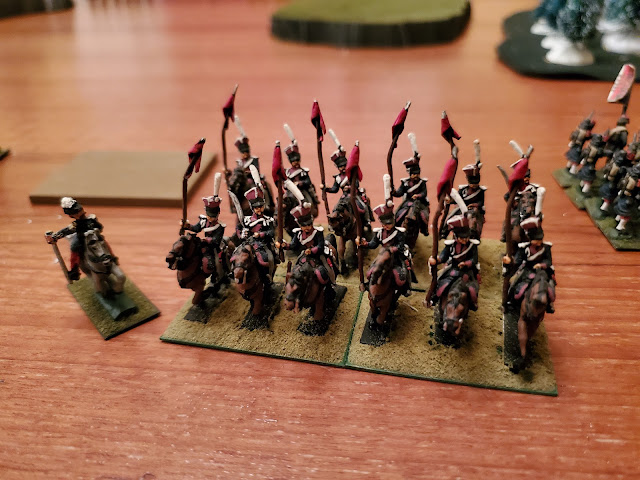
A close-up of the pretty - and animated - Rank and File Prussian Hussars, with R&F Guard behind, both in firing pose [a bit awkward on the small bases].

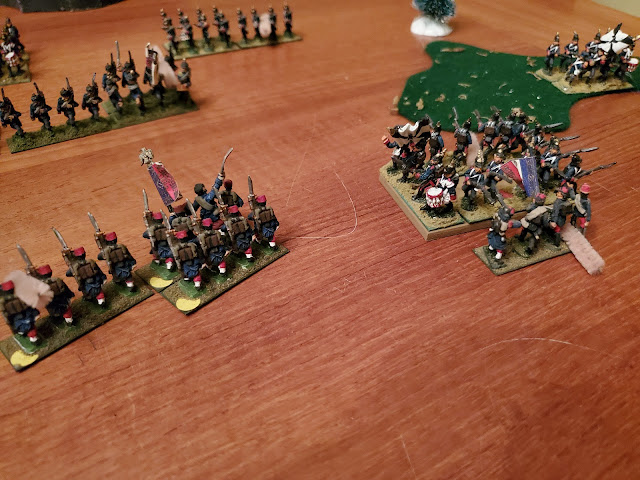
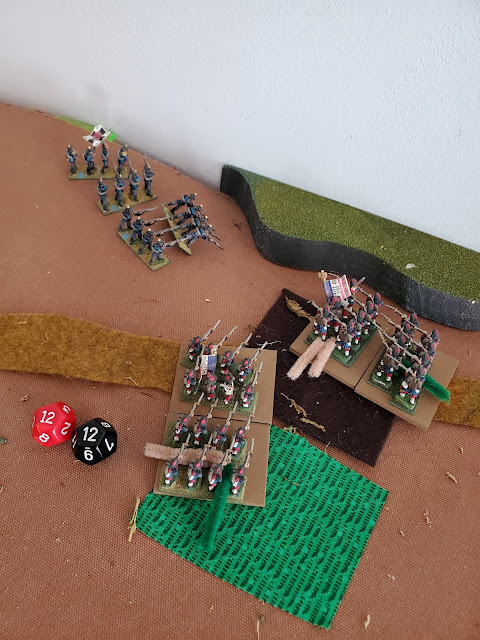
A couple turns later, the French Ligne occupied the town thanks to great maneuvering and fleet feet. Unfortunately, the Mitrailleuse battery was left behind to cover them, and the dragoons decided to try their luck since the Ligne had Prussian Infantry right keeping them busy - didn't stop the French from knocking off two Cavalry figs, however. More R&F cavalry, with Old Glory artillerists and gun.
Unfortunately, the Mitrailleuse rolled well on defensive fire, shot off a stand, the dragoons failed morale and lost another stand, and then rolled poorly in the melee as well.  They lost, 1 hit to 1 hit! They then retreated quickly, with only two FIGURES remaining... they will need a lot of help to rally, that's for sure!

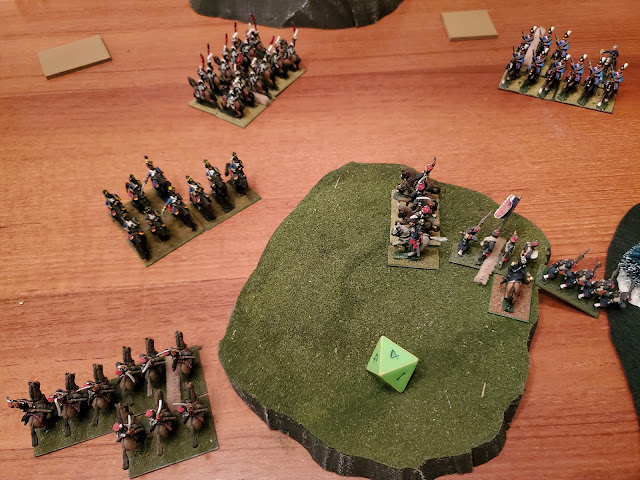
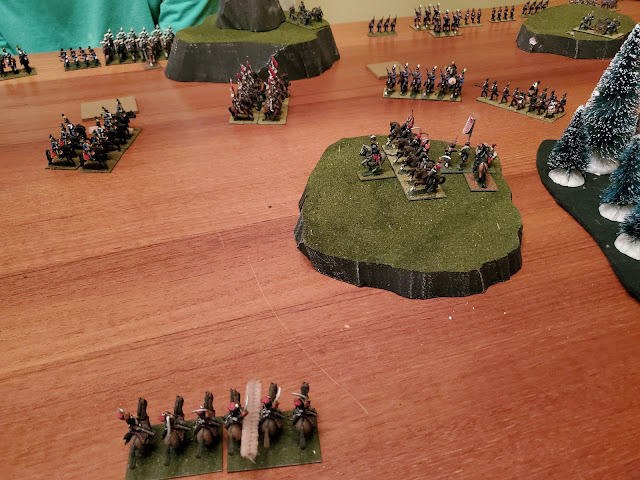
At the game midpoint, French Player Turn 7, the situation is looking good for the French: in the North, the Guard have managed to isolate the last Prussian defender of the town, and are advancing upon it with two battalions. Their Skirmishers destroyed the Krupp guns with some great rolls, after the other dragoon unit failed to activate being out of Command Radius. The Voltigeurs then occupied the vacated hill. 
To the South, the two Prussian battalions in the woods are regretting their quick advance [or at least I am...] as it looks like they will neither take the town and lose the one behind them! The three French Ligne are pretty beat up, and the guns have been running around trying to do something and failing to do anything.

North flank, Turn 7.
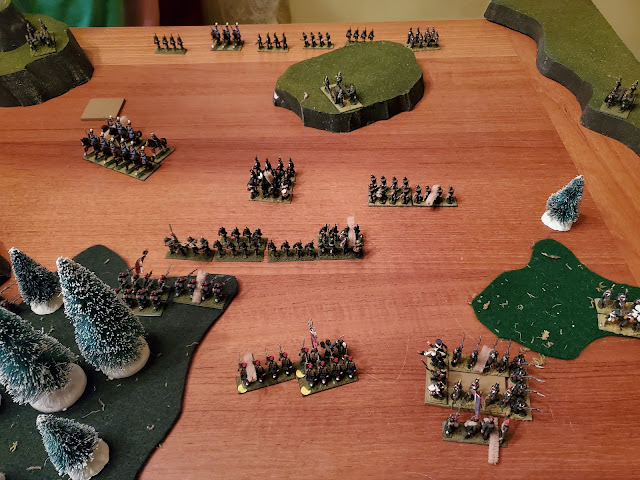
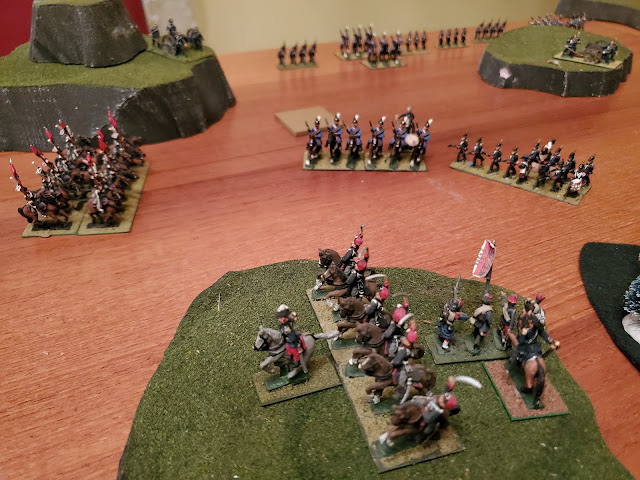
South flank, Turn 7. With a 4-2 plus 2 gun advantage, I can't see how the Prussians will succeed here.

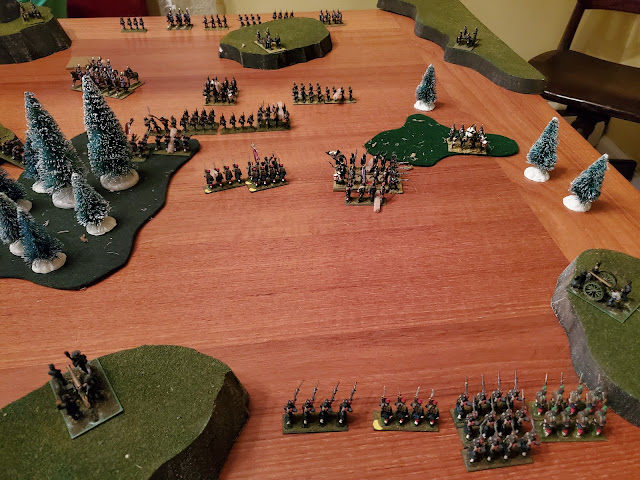
French Player Turn 8. They set up for a flank charge while moving the Artillery around the town to support the defense. Voltigeurs close in on the town at bottom.
Guard advances!

Prussian Turn 8. Sacre bleu! C'est impossible!  The Flank attack LOST [very bad dice] and in the shooting phases, the Prussiand got a clear edge, then charged into the town and managed to destroy the French holding it! They then occupied the town as the guns were just out of reach of their maximum pursuit distance. 
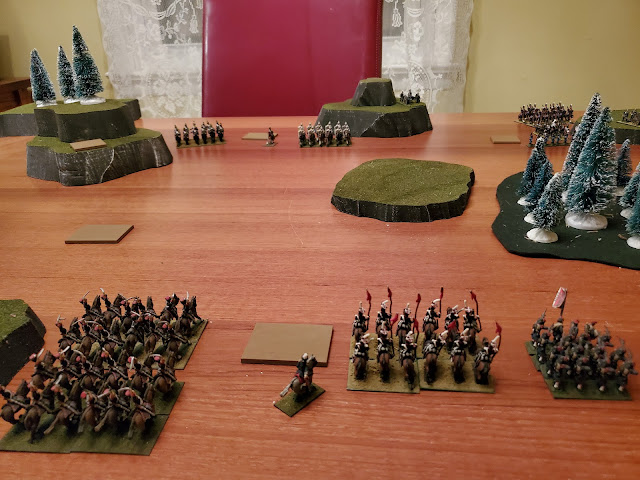
They decided to refresh themselves in the cafes a bit, anyway...
Next turn, the same Prussian heroes charge the other French Ligne in the flank and destroy them, too! They then pursue into the Artillery, but the fun ends there, as the Mitrailleuse battery shows them the meaning of real firepower [well, barely].

Meanwhile, to the North, the Guard make a sloppy attack but manage to rout the Prussians out of the town, The pursuit was successful, and the left Guard managed to contact the retreating Prussians who managed to get one hit while the Guard completely blew their roll and got none. Will the Prussians survive??
Nope - the Guard managed to shoot the Prussians down before they could even Turn around and face them!

Back in the center, the Hussars managed to rout the Skirmishers - barely. Taking a lot of casualties in the process, however.
Despite help from the Voltigeurs and one Ligne Infantry, the cavalry had to drive off the Prussian Skirmisher - the units were too depleted to have effective firepower.

Game end. French Player Turn 13. I thought the Prussians would turn things around with the amazing attack to the South, but they had lost too many units and eventually the two French Artillery batteries made their presence felt - they drop a lot of dice up close, and the Prussians weren't able to shoot the gunners fast enough. With 8/10 Prussian units destroyed, the game is over as the last two are isolated and dare not depart from the woods.

That was a pretty near thing, which makes sense as the forces were basically equal. In tactical terms, the French having the first move was a huge help, as the cavalry were set up to advance 24" and contain the Prussian advance to a few short moves. The French batteries were not used well, and didn't have any effect until the second half of the game. The Prussian batteries were engaged quickly and were shooting the heck out of the Guard, but they misjudged the threat of the French Skirmishers and Infantry, and ended up being shot down.

The Cavalry was used well by the French, but did nothing for the Prussians who added insult to injury by rolling poorly for them after handling them poorly. The Prussian Skirmishers were a lot more effective, but ultimately couldn't handle French Infantry battalions closing in, despite being in cover.

Overall, this was an interesting game that generally had good feel. If the Prussians had been better handled, then they *might* have won. If the French had the numbers they needed to attack, *really*, then they would have been able to seize most of the towns, say 5 of 7.

There were some game mechanic issues that I will address:
  1. Fighting in woods and towns bogs down with the Rally rules as presently written - you just don't inflict enough Hits to make progress. Rallying as a mechanic needs to be more limited near the enemy.
  2. Generals shouldn't help morale - they should focus on command and control at this level of game, except for the occasional exceptional leader. And the Command Radius should be a bit shorter.
  3. You need to inflict more Hits up close - there's no close range in the game, which the Prussians saw as the decisive reason for their repeating rifle.
  4. Charging small targets like batteries is a bit awkward - this has more to do with the basing scheme of these figures, which I'm going to change anyway. 
Other observations:
  1. Cavalry worked great in the combined arms if I was thinking, but they need several turns to Rally afterwards! I think they play just perfect.
  2. The overall scenario setup was good. I think that Skirmishers and Cavalry should set up a bit farther forward, perhaps, to represent their scouting abilities. The pre-game sequence was fine, but didn't impact the game at all. Had I rolled for a Flank March or Forward Deployment, that would have had a big impact.
  3. Overall pace was good and all unit types made sense on the table. Infantry is clearly the best overall unit, but benefits from the others.
I can heartily recommend Neil Thomas' "Wargaming Nineteenth Century Europe: 1815-1878" to anyone interested in the period and many interesting wars fought during it. It looks like Napoleonics, but it has a LOT more variety and therefore many more tactical challenges for the gamer who has had their fill of Nappy.

Franco - Prussian War: playtesting for Beaumont 1870! p.2

The Cartographer is generally correct...
...but it's hard to make a game board from it! 
By L.C. Bruno, from [CLICK]

How to adapt a real battle to the table?  And in this case, to my rules?  I start with the history, then look at the best game scenarios that can be found [if any] and finally focus on the considerations of running the game itself, such as player commands and seating, and how they will sit around the table, etc.

Beaumont [CLICK] battle Considerations:
  1. A Surprise attack, then a second follow-up attack - which attack?
  2. Commands: Prussian, Saxon and Bavarians v. French Corps
  3. Classifying troops: Quality at the second attack?
Game Considerations:
  1. Table Size and game room - creating comfortable space
  2. Commands and Player spread
  3. Player numbers: +/- 2, as host and I can play or not.

An excellent wargame-eye-view of the battle:
from "1870" by Bruce Weigle from Grand Tactical Rules [CLICK]...get these rules!

And my simplified version of the map:
This takes some effort but in game terms, a three level build-up is sufficient.

The mad genius of the game's host: 12x6' wood table, insulation shaped, with the smaller hills in styrofoam, secured with painter's tape. This is from Table East, with Beaumont to the left, and Yonch to the center-right a bit back:
Same view, pretty much built at this point:
View to Table South, Beaumont in distance. The "island" of hill at center is the Bois de Givodeau, a steep hill with a substantial forest on it.

And finally, covered with the felt cloth, which has a bunch of flocking laying upon it, dampened a bit with a spray bottle of water to help it settle.  We did this two days before the game, which allows the whole thing to settle and sharpens the heights a bit as a result, making them more clear.  Unfortunately, the hills aren't as obvious to the camera, but below is looking to Table North, with the top six trays across the table being French, and the near five trays being Prussian / German. 

The tall hill with the shadowed tray is the Bois de Givodeau, the closer tray is Le Fays, both French. Close upon Le Fays, is the Saxon Division at Letanne. To the center left is the buildings of Yoncq surrounded by three French trays. Finally, there's a couple French trays to top left, the lost 7th Corp, and way at the top right the 12th Corps trying to help.
The rules and of course, a Gamer marches on his stomach!  Hopefully, his stomach won't squash any miniatures...

More playtesting of the rules was needed, but there wasn't enough time.

The game played OK, with a bit of time to get used to the rules, and the French retreating onto the main objective, Yoncq. The Prussians struggled to assemble a coordinated attack and place their significant Artillery advantage effectively.  Once they got moving, they made steady progress onto the main plateau of the Bois de Givodeau. 

The Prussian left pursued the withdrawing French aggressively and then attacked with all their available cavalry, which was destroyed.  The Artillery and infantry were left behind, and were still wandering towards Yoncq when the game was called.

Overall, the players struggled to figure out the difference between this period and Napoleonics. Firepower is decisive, but you can't take ground without Close Combat. The players on the right, the Saxon and French fighting through Le Fays and up the Bois de Givodeau peak were just starting to get things figured out by the end of the evening.

"You can take the Gamer out of Napoleonics, but you can't take the Napoleonics out of the Gamer" may be the truism here. Interestingly, lots of the leaders on both sides in 1870 can be accused of still being focused on Napoleonic thinking. Of cousre, the best leaders on both sides quickly adapted, even the French ones - they mostly fought for the Republic.

More playtesting to be done!

Sunday, February 20, 2022

Franco - Prussian War: playtesting for Beaumont 1870! p.1

15s in their glory:
The Prussians have secured the objective on the dining room table!

Was pleased to make it to a fun game of 1:2400 WWI Dreadnoughts at my old club [forgot to take pics, duh] and was reminded that it was time to get back into the Franco-Prussian War again, after a long plague-caused hiatus. As I was knee-deep in naval matters again [CLICK], I was reluctant to break contact as I had the Weather Gage and the French downwind. Still, I broke out the rules and began reviewing from where things left off in July of 2019 [CLICK!]. 

A quick review of the fall 2019 goals revealed that all the projects got attention over the next several months except FPW which was sadly neglected. Yet another case of too much game goodness, but my excuse is the person for whom I'd worked the rules was not gaming live for a while, and I just had a sample of figures to playtest with. It is always helpful to have a goal in mind, and now we do!

A review of the rules draft with fresh eyes showed me a few clunky spots but much progress towards the goal of "a set of rules that are playable in 2-3 hours of a gaming evening, and do NOT feel like a Naps or ACW retread". Lots of playing had an interesting set of rules with solid mechanics that definitely put the "BANG!" in Napoleonic firepower with the same sartorial panache. I'd also worked out how to set up and throw a game, and how to use terrain at this scale that that was realistic [many of the battles were in rough and hilly country] and prevented firepower from owning the game. With a 1" is 80-100 yards, there SHOULD be plenty of places to get cover, if you are looking for it.

While my family went out to visit the in-laws, I pondered where I could do some playtesting. The office / gameroom was months uncleared from clutter...
...so not an option!  Clearly, something to be done about this in the future, *sigh. 

I cleared the dining-room table and threw some wintry terrain and hills upon it, and some villages, and got to playing as quickly as possible.

Throwdown was a brigade of infantry with a skirmisher unit on the right, each, and a few cavalry regiments on the left, each, with 3 Prussian v. 2 French batteries in the rear and easily covering the battlespace. Victory is for the town occupied by the French at the right center. Next to them in the wood is their chasseurs, skirmishers. Racing to the rescue are three more battalions of Ligne, and two Hussar regiments and an uhlan cover the left.  For the Prussians, two cavalry and a battery cover the left, with an infantry brigade of four battalions, a skirmisher, two batteries and a dragoon regiment advancing - a couple more Prussian battalions are marching to the sound of guns, "Hail Blucher!"


View from the French side. It looks like 'pas de probleme' here folks! There should be more than enough to support the town, which is sheltered by the forest.

French left has a battery to the right off camera, and infantry support, which is more than the Prussians can say - this should be no problem, also, and I am planning to force the Prussians back with this superiority, and threaten their attack.
Featured Foto: Lemproski's Improbably Lancers, Nap'c Polish Lancers I believe, but who cares??  Last playtest in 2019, they single-handedly held a flank!

Battle got off to a smooth start with a new turn sequence that made Fire and Melee interactive in each player turn.  I liked it, had the "feel" of rapid-firing weapons. By turn 4, the French had seen off the Prussian cuirassiers [with difficulty], and rallied their losses, a nice job of economy and aggression! The Prussians were a bit indecisive but their hussars performed well. Unfortunately, they are presently surrounded at center. To the pic right, French ligne shoot up Prussian dragoons who would have been better used elsewhere, like as not.
Still a few more French Hussars to rally, and some infantry, too! Should also be noted that Mr. Winkie, who is a large lad at 12, has decided to drop by and drop some dice with "dad's toy soldiers" which he thinks are cool. He rolls well!

Close up below shows what bright paint schemes can do for 15s, small as they are.

To the right, the Prussians pushed two battalions into the woods, seizing them from the skirmishers [who never had a chance to hold it]. Their timing [and the game mechanics] worked well, and the pressure increased with a bit of fortune and they were able to charge the town and seize it, driving the French outside it. The survivors have no choice but to retreat and attempt to rally...or die.
To the left, French hold the woods and the open space. They are holding out quite well so far. The Prussians are taking their lumps along the way. They needed a couple more battalions to really push, as I wanted to get some charges in.
French casualties are piling up, but not much worse than the Prussians.

Below, the Prussians easily out-rolled the French, who took concentrated fire for a few phases before missing morale and losing a second base. Unfortunately, the woods should have been more strongly held by the French - as it was, the skirmishers were ultimately destroyed and the woods then provided a covered avenue of attack for the two Prussian battalions, who massed fire at the town, with a third battalion [center, a bit back] and a battery. At 50%, the Prussians were able to charge and evict them. They passed morale and fell back only 1", stubbornly remembering all the wine casks they had left behind...

Couple turns later, Prussians break through, destroying the French in the center area, behind which the town survivors were attempting to rally. Into the breach, they push more battalions, further isolating the objective from succor. The French in the woods are now pressed on Front and Flank, and will [wisely] have to retire. One briskly moving battalion - at 50% - is moving up to threaten the battery.
Closeup - they needed the additional battalion on the town attack, and one to secure their right flank from French cavalry.

Mr. Winkie, in a contemplative moment behind his Prussians. War is h-e-!-! His hussars have managed to extricate themselves from encirclement, but his cavalry kept the French fully occupied and not helping with the town.
The Lucky Lancers will charge and crush the dragoons, but the supporting infantry are more than enough to see them off. Plus there's those annoying Hussars to their rear.
The Prussian Infantry have trimmed down the French infantry with the help of the Krupp gun. A bit of a stalemate here, but only with the Prussian Infantry...

Well, lots of fun to play after these years, and much of the playtest rules went well. I prefer the sequence with movement after shooting, and tweaking a few of the hit numbers and putting in a few little bits of chrome while removing a few others has been beneficial. But there's room for improvement. The rules aren't "clean" enough, for one thing. It is unclear what a newer player should do with his troops each turn.

Other fine tuning needed:
- move rates and the cost to turn
- how to prevent artillery acting as snipers; probably solved
- the options for winners and losers after melee need to be more dynamic and present more historical choices than "stand there and catch your breath".
- what are the uses for a general?

All these seem to have some solutions, so will have to check the notes from the game and see what comes up.  This is definitely a fun game and very evocative of history, and "not just like retreaded Nap rules"!

Sunday, November 14, 2021

EC-BC Playtest Series 4: revisiting the revisions, Part 3

Welcome back to the continuing saga of "Eagles Cheaper than Brain Cells", a grand tactical set of rules that are something of a spin-off on One-Hour Wargames Horse and Musket rules and Volley and Bayonet.
Some key changes from last time
  1. Artillery a bit less effective due to shorter range and lower Hit number. This puts it more in line with the original Hit ratio from OHW. Altho it has amazing range in all One-Hour Wargame rules [it is always longer than the board itself!] it varies in effectiveness from low to medium to high ability to inflict Hits, resulting in an average of 10, 5, and 3 turns to destroy a unit. It should be noted that both game length and board size in OHW scenarios are directly related to the RAW OHW rules, so this needs to be taken into consideration when using the scenarios with modified rules.
  2. Cavalry should have more options after a charge, especially to continue a successful charge. However, it should usually be more prudent to rally back! I am looking to achieve this by a combination of simple options [a breakthrough charge, similar to Volley and Bayonet] and the lower strength of the cavalry units than Infantry Brigades.
So this time we have One-Hour Wargames Scenario 21: Twin Objectives, an interesting scenario based upon Lobositz. I've always found this very difficult to win for the defense as they are outnumbered 6-4 and any reasonably competent attack should - at the worst - grind the defense down.  The OHW rules are all attritional, so even one unit difference can be significant with a "last man standing" mechanic.

Also, the objectives are the town at the North end, and the hill at the South end, so the two are not mutually supporting. Only cavalry and artillery have a reasonable chance of supporting the hill objective at all. Knowing this, I accept that the main fight is over at the town and don't try to relieve the hill which is usually doomed to fall with its one Unit, while the "main battle line" by the town has the other three.

Interesting question - does the attacker wait and overwhelm the hill defenders, then move on the town?  Or attack both simultaneously? Best to try a quick run-through and test the theory!

Below, I have a 12-8 game set up ["Eagles Cheaper than Brain Cells" has Units that are a bit small for a OHW table so I double the number of units]. The defending Austrians have four Infantry and two Cavalry on the right, with one Infantry and a Light battalion on the wooded hill.

Facing the hill are two Russian Infantry brigades and a Light battalion, while 5 Infantry, three Cavalry regiments and a battery face the North objective. The thought is that the Russians attacking the hill will reinforce the North attack after wiping out the hill. The hill offers cover against shooting and an advantage to defenders being charged ["Assaulted" in EC-BC].

Below, alternate defense with the cavalry ready to contest the open space between the objectives. As attacker sets up second, they can counter with their own cavalry or mass any artillery they get to shoot the cavalry.
I decided to try this out and ended up with an infantry fight at the town and a cavalry melee in the center, which is the opposite of the traditional battle with infantry in the center and cavalry on the wings. Made for a pretty fluid and wild battle!
In the end, the Austrian Infantry was overwhelmed at the town, while the cavalry was unable to effectively contest the open space being outnumbered 3-2.

Having had an interesting playtest of one defense, I still laid out and visualized a couple of other possibilities [post on visualizing a wargames plan HERE]. Below, I was wondering if with a slightly larger game I could fight for both objectives and threaten the Russian right flank if they attacked straight against the line:

This seemed possible, and I'd never successfully done so before so I laid it out and gave it a go. Below, a 15-11 unit fight, I felt the Austrians needed a bit more help at the hill, so gave them two Light battalions. Uncertain if they'll carry the day...

The Russians are still doing the obvious, and throwing an infantry division at it supported by guns - the "lightly wooded" hill scenario rules implies to me that there isn't a line of sight obstruction provided by the hill. The defenders do get a cover bonus within the hill template, and the Artillery has been toned down a bit, so only inflicted one Hit on the Lights. I'm fine with that...
The Infantry brigades pushed right up close and the center got bashed as the Austrian grenzers inflicted max Hits, which also resulted in a Casualty Hit [permanent damage to the brigade]. The other Russian got a hit and rolled low on ammo. Fortunately, this attack is pretty well supported!

Elsewhere on the battlefield, the Russians rolled well and advanced aggressively. The Austrians did the usual Austrian thing - historically speaking - and responded sluggishly so the Russians have once again driven a wedge between the two objectives. Their two cavalry are also supported by a third cavalry and a horse battery, but uncertain it will be enough to clear that flank!

Turn 2, the Russians kept Initiative, and devoted Orders to the cavalry attack. The horse battery managed a hit, but the cuirassiers bounced back on a 2-2 Hit tie. I debated using the hussars against the Uhlans [my favorite Austrian Unit!] but I need not have worried...the Hussars rolled crushingly well and sent the Uhlans routing to the edge of the board...which destroyed them! [my fault for not advancing farther from the board edge...] The Russians only took one Hit back! 
Discretion should be the better part of valor, but I have trouble resisting cavalry charges, so...
...the Russky Hussars continued their charge into the flank of the Austrian Hussars! The Russians only inflicted one Hit, but the Austrians inflicted none, so they also fled to the board edge and were destroyed.  
Wow!  So partially my fault for being near the board edge, but the Russian Hussars are definitely the star Unit today, clearing out the right board edge and eliminating the flank threat.
The Hussars finish by facing the town, preventing the Infantry from maneuvering out of it to re-organize their defense.

Greatly encouraged by the cheering on the right flank, the Russian left presses onwards, and is promptly punched in the kisser again. Between the Infantry and the Lights, the center Russian Unit is wiped out [barely]. Fortunately, they prepared in depth for just this situation and the second line is ready to move up.

End of Turn 2, the Austrians hold both objectives but the plan to defend them on a united front is pretty much shot.  I should've put the Austrian cavalry in the center like last time...maneuvering with plodding Austrian infantry is never wise!

Turn 3, the Russkies clear the two flanking Light units with a brigade assault on the left and the guns on the right, forcing the grenzers to retreat and re-orient their Front. This objective is almost clear - the Austrian defenders need some help!


The fight for the town is going better. The Austrians manage to make a shorter but stronger battleline with plenty of Artillery. The Russians overstretched themselves a bit, but they still have a strong mobile force of cavalry trotting around which actually makes the wide spacing possibly helpful - interesting...
Four Russian brigades are lined up, but there are gaps in the line and their batteries are still on the move. Overall, a poor job by the Russians, especially since their left battery is being threatened by an Austrian infantry brigade! Still, the cavalry are coming to the rescue to prevent the Austrians from carrying off the guns.  
Hmm, that sounds familiar somehow...

Turn 4, the Austrians seize the Initiative!

First order of business - run over the Russian battery holding the left flank of their battle line. The battery defends itself by inflicting max damage and not running low on ammo. Never let it be said the Russkies can't handle their guns!
The Austrians follow up by rolling poorly and having to retreat. Violating that rule of tabletop war "when in doubt, roll well" is always a poor choice!

Turn 4 sees a strong Austrian firepower destroy half the Russian battle line. They managed to position themselves well in response to the Russian advance, and ended up with local advantages in a couple of critical locations. The Russian attack is too piecemeal, due to the commander's distractions and some poor command rolls, lowering the orders available at a critical moment and resulting in a traffic jam in the Russian rear area.

Turn 5 sees a resurgent Austrian force begin by attacking with their Grenadier brigade, hitting the flank of a Russian brigade and wiping it out!

Despite a conservative repositioning after their Assault, the Russians are able to counter-attack the fatigued Grenadiers with the cuirassiers...
...wipe them out and continue into the guns! These valiantly defend themselves to the last bucket and swabbing brush. The Cuirassiers attempt a final rally, but fail. The Austrian guns are taken and spiked, but the cuirassiers are done for the day...
...and they are removed.  The Austrian defense is looking a bit sparse now.
With some more cavalry handy, and considering the successful cuirassier attack, a composite cavalry brigade attacks the weakened infantry in the Austrian center and manage to destroy them, albeit at the loss of a couple more Hits.
They also continue into the nearby guns, and their fortunate ends with destruction just like with the cuirassiers. This time, they do not destroy the guns, however.
Still, the Austrian line is shattered, and the Russians have reserves on hand.
Turn 5 ends with a somewhat scattered Austrian defense holding onto both objectives, but with few strong units left to hold out. Most importantly, the Russians have five healthy Infantry Brigades on the field, while the Austrians have only a couple and they are widely separated.

And on Turn 6...the Russians seize back the Initiative! This will allow them to keep the Austrians from reorganizing an effective battle line before they can push into their battle space.

The Russians Assault and destroy the last defender on the hill. They position an infantry brigade and the horse battery against the town with its isolated defending Austrian infantry brigade. They also put their heroic Hussar regiment in the flank area of the battery as reinforcements move up against the town.  

Turn 7 starts with a divided Austrian army that has the majority of its remaining units no where near the town objective - clearly bad generalship!

Retaining Initiative, the Russian hussars charge the battery and wipe it out, but take some serious Hits along the way - fortunate they they were still a fresh unit.
Continuing on with their breakthrough charge, the hussars defeat the Infantry brigade, but take just enough hits that they have to Rally back a Hit to stay on the board - but if they do, they can eventually regain much of their strength after resting and rallying...
...unfortunately, a '1' will not do it...
...so they disappear leaving a damaged Infantry brigade just hanging on. 
The Russians would like this unit to disappear, so get one hit with their guns, they Assault with their fresh Infantry Brigade! The Austrians take three Hits from the Assault, which means a second Casualty Hit, but just enough to destroy them anyway.  Note that at top right, the Austrian infantry in the town are in trouble.

Yeah, I'm really thinking that 1.5:1 odds is tough on the defense here. Perhaps 6-5 in the original OHW, and 15-12 for EC-BC will play better.  Also, I should try not to lose Austrian units and get ambitious with relieving the hill objective.  For starters!

I think the rules played just fine. The cavalry was impactful but ended up "destroyed" [really, horses blown and too tired to fight any longer], which turned out to not be a problem as the poor positioning of the Russian infantry ended up making it easier for them to maneuver in from the reserve and counter-attack the successful Austrian attack that heavily damaged their battle line.

The weaker artillery was still useful for a Hit here and there, and when charged often rolled well and defended itself - note that one cannot always rely on rolling well, and it is smarter and safer to keep your Artillery far enough away that it contributes to the battle but is not over run!

Generally speaking, I think that this phase of playtesting has been very successful - I streamlined a few rules and cut down on needless differentiation and that also allowed me to get rid of a few exceptions to rules. Yet, the game play felt quite historical, with each of the three key units making their contribution when well handled, but Infantry still being the Queen of the Battlefield.

The next question is should Artillery and Light Infantry battalions be weak enough that they are half as effective as Infantry Brigades? This would mean that when one rolled them using the OHW force composition charts on p.64, you'd get two small Light battalions or two small artillery batteries instead of one that is almost as strong as an Infantry Brigade [but not quite as strong].  That will be something to work on next go around.

Another issue is that altho I like the simple "DBA-esque" system of Orders, I feel that some units showed enough initiative historically that they shouldn't need an order all the time, like Lights and Cavalry. I'm thinking that maybe a different order system should be used, one that is a bit more complicated but that will feel realistic.  Will make for a nice Advanced Rule in EC-BC.

So it has been a great series of playtests, and I'm very pleased with the old-school 9mm Scruby figs, so there is some work to be done on this project in the future.