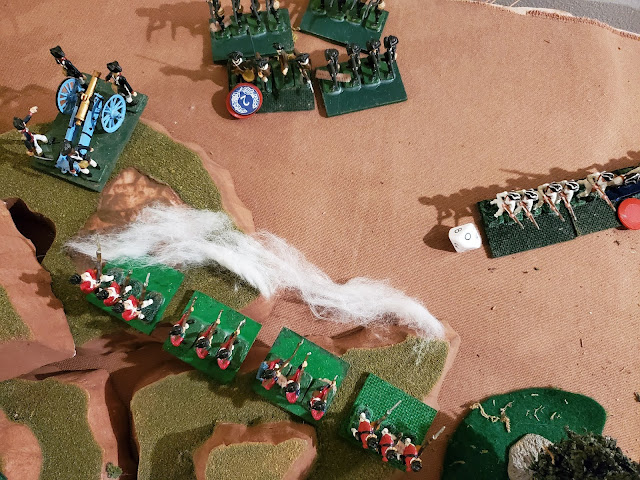
In this playtest of "Zeal & Bayonets" I again used the venerable One-Hour Wargames scenario #8, Melee. I switched around the American battle plan a bit from last time [CLICK]. They started with the Rifles and Marylanders on the hill - the Rifles immediately entered the woods to plink away at the advancing Brits. Their reinforcements were the Pennsylvanians and the Gun, which came in on the road. They immediately raced the Gun to the hill, and rolling well, managed to reach a suitable position to fire in just a couple turns. The Pennsylvanians kept a respectful distance, hoping to stay alive and a threat for as long as possible so that the British 40th Foot in front of them wouldn't be free to maneuver.
For the British, the problem is the same - they need to secure a hill but there's a woods in the way, and enemy reinforcements threaten first their right flank then enter right behind the objective. Generally speaking, I feel that Scenario #8 favors the defense a bit, and only in a few of the periods in the book can the attacker take it.
This time, the Brits push the Highlanders hard down the table edge to the left, where they face right and are past the flank of the Marylanders - who now have a problem. The Irish are going up the middle with a Gun. The lights take on the woods, as always, and drive out the Rifles who retreat onto the hill behind the woods. The 40th Foot try to force the Pennsylvanians to crumble without any help. Bringing up the rear are the Grenadiers, who I hope to use in a final attack on the hill. Below, it's about turn 4-5.
Unfortunately, the American general goes down while rallying the Rifles. He took too many risks, it seems. His ghost haunts the hill now...
The British have steadily advanced, taking advantage of the disarray of the American center. Space is getting tight, however, and I should've made a few quick measurements of what units fit where - the British gun has no space to deploy effectively, so is shifted to the right, hoping to flank the hill when the Pennsylvanians are driven off. This seems pretty likely as the 40th Foot has steadily out performed them, driving them back a short distance. Still, the gun could already be in use if I had planned better!
Turn 12. The Pennsylvanians fled the field but the Carolinians have arrived and are opposing the 40th Foot. The Rifles are holding off the lights, but probably not for long! The Gun ran out of ammo and left the hill, so the Marylanders are returning to the fray, albeit a bit the worse for wear. The Germans are holding their own.
Meanwhile, the Brits have made a solid line, with the Highlanders taking on the Continental Germans, the Grenadiers ready to charge up Edgehill, the Irish in a deep formation - column by divisions - so they will fit and fire upon the Rifles in aid of the Lights. The 40th Foot finishes up the battle line, now facing a second, fresh unit of State Line.
...they pour a couple of volleys into the Carolinians open flank!
Turn 13. The Carolinians leave the field, overwhelmed by the combined close-range fire of the Lights and the supporting 40th Foot. The Irish are on the hill along with the Grenadiers. Still, may be possible for the Americans to contest the hill these last couple of turns...?
Whew, that was a tough fight. It took longer than I thought to get the British into position, altho once they were there it was a steady, successful advance. Their Gun did nothing but run around the board, and I should have left it on the Left to pour cannister fire into the Marylanders and Germans on the hill! Just goes to show that OHW scenarios are pretty tightly put together and often give a close result if both sides play comparably well.
For the Americans, I made a mistake advancing the Marylanders off the hill. With their shorter range, they should have been in the woods and the rifles on the hill. Only problem is they don't melee well, anytime. The Pennsylvanian State Line are sort of like my Grenadiers - a hard luck unit that always seems to perform poorly. The 40th pretty much kicked them off the board on their own merits. Once the rifles got evicted from the woods they should have formed a continuous line along the hill. Instead, the Brits caught them in the flank and drove them off.
Overall, very happy with how the rules have been going. Scenario #8 has consistently been interesting to playtest, and with just a little variety in force composition, the rules have had plenty of decisions for both sides. Generally, tactical errors on my part led to the mediocre performance of both sides in this game.
Zeal and Bayonets will need to head out onto the table for more playtesting with others. On an uplifting note, I managed to reach the author, Matthew H. Spring, through his school! He was very nice - if busy with the start of term - and graciously gave permission for me to use the title of his book for my rules. It is a quote from a British officer, anyway, but how my rules play is very much inspired by his research and effective presentation. Extended review is here [CLICK]. Very enjoyable and informative work, can't recommend it enough!


Nice account. The OHW scenarios can often turn on the last few die rolls - very good.
ReplyDeleteIndeed, especially with a scenario like this. It's hard to win at all, but unless a side makes a mistake it will come down to the wind of fortune!
Delete